Epson XP-640 Users Guide - Page 180
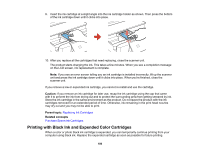
Printing with Black Ink and Expended Color Cartridges, Caution, Parent topic, Related concepts
 |
View all Epson XP-640 manuals
Add to My Manuals
Save this manual to your list of manuals |
Page 180 highlights
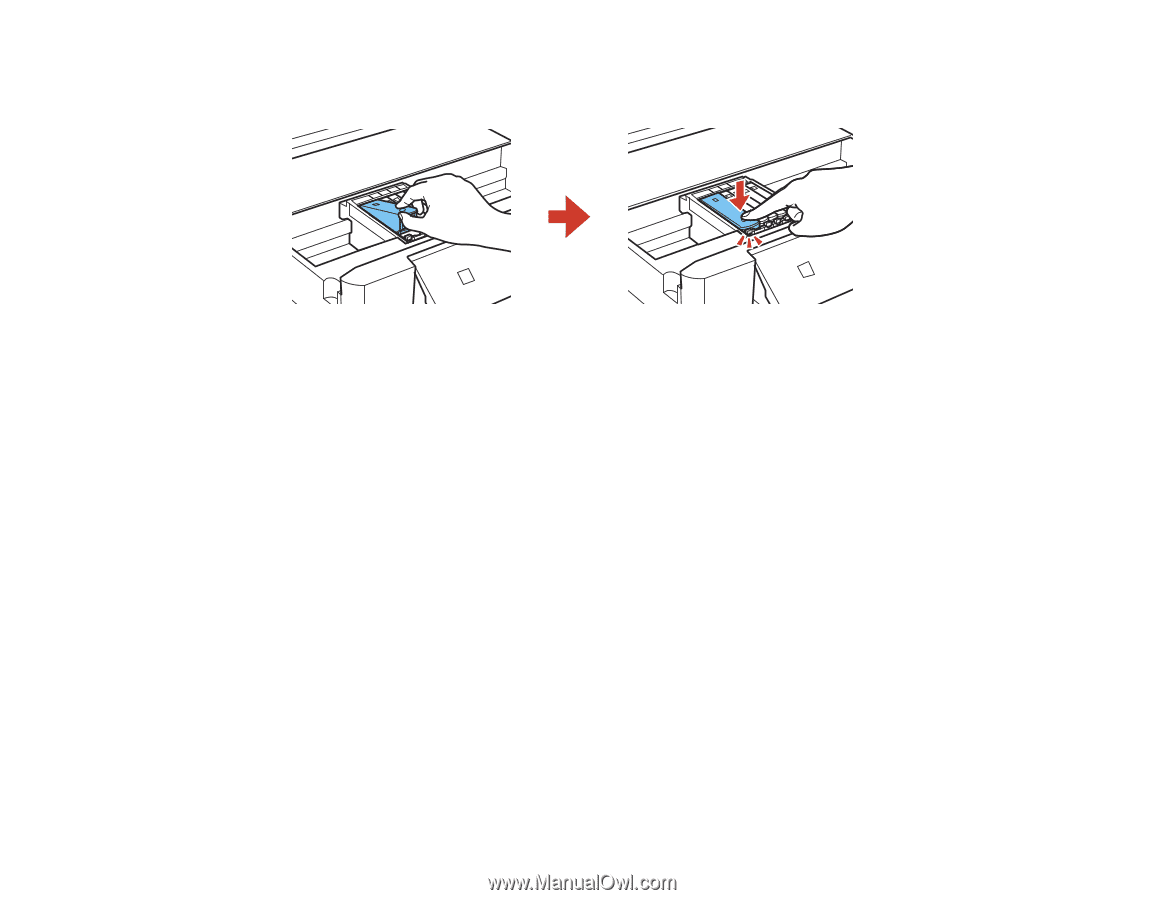
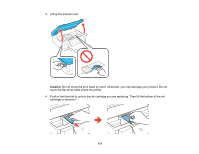
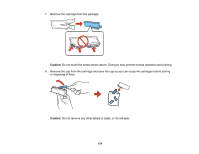
9. Insert the ink cartridge at a slight angle into the ink cartridge holder as shown. Then press the bottom of the ink cartridge down until it clicks into place. 10. After you replace all the cartridges that need replacing, close the scanner unit. The product starts charging the ink. This takes a few minutes. When you see a completion message on the LCD screen, ink replacement is complete. Note: If you see an error screen telling you an ink cartridge is installed incorrectly, lift up the scanner unit and press the ink cartridge down until it clicks into place. When you're finished, close the scanner unit. If you remove a low or expended ink cartridge, you cannot re-install and use the cartridge. Caution: If you remove an ink cartridge for later use, recap the ink cartridge using the cap that came with it to prevent the ink from drying out and to protect the surrounding area from getting smeared by ink. Store the ink cartridge in the same environment as the product. Do not leave the product with the ink cartridges removed for an extended period of time. Otherwise, ink remaining in the print head nozzles may dry out and you may not be able to print. Parent topic: Replacing Ink Cartridges Related concepts Purchase Epson Ink Cartridges Printing with Black Ink and Expended Color Cartridges When a color or photo black ink cartridge is expended, you can temporarily continue printing from your computer using black ink. Replace the expended cartridge as soon as possible for future printing. 180
-
 1
1 -
2
-
3
-
4
-
5
-
6
-
7
-
8
-
9
-
10
-
11
-
12
-
13
-
14
-
15
-
16
-
17
-
18
-
19
-
20
-
21
-
22
-
23
-
24
-
25
-
26
-
27
-
28
-
29
-
30
-
31
-
32
-
33
-
34
-
35
-
36
-
37
-
38
-
39
-
40
-
41
-
42
-
43
-
44
-
45
-
46
-
47
-
48
-
49
-
50
-
51
-
52
-
53
-
54
-
55
-
56
-
57
-
58
-
59
-
60
-
61
-
62
-
63
-
64
-
65
-
66
-
67
-
68
-
69
-
70
-
71
-
72
-
73
-
74
-
75
-
76
-
77
-
78
-
79
-
80
-
81
-
82
-
83
-
84
-
85
-
86
-
87
-
88
-
89
-
90
-
91
-
92
-
93
-
94
-
95
-
96
-
97
-
98
-
99
-
100
-
101
-
102
-
103
-
104
-
105
-
106
-
107
-
108
-
109
-
110
-
111
-
112
-
113
-
114
-
115
-
116
-
117
-
118
-
119
-
120
-
121
-
122
-
123
-
124
-
125
-
126
-
127
-
128
-
129
-
130
-
131
-
132
-
133
-
134
-
135
-
136
-
137
-
138
-
139
-
140
-
141
-
142
-
143
-
144
-
145
-
146
-
147
-
148
-
149
-
150
-
151
-
152
-
153
-
154
-
155
-
156
-
157
-
158
-
159
-
160
-
161
-
162
-
163
-
164
-
165
-
166
-
167
-
168
-
169
-
170
-
171
-
172
-
173
-
174
-
 175
175 -
 176
176 -
 177
177 -
 178
178 -
 179
179 -
 180
180 -
 181
181 -
 182
182 -
 183
183 -
 184
184 -
 185
185 -
186
-
187
-
188
-
189
-
190
-
191
-
192
-
193
-
194
-
195
-
196
-
197
-
198
-
199
-
200
-
201
-
202
-
203
-
204
-
205
-
206
-
207
-
208
-
209
-
210
-
211
-
212
-
213
-
214
-
215
-
216
-
217
-
218
-
219
-
220
-
221
-
222
-
223
-
224
-
225
-
226
-
227
-
228
-
229
-
230
-
231
-
232
-
233
-
234
-
235
-
236
-
237
-
238
-
239
-
240
-
241
-
242
-
243
-
244
-
245
-
246
-
247
-
248
-
249
-
250
-
251
-
252
-
253
-
254
-
255
-
256
-
257
-
258
-
259
-
260
-
261
-
262
 |
 |