Epson XP-950 User Manual - Page 201
Printing Your CD/DVD Design - Windows
 |
View all Epson XP-950 manuals
Add to My Manuals
Save this manual to your list of manuals |
Page 201 highlights
1. Open the Epson Print CD program on your computer. You see this screen: 2. Use the buttons on the left side of the screen to select a pre-designed template or add a background image, picture, text, or graphic elements. For more information, select the Help menu. 3. When you are finished creating your design, click Save and save your design file. Parent topic: Printing on a CD/DVD with Windows Printing Your CD/DVD Design - Windows After you create your design, you can print it on paper to test it, then print it on the CD or DVD that contains your data, photos, video, or music. Make sure the disc is loaded for printing before you start. 1. Open your file in Epson Print CD and click Print. You see this screen: 201
-
 1
1 -
2
-
3
-
4
-
5
-
6
-
7
-
8
-
9
-
10
-
11
-
12
-
13
-
14
-
15
-
16
-
17
-
18
-
19
-
20
-
21
-
22
-
23
-
24
-
25
-
26
-
27
-
28
-
29
-
30
-
31
-
32
-
33
-
34
-
35
-
36
-
37
-
38
-
39
-
40
-
41
-
42
-
43
-
44
-
45
-
46
-
47
-
48
-
49
-
50
-
51
-
52
-
53
-
54
-
55
-
56
-
57
-
58
-
59
-
60
-
61
-
62
-
63
-
64
-
65
-
66
-
67
-
68
-
69
-
70
-
71
-
72
-
73
-
74
-
75
-
76
-
77
-
78
-
79
-
80
-
81
-
82
-
83
-
84
-
85
-
86
-
87
-
88
-
89
-
90
-
91
-
92
-
93
-
94
-
95
-
96
-
97
-
98
-
99
-
100
-
101
-
102
-
103
-
104
-
105
-
106
-
107
-
108
-
109
-
110
-
111
-
112
-
113
-
114
-
115
-
116
-
117
-
118
-
119
-
120
-
121
-
122
-
123
-
124
-
125
-
126
-
127
-
128
-
129
-
130
-
131
-
132
-
133
-
134
-
135
-
136
-
137
-
138
-
139
-
140
-
141
-
142
-
143
-
144
-
145
-
146
-
147
-
148
-
149
-
150
-
151
-
152
-
153
-
154
-
155
-
156
-
157
-
158
-
159
-
160
-
161
-
162
-
163
-
164
-
165
-
166
-
167
-
168
-
169
-
170
-
171
-
172
-
173
-
174
-
175
-
176
-
177
-
178
-
179
-
180
-
181
-
182
-
183
-
184
-
185
-
186
-
187
-
188
-
189
-
190
-
191
-
192
-
193
-
194
-
195
-
 196
196 -
 197
197 -
 198
198 -
 199
199 -
 200
200 -
 201
201 -
 202
202 -
 203
203 -
 204
204 -
 205
205 -
 206
206 -
207
-
208
-
209
-
210
-
211
-
212
-
213
-
214
-
215
-
216
-
217
-
218
-
219
-
220
-
221
-
222
-
223
-
224
-
225
-
226
-
227
-
228
-
229
-
230
-
231
-
232
-
233
-
234
-
235
-
236
-
237
-
238
-
239
-
240
-
241
-
242
-
243
-
244
-
245
-
246
-
247
-
248
-
249
-
250
-
251
-
252
-
253
-
254
-
255
-
256
-
257
-
258
-
259
-
260
-
261
-
262
-
263
-
264
-
265
-
266
-
267
-
268
-
269
-
270
-
271
-
272
-
273
-
274
-
275
-
276
-
277
-
278
-
279
-
280
-
281
-
282
-
283
-
284
-
285
-
286
-
287
-
288
-
289
-
290
-
291
-
292
-
293
-
294
-
295
-
296
-
297
-
298
-
299
-
300
 |
 |

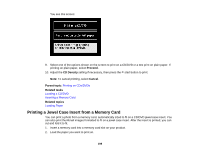
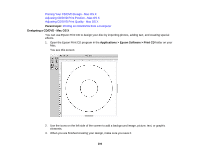
1.
Open the Epson Print CD program on your computer.
You see this screen:
2.
Use the buttons on the left side of the screen to select a pre-designed template or add a background
image, picture, text, or graphic elements. For more information, select the
Help
menu.
3.
When you are finished creating your design, click
Save
and save your design file.
Parent topic:
Printing on a CD/DVD with Windows
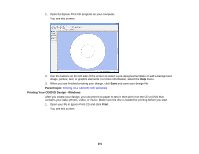
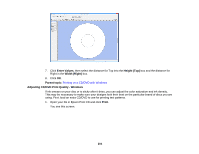
Printing Your CD/DVD Design - Windows
After you create your design, you can print it on paper to test it, then print it on the CD or DVD that
contains your data, photos, video, or music. Make sure the disc is loaded for printing before you start.
1.
Open your file in Epson Print CD and click
Print
.
You see this screen:
201