Epson r-d1 User Manual - Page 22
Removing M (Bayonet) mount lenses, Mounting L mount lenses, DUMMY
 |
View all Epson r-d1 manuals
Add to My Manuals
Save this manual to your list of manuals |
Page 22 highlights
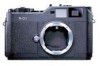
2. Insert the lens and turn it clockwise until you hear a click. 2. Pull the lens straight out of the mount. Removing M (Bayonet) mount lenses 1. Turn the lens counterclockwise as far as it will go while pressing down the lens release button. Mounting L mount lenses Note: ❏ When you install an L mount lens, you need an optional M-Bayonet adapter ring. ❏ There are three sizes of M-Bayonet adapter rings, and any one of them can be used. ❏ For more information on mounting an M-Bayonet adapter ring on the camera body, see the M-Bayonet adapter ring manual. 1. Mount an optional M-Bayonet adapter ring together with its cover onto the lens mount. DUMMY 17 Getting Started
-
 1
1 -
2
-
3
-
4
-
5
-
6
-
7
-
8
-
9
-
10
-
11
-
12
-
13
-
14
-
15
-
16
-
 17
17 -
 18
18 -
 19
19 -
 20
20 -
 21
21 -
 22
22 -
 23
23 -
 24
24 -
 25
25 -
 26
26 -
 27
27 -
28
-
29
-
30
-
31
-
32
-
33
-
34
-
35
-
36
-
37
-
38
-
39
-
40
-
41
-
42
-
43
-
44
-
45
-
46
-
47
-
48
-
49
-
50
-
51
-
52
-
53
-
54
-
55
-
56
-
57
-
58
-
59
 |
 |

17
Getting Started
2.
Insert the lens and turn it clockwise until you hear a click.
Removing M (Bayonet) mount lenses
1.
Turn the lens counterclockwise as far as it will go while pressing
down the lens release button.
2.
Pull the lens straight out of the mount.
Mounting L mount lenses
Note:
❏
When you install an L mount lens, you need an optional M-Bayonet
adapter ring.
❏
There are three sizes of M-Bayonet adapter rings, and any one of them can
be used.
❏
For more information on mounting an M-Bayonet adapter ring on the
camera body, see the M-Bayonet adapter ring manual.
1.
Mount an optional M-Bayonet adapter ring together with its cover
onto the lens mount.
DUMMY