Epson r-d1 User Manual - Page 44
Setting Number of Prints (DPOF Setting), LCD Brightness, ENTER, Print Order, Set DPOF for one
 |
View all Epson r-d1 manuals
Add to My Manuals
Save this manual to your list of manuals |
Page 44 highlights
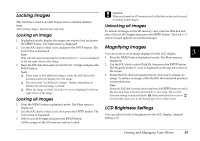
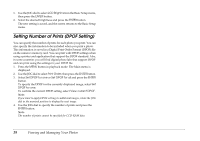
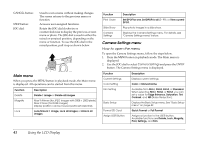
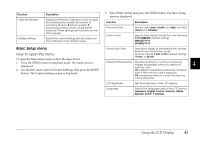
1. Use the JOG dial to select LCD Brightness in the Basic Setup menu, then press the ENTER button. 2. Select the desired brightness and press the ENTER button. The new setting is saved, and the screen returns to the Basic Setup menu. Setting Number of Prints (DPOF Setting) You can specify the number of prints for each photo you print. You can also specify the information to be included when you print a photo. This information is saved in a Digital Print Order Format (DPOF) file on the camera's memory card. You can print with DPOF settings when using a printer and application that support the DPOF standard. Also, in some countries you will find digital photo labs that support DPOF and can print using the settings in your DPOF file. 1. Press the MENU button in playback mode. The Main menu is displayed. 2. Use the JOG dial to select Print Order, then press the ENTER button. 3. Select Set DPOF for one or Set DPOF for all and press the ENTER button. To specify the DPOF for the currently displayed image, select Set DPOF for one. To confirm the current DPOF setting, select View current DPOF. Note: If you want to apply DPOF settings to additional images, rotate the JOG dial in the unraised position to display the next image. 4. Use the JOG dial to specify the number of prints and press the ENTER button. Note: The number of prints cannot be specified for CCD-RAW data. 39 Viewing and Managing Your Photos
-
 1
1 -
2
-
3
-
4
-
5
-
6
-
7
-
8
-
9
-
10
-
11
-
12
-
13
-
14
-
15
-
16
-
17
-
18
-
19
-
20
-
21
-
22
-
23
-
24
-
25
-
26
-
27
-
28
-
29
-
30
-
31
-
32
-
33
-
34
-
35
-
36
-
37
-
38
-
 39
39 -
 40
40 -
 41
41 -
 42
42 -
 43
43 -
 44
44 -
 45
45 -
 46
46 -
 47
47 -
 48
48 -
 49
49 -
50
-
51
-
52
-
53
-
54
-
55
-
56
-
57
-
58
-
59
 |
 |
