Epson r-d1 User Manual - Addendum - firmware version 2.0 upgrade features. - Page 18
Taking Photos, Turning the Camera On and Off, Taking a Picture
 |
View all Epson r-d1 manuals
Add to My Manuals
Save this manual to your list of manuals |
Page 18 highlights
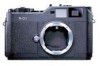
Chapter 2 Taking Photos Turning the Camera On and Off Turn on Turn off DUMMY Taking a Picture 1. Make sure the camera is turned on and a memory card is installed. 2. Before taking a picture, you may need to adjust the white balance, image quality setting, ISO sensitivity, exposure, and focus, as described on the following pages. 3. When you are ready to shoot, push the shutter charge lever as far as it will go to the right to cock the shutter. When you turn on the camera the first time, you need to set the current date (month, day, and year) and time (hours and minutes) on the LCD monitor. Once these settings are made, the camera automatically records the date and time for each picture taken. For instructions, see "Setting the Time and Date" on page 41. c Caution: Never turn off the power while the memory card access light is on. This may cause data in the card to be lost or damaged, or render the memory card unusable. Under certain circumstances, the memory card access light may remain on for several seconds after taking a picture (for example, if you turn on noise reduction and take a long exposure). Note: The shutter charge lever can be left in the "ready" position when shooting a series of pictures. 18 Taking Photos
-
 1
1 -
2
-
3
-
4
-
5
-
6
-
7
-
8
-
9
-
10
-
11
-
12
-
 13
13 -
 14
14 -
 15
15 -
 16
16 -
 17
17 -
 18
18 -
 19
19 -
 20
20 -
 21
21 -
 22
22 -
 23
23 -
24
-
25
-
26
-
27
-
28
-
29
-
30
-
31
-
32
-
33
-
34
-
35
-
36
-
37
-
38
-
39
-
40
-
41
-
42
-
43
-
44
-
45
-
46
-
47
-
48
-
49
-
50
-
51
-
52
-
53
-
54
 |
 |
