Epson r-d1 User Manual - Addendum - firmware version 2.0 upgrade features. - Page 23
B (Bulb) Setting, Using a Flash, Setting the Aperture, Using the Light Meter - best settings
 |
View all Epson r-d1 manuals
Add to My Manuals
Save this manual to your list of manuals |
Page 23 highlights
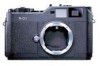
B (Bulb) Setting The bulb setting is used for shooting night pictures or astronomical objects. With this setting, the shutter stays open as long as the shutter release button is depressed. Note: ❏ When you set NR (Noise Reduction) to Hi (High) in the Film Settings screen and set the exposure at more than 2 seconds, noise reduction is automatically performed after taking a photo. Do not turn the power off until the SD card access light goes out. If you turn the power off before the noise reduction procedure is complete, the image is saved without noise reduction. ❏ When taking photos in B shooting mode, use a tripod and shutter release cable to prevent the picture from blurring. Install the cable as shown in the illustration below. Using a Flash You can use an optional flash unit when shooting pictures under low light conditions. The syncro speed of the flash is 1/125 second. Set the shutter speed dial to 125 when using a flash. For more information, see the documentation included with your flash. Setting the Aperture Rotate the lens aperture ring to the desired value. 2 2 2 2 2 For more information, see the documentation included with your lens. Using the Light Meter 2 The camera has a built-in light meter that calculates the best shutter speed for the amount of light available through the lens. Press the shutter release button halfway to view the metered shutter speed (in red) at the bottom of the viewfinder, then adjust the exposure settings 2 as needed. The metered value is displayed in the range of 1 (1 second) through 2000 (1/2000 second). For any value higher than one second, 1 is 2 displayed in the viewfinder. Likewise, for values lower than 1/2000 second, 2000 is displayed in the viewfinder. 2 2 Taking Photos 23
-
 1
1 -
2
-
3
-
4
-
5
-
6
-
7
-
8
-
9
-
10
-
11
-
12
-
13
-
14
-
15
-
16
-
17
-
 18
18 -
 19
19 -
 20
20 -
 21
21 -
 22
22 -
 23
23 -
 24
24 -
 25
25 -
 26
26 -
 27
27 -
 28
28 -
29
-
30
-
31
-
32
-
33
-
34
-
35
-
36
-
37
-
38
-
39
-
40
-
41
-
42
-
43
-
44
-
45
-
46
-
47
-
48
-
49
-
50
-
51
-
52
-
53
-
54
 |
 |
