Epson r-d1 User Manual - Addendum - firmware version 2.0 upgrade features. - Page 36
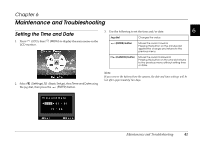
Basic Setup Menu, Time and Date - firmware
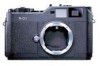 |
View all Epson r-d1 manuals
Add to My Manuals
Save this manual to your list of manuals |
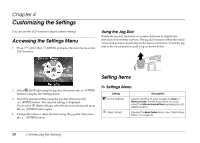
Page 36 highlights
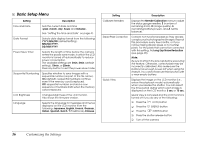
Basic Setup Menu Setting Description Time and Date Sets the current date and time (year, month, day, hours and minutes). See "Setting the Time and Date" on page 41. Date Format Selects date display format from the following: YYYY/MM/DD (default setting), MM/DD/YYYY, DD/MM/YYYY Power Save Timer Selects the length of time before the camera enters the power save mode, in which the LCD monitor is turned off automatically to reduce power consumption. The available settings are 3min, 5min (default setting), 10min, or 20min. Press any button to exit the power save mode. Sequential Numbering Specifies whether to save images with a sequential number (as part of the file name). On (default): sequential numbers continue even if the memory card is replaced. Off: sequential numbers end and a new sequence of numbers starts when the memory card is replaced. LCD Brightness Changes brightness of the LCD monitor. Also shows the firmware version. Language Selects the language for messages and menus displayed on the LCD monitor from the following: Japanese, English, French, German, Italian, Spanish, Dutch, T (Traditional)-Chinese Setting Description Calibrate Needles Displays the Needle Calibration menu to adjust the status gauge needles: E (number of remaining shots), R (image quality), E (remaining battery power), and A (white balance). Dead Pixel Correction Corrects non-functional pixels so they are less conspicuous in photographed images. Repeat this procedure every few months, or if you notice missing (black) pixels or hot (white) pixels. For the pixels that cannot be corrected with this setting, try Long Exp Noise Reduction (see page 35). Note: Be sure to attach the lens cap before executing this feature. Otherwise, correct pixels may be incorrectly calibrated. Also make sure the battery has enough power left when using this feature. You cannot execute this function with a near-empty battery. Quick View Displays the image on the LCD monitor (i.e., enters the playback mode) automatically when you release the shutter. You can select the time period during which each image is displayed on the LCD monitor: 3 sec or 10 sec. Quick View is canceled and the LCD monitor is turned off if you do any of the following: ❏ Press the (LCD) button ❏ Press the (MENU) button ❏ Press the (USER) button ❏ Press the shutter release button ❏ Turn off the camera 36 Customizing the Settings
-
 1
1 -
2
-
3
-
4
-
5
-
6
-
7
-
8
-
9
-
10
-
11
-
12
-
13
-
14
-
15
-
16
-
17
-
18
-
19
-
20
-
21
-
22
-
23
-
24
-
25
-
26
-
27
-
28
-
29
-
30
-
 31
31 -
 32
32 -
 33
33 -
 34
34 -
 35
35 -
 36
36 -
 37
37 -
 38
38 -
 39
39 -
 40
40 -
 41
41 -
42
-
43
-
44
-
45
-
46
-
47
-
48
-
49
-
50
-
51
-
52
-
53
-
54
 |
 |
