Foxconn P35A-S English manual - Page 82
Install Serial ATA Hard Disks
 |
View all Foxconn P35A-S manuals
Add to My Manuals
Save this manual to your list of manuals |
Page 82 highlights
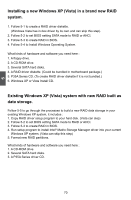
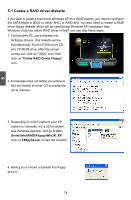
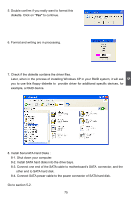
5 5. Double confirm if you really want to format this diskette. Click on "Yes" to continue. 6. Format and writing are in processing. 7. Check if the diskette contains the driver files. Later, when in the process of installing Windows XP in your RAID system, it will ask you to use this floppy diskette to provide driver for additional specific devices, for example, a RAID device. 8. Install Serial ATA Hard Disks : 8-1. Shut down your computer. 8-2. Install SATA hard disks into the drive bays. 8-3. Connect one end of the SATA cable to motherboard's SATA connector, and the other end to SATA hard disk. 8-4. Connect SATA power cable to the power connector of SATA hard disk. Go to section 5-2. 75
-
 1
1 -
2
-
3
-
4
-
5
-
6
-
7
-
8
-
9
-
10
-
11
-
12
-
13
-
14
-
15
-
16
-
17
-
18
-
19
-
20
-
21
-
22
-
23
-
24
-
25
-
26
-
27
-
28
-
29
-
30
-
31
-
32
-
33
-
34
-
35
-
36
-
37
-
38
-
39
-
40
-
41
-
42
-
43
-
44
-
45
-
46
-
47
-
48
-
49
-
50
-
51
-
52
-
53
-
54
-
55
-
56
-
57
-
58
-
59
-
60
-
61
-
62
-
63
-
64
-
65
-
66
-
67
-
68
-
69
-
70
-
71
-
72
-
73
-
74
-
75
-
76
-
 77
77 -
 78
78 -
 79
79 -
 80
80 -
 81
81 -
 82
82 -
 83
83 -
 84
84 -
 85
85 -
 86
86 -
 87
87 -
88
-
89
-
90
-
91
-
92
-
93
-
94
-
95
-
96
-
97
-
98
-
99
-
100
-
101
-
102
-
103
-
104
-
105
-
106
-
107
-
108
-
109
-
110
-
111
-
112
-
113
-
114
-
115
-
116
-
117
 |
 |
75
5
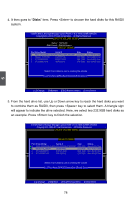
5. Double confirm if you really want to format this
diskette. Click on "
Yes"
to continue.
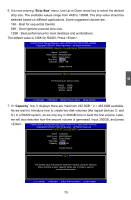
6. Format and writing are in processing.
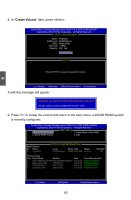
7. Check if the diskette contains the driver files.
Later, when in the process of installing Windows XP in your RAID system, it will ask
you to use this floppy diskette to
provide driver for additional specific devices, for
example, a RAID device.
8. Install Serial ATA Hard Disks :
8-1. Shut down your computer.
8-2. Install SATA hard disks into the drive bays.
8-3. Connect one end of the SATA cable to motherboard’s SATA
connector, and the
other end to SATA hard disk.
8-4. Connect SATA power cable to the power connector of SATA hard disk.
Go to section 5-2.