Fujitsu 6010N Getting Started Guide - Page 10
Setting the Admin Network, Setting the DNS Server, Setting the WINS Server - scanners
 |
UPC - 097564307683
View all Fujitsu 6010N manuals
Add to My Manuals
Save this manual to your list of manuals |
Page 10 highlights
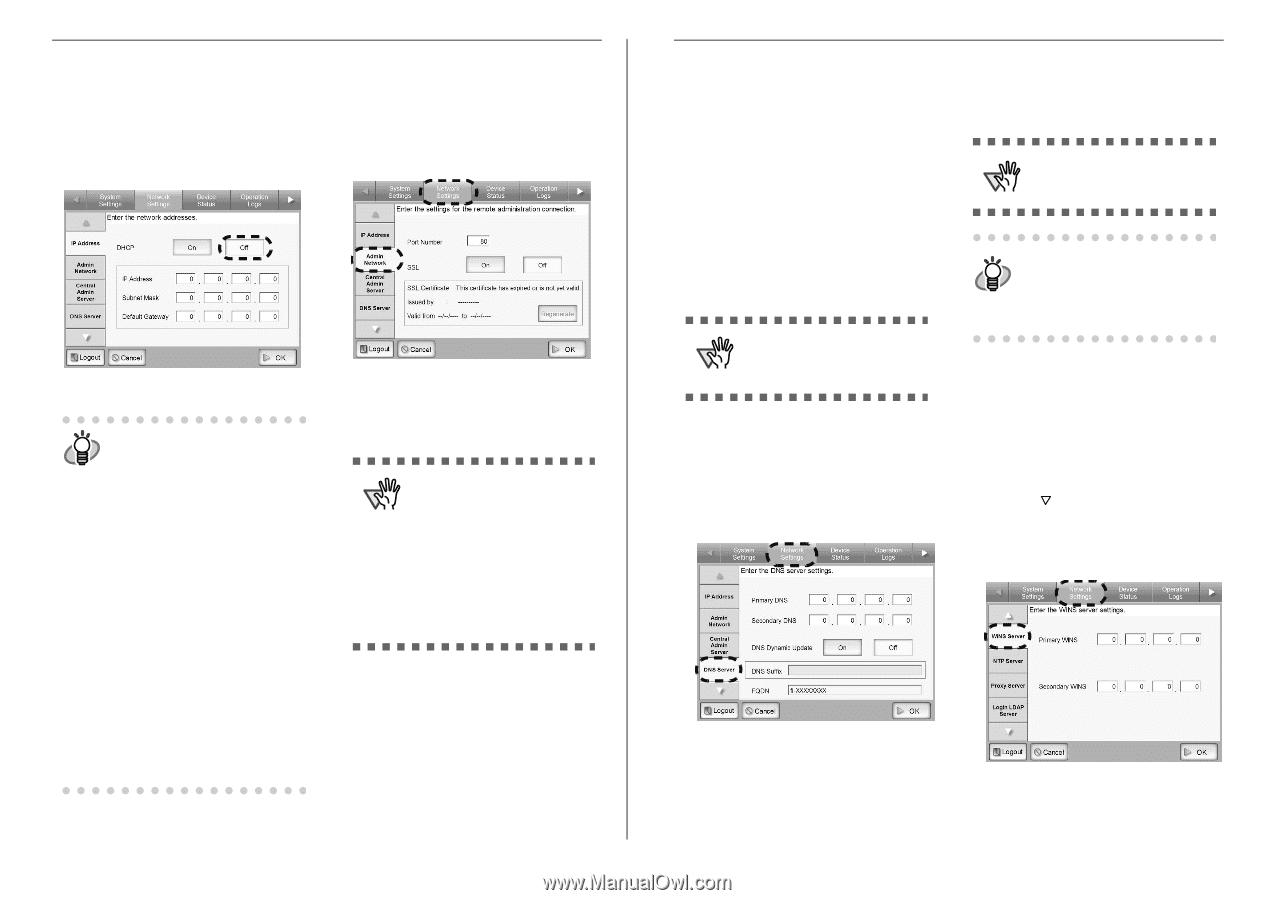
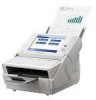
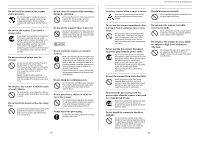
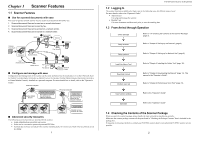
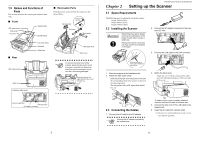
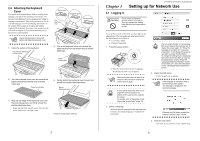
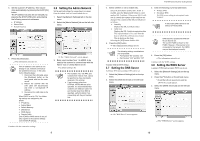
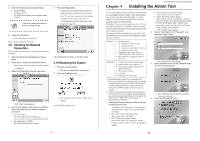
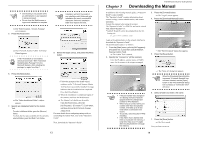
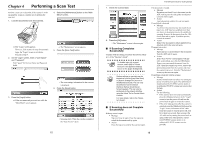
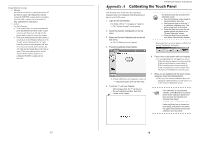
3. Set the scanner's IP address. This may be done automatically, by pressing the DHCP [On] button. The IP address may also be set manually, by pressing the DHCP [Off] button and entering the following numerical addresses: • IP Address • Subnet Mask • Default Gateway 3.6 Setting the Admin Network Set the network settings for connecting to a scanner from the Admin Tool or Central Admin Server. 1. Select the [Network Settings] tab on the top menu. 2. Select the [Admin Network] tab on the left side menu. 4. Press the [OK] button. ⇒ The information entered is set. If the IP address is the same as one HINT already in use, network communica- tion problems will occur. In this case, try the following steps: 1. Disconnect the LAN cable, press the [Shutdown] button on the touch panel, and turn the scan- ner off. 2. Reboot the scanner with the LAN cable still disconnected, and enter a non-duplicate IP address. 3. Re-connect the LAN cable to the scanner. When DHCP is set to "On", the follow- ing settings are assigned by the DHCP: • IP Address • Subnet Mask • Default Gateway • DNS Server • WINS Server • Domain Suffix Even if DNS or WINS server is set, pri- ority is given to the scanner settings over the DHCP settings. ⇒ The "Admin Network" screen appears. 3. Enter a port number from 1 to 65535, to be used by the scanner to communicate with the Admin Tool or Central Admin server. The default setting is 80. ATTENTION • Port numbers 135, 139, 445, and numbers from 1025 to 1124, cannot be specified as they are already reserved in the scanner. • If port numbers other than HTTP:80, HTTPS:443 are to be specified, it is recommended that numbers over 5000 are used. If a port number lower than 5000 is specified, verify the Admin Tool connectivity with the port number first. Continue with the connection settings. 9 fi-6010N Network Scanner Getting Started 4. Select whether or not to enable SSL. Select the [On] button enables SSL. If SSL is enabled, press the [Regenerate] button to create another SSL Certificate. When a new SSL Certificate is created, the contents of the certificate are changed. The contents of the SSL Certificate are as follows. • Issued by Displays the SSL Certificate issuer. • Valid from Displays the SSL Certificate expiration date. The expiration date is five years from the date on which the certificate was created. This is shown in date form. Selecting the [Off] button disables SSL. 5. Press the [OK] button. ⇒ The communication settings are set. ATTENTION The following settings combinations are not possible. • Port Number "80" and SSL "On" • Port Number "443" and SSL "Off" Continue with the DNS settings. 3.7 Setting the DNS Server A primary DNS and secondary DNS can be set. 1. Select the [Network Settings] tab on the top menu. 2. Select the [DNS Server] tab on the left side menu. 3. Enter the following numerical addresses: • Primary DNS • Secondary DNS If a DNS server setting is not required, enter "0.0.0.0". ATTENTION A Secondary DNS cannot be set without a Primary DNS. DNS Dynamic Update and DNS Suf- HINT fix can also be set. The current FQDN is shown for the FQDN. However, if the scanner is not connected to the network, the FQDN may not be displayed correctly. 4. Press the [OK] button. ⇒ The information entered is set. Continue with the WINS settings. 3.8 Setting the WINS Server A primary WINS and secondary WINS can be set. 1. Select the [Network Settings] tab on the top menu. 2. Press the [ ] button on the left side menu. ⇒ Scroll the left side menu down until the [WINS Sever] tab appears. 3. Select the [WINS Server] tab on the left side menu. ⇒ The "DNS Server" screen appears. ⇒ The "WINS Server" screen appears. 10
-
 1
1 -
2
-
3
-
4
-
 5
5 -
 6
6 -
 7
7 -
 8
8 -
 9
9 -
 10
10 -
 11
11 -
 12
12 -
 13
13 -
 14
14 -
 15
15 -
16
-
17
-
18
-
19
-
20
-
21
 |
 |