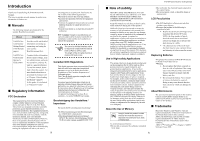
Fujitsu 6010N Getting Started Guide - Page 6
Scanner Features - fi iscanner
 |
UPC - 097564307683
View all Fujitsu 6010N manuals
Add to My Manuals
Save this manual to your list of manuals |
Page 6 highlights
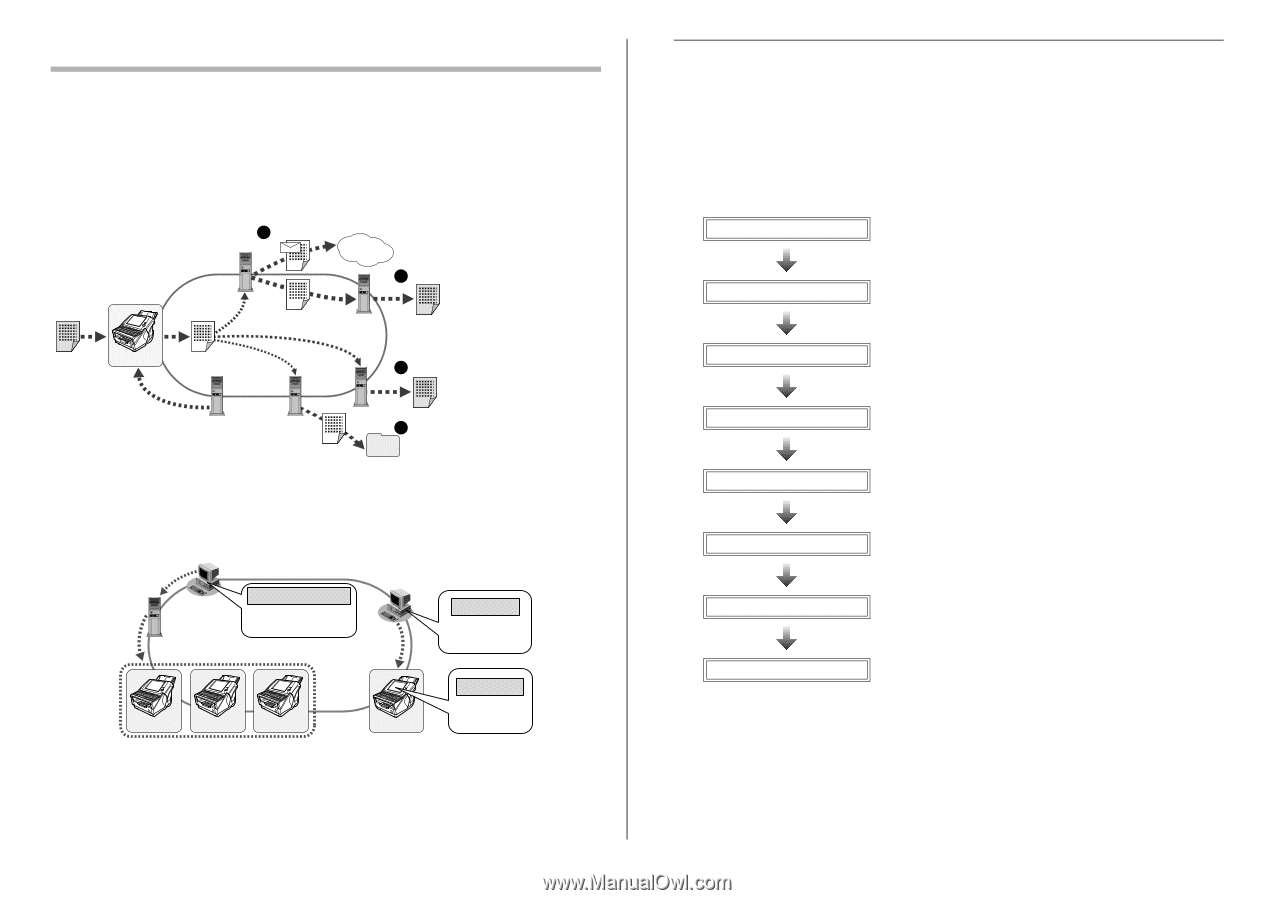
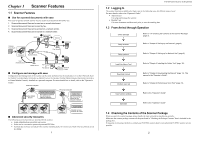
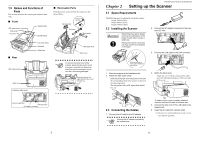
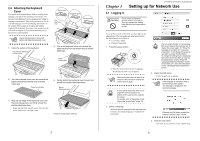
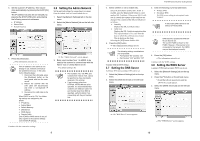
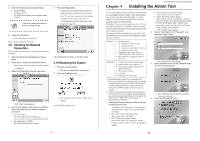
Chapter 1 Scanner Features 1.1 Scanner Features ■ Use for scanned documents with ease This easy-to-operate network scanner may be used to scan documents for further use: 1. Scanned document files can be sent as an e-mail attachment. 2. Scanned document files can be sent by fax. 3. Scanned document files can be printed on a network printer. 4. Scanned document files can be saved in a network folder. 1 Send e-mail SMTP Server Internet 2 Send Fax Original Document Fax Server Scanner Scanned Data 3 Print User Authentication LDAP Server FTP Server or File Server Print Server 4 Network Save Folder ■ Configure and manage with ease Configuration and management of the scanner can be easily performed via the touch panel, or via the fi Network Scanner Admin Tool (hereinafter referred to as Admin Tool) or the iScanner Central Admin Console (hereinafter referred to as Central Admin Console), installed on a personal computer. For more details how to install, refer to the "Operator's Guide". Personal computer Central Admin Server Central Admin Console Set multiple scanners at a time via the network interface Personal computer Admin Tool Set one scanner at a time via the network interface Touch Panel Scanner Scanner Scanner Scanner Directly set one scanner at a time ■ Advanced security measures The following security functions are provided for the scanner. • Login authentication can restrict user access. • Scans can be converted to password protected PDF files. • Scanned data is always encrypted in the scanner and deleted after it is sent as an e-mail or by fax, printed, saved in a folder. 1 fi-6010N Network Scanner Getting Started 1.2 Logging In The scanner functions available after login vary in the following ways for different types of user: For more details, refer to the "Operator's Guide". • Administrator Can setup and manage the scanner. • Regular User Can scan documents and then send, print, or save the resulting data. 1.3 From Arrival through Operation Check package Refer to "1.4 Checking the Contents of the Scanner Package" (page 2). Setup scanner Refer to "Chapter 2 Setting up the Scanner" (page 4). Setup network Refer to "Chapter 3 Setting up for Network Use" (page 6). Install the Admin Tool Refer to "Chapter 4 Installing the Admin Tool" (page 12). Download manual Perform scan test Refer to "Chapter 5 Downloading the Manual" (page 14). This manual is the "Operator's Guide". Refer to "Chapter 6 Performing a Scan Test" (page 15). User function settings Refer to the "Operator's Guide". Operation Refer to the "Operator's Guide". 1.4 Checking the Contents of the Scanner Package When you open the scanner package, please handle the main unit and its attachments carefully. Make sure the scanner package contains all the parts listed in "Checking the Package Contents" that is included in the package box. If any parts are missing or defective, contact your FUJITSU scanner dealer or an authorized FUJITSU scanner service provider. 2
-
 1
1 -
 2
2 -
 3
3 -
 4
4 -
 5
5 -
 6
6 -
 7
7 -
 8
8 -
 9
9 -
 10
10 -
 11
11 -
 12
12 -
13
-
14
-
15
-
16
-
17
-
18
-
19
-
20
-
21
 |
 |