Fujitsu 6010N Getting Started Guide - Page 13
Performing a Scan Test - manual
 |
UPC - 097564307683
View all Fujitsu 6010N manuals
Add to My Manuals
Save this manual to your list of manuals |
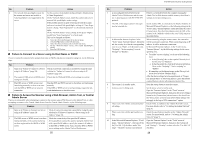
Page 13 highlights
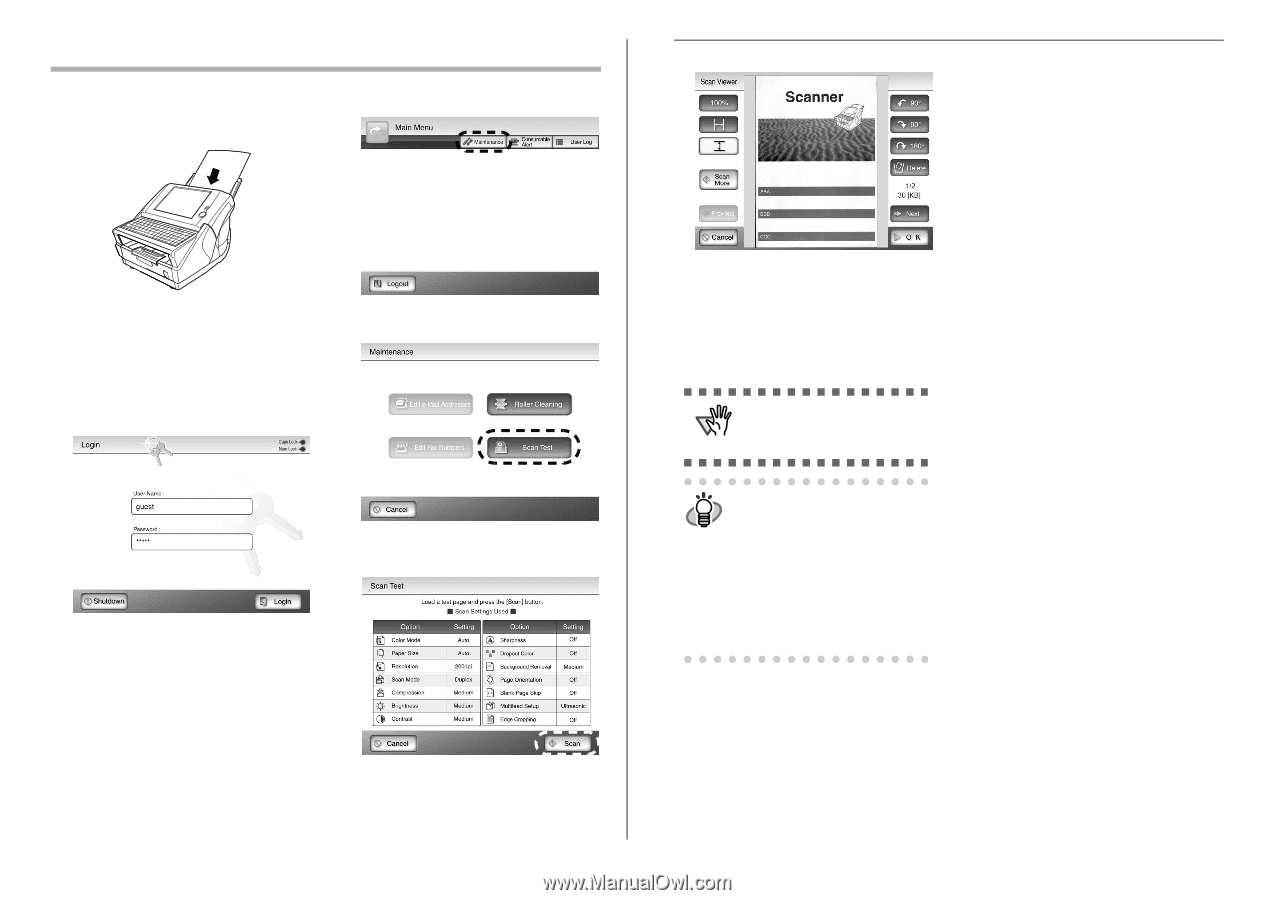
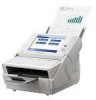
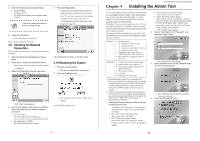
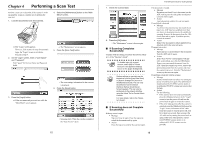
Chapter 6 Performing a Scan Test Perform a scan test to determine if the scanner is working properly. Login as a regular user to perform the scan test. 1. Load the documents to be test scanned. 4. Select the [Maintenance] button on the "Main Menu" screen. ReSivderese ⇒ The "Login" screen appears. However, if the scanner is setup for automatic login, the "Login" screen is not shown. Proceed to Step 4. 2. On the "Login" screen, enter a "User Name" and "Password". Enter "guest" for the User Name and Password fields. ⇒ The "Maintenance" screen appears. 5. Press the [Scan Test] button. ⇒ The scan settings information for the scan test is displayed. 6. Press the [Scan] button. 3. Press the [Login] button. ⇒ If the user name and password are valid, the "Main Menu" screen appears. ⇒ Scanning starts. When the scan has completed, the "Scan Viewer" opens. 15 7. Check the scanned data. 8. Press the [OK] button. ⇒ The "Maintenance" screen is shown again. ■ If Scanning Completes Successfully Continue with the setting procedures described in Chapter 1 of the "Operator's Guide". ATTENTION To disable login with a guest account, select [Off] for "Guest Account" in the [System Settings] screen on the [Login Settings] tab. System settings or user data can be HINT backed up from the [User Data Store] or [System Settings File] screen on the [Maintenance] tab. This can only be performed via the network interface. Backup should be per- formed regularly. This can only be performed via the network interface using the Admin Tool or Central Admin Console. For more details, refer to the "Operator's Guide". ■ If Scanning does not Complete Successfully If the top cover is open • Message Top cover may be open. Close the top cover, reload the documents and try again. • Action Close the top cover, and try the scan test again. fi-6010N Network Scanner Getting Started If no document is loaded • Message Document not found. Load a document into the ADF, making sure the side guides are adjusted correctly and try again. • Action Load a document, and try the scan test again. If a multifeed is detected • Message Feed Error: Document(s) may not match the set paper size, ADF may have grabbed more than one sheet, or documents may not be suitable for scanning. Remove the documents from the ADF, check them and try again. If problem persists, consult the manual. • Action Remove the document for which multifeed was detected, and try the scan test again. If a paper jam occurs • Message Paper jam has occurred. Remove the documents from the ADF and try again. • Action If the "Scan Viewer" screen appears with partially scanned data, just click the [OK] button. Remove any unscanned documents from the ADF. Open the scanner's top cover, remove the jammed document from the scanner, and close the scanner's top cover. From the "Maintenance" screen, try the test scan again. If a problem is detected with the scanner • Message Scanner initialization has failed. Try turning the power off and back on again. The administrator should contact the FUJITSU scanner dealer or an authorized FUJITSU scanner service provider for help. • Action Try the following: • If the scanner does not restart automatically, press the [Shutdown] button on the "Login" screen to turn the power off, and turn the power back on again to restart the scanner. • If the error status persists after the scanner is restarted, press the [Shutdown] button on the "Login" screen, disconnect the AC cable from the scanner to turn the power off, wait for at least ten seconds, then reconnect the AC cable and try turning the power back on again. If the error status persists, contact your FUJITSU scanner dealer or an authorized FUJITSU scanner service provider. 16
-
 1
1 -
2
-
3
-
4
-
5
-
6
-
7
-
 8
8 -
 9
9 -
 10
10 -
 11
11 -
 12
12 -
 13
13 -
 14
14 -
 15
15 -
 16
16 -
 17
17 -
 18
18 -
19
-
20
-
21
 |
 |