Garmin eTrex Venture HC Owner's Manual - Page 24
Creating a Route, Navigating a Saved Track - does not turn on
 |
UPC - 753759072872
View all Garmin eTrex Venture HC manuals
Add to My Manuals
Save this manual to your list of manuals |
Page 24 highlights
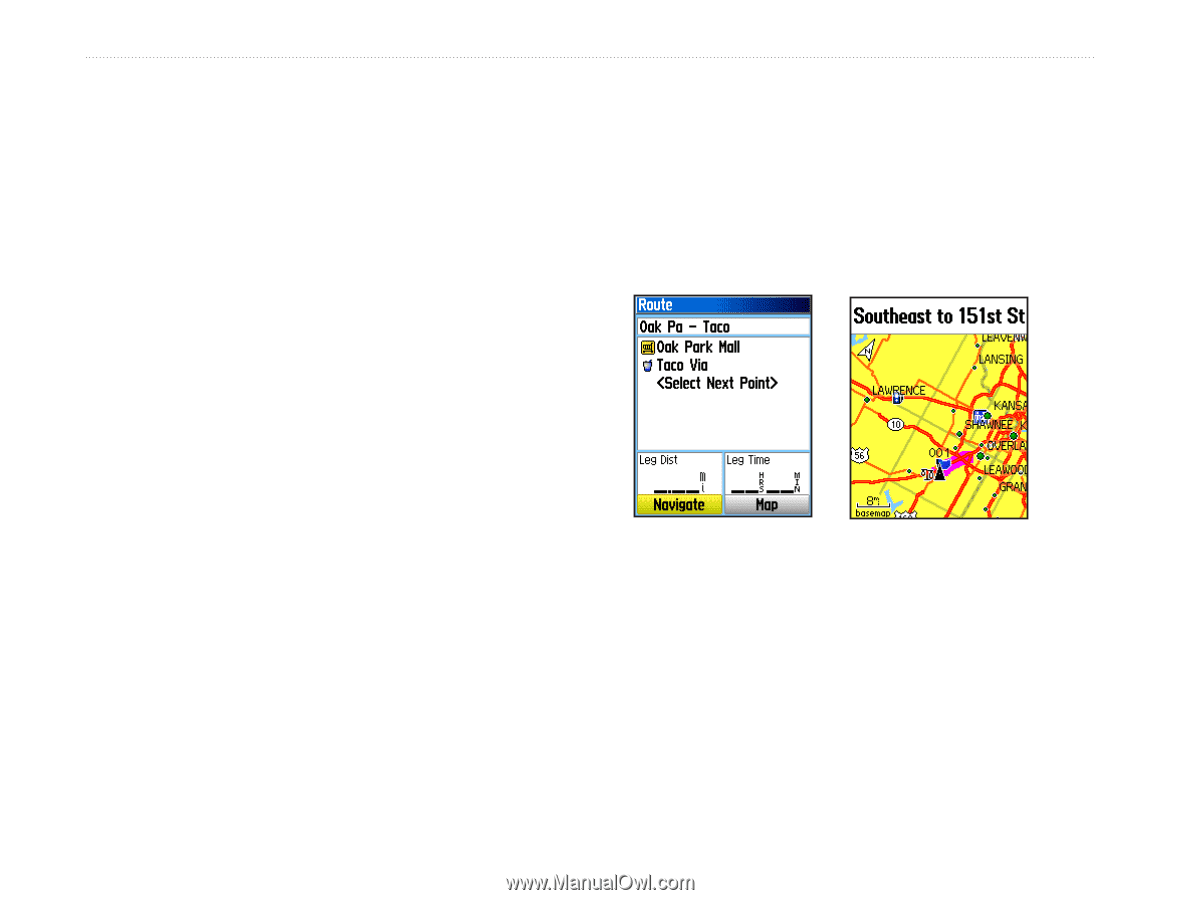
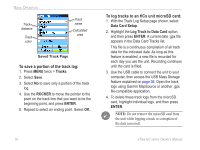
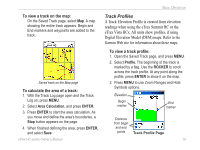
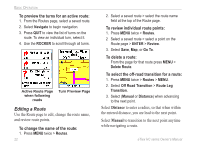
Basic Operation Navigating a Saved Track To use the TracBack feature: 1. With the Saved Tracks page for the track or the Track Log open, select TracBack, to show the track. Select the point to TracBack. 2. Use the ROCKER to move the pointer to the point on the map to start navigating the TracBack. 3. Select Follow Road (HCx units with detailed maps only) to route back to the point using available roadways, or select Follow Track to retrace your original path of travel. The Map page gives directions to the first turn on the track. 4. Move in the direction of the first turn. At the first turn, directions to each turn are shown. 5. Select Menu > Stop Navigation to exit. To create a waypoint on a saved track: 1. With a saved track on the map, use the ROCKER to move the pointer on the track point that you want to mark as a user waypoint. 2. Press and hold ENTER. 20 Creating a Route Routing creates a sequence of waypoints that lead you to your final destination. The eTrex stores 50 routes with up to 250 points each. Create or modify a route using the Routes page, and add waypoints to a route. Create complex routes using MapSource mapping. Route Page Route on the Map Page To create a route: 1. Press MENU twice > Routes. 2. Select New > . 3. Use the Find Menu to select a route waypoint from one of the Find groups. 4. Select Use to add it to the route. 5. Select Navigate. eTrex HC series Owner's Manual
-
 1
1 -
2
-
3
-
4
-
5
-
6
-
7
-
8
-
9
-
10
-
11
-
12
-
13
-
14
-
15
-
16
-
17
-
18
-
 19
19 -
 20
20 -
 21
21 -
 22
22 -
 23
23 -
 24
24 -
 25
25 -
 26
26 -
 27
27 -
 28
28 -
 29
29 -
30
-
31
-
32
-
33
-
34
-
35
-
36
-
37
-
38
-
39
-
40
-
41
-
42
-
43
-
44
-
45
-
46
-
47
-
48
-
49
-
50
-
51
-
52
-
53
-
54
 |
 |