Gigabyte GA-6QPCV-RH Manual - Page 11
Hardware Installation Process
 |
View all Gigabyte GA-6QPCV-RH manuals
Add to My Manuals
Save this manual to your list of manuals |
Page 11 highlights
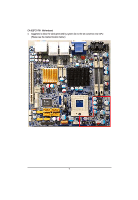
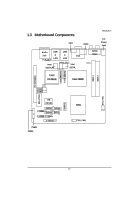
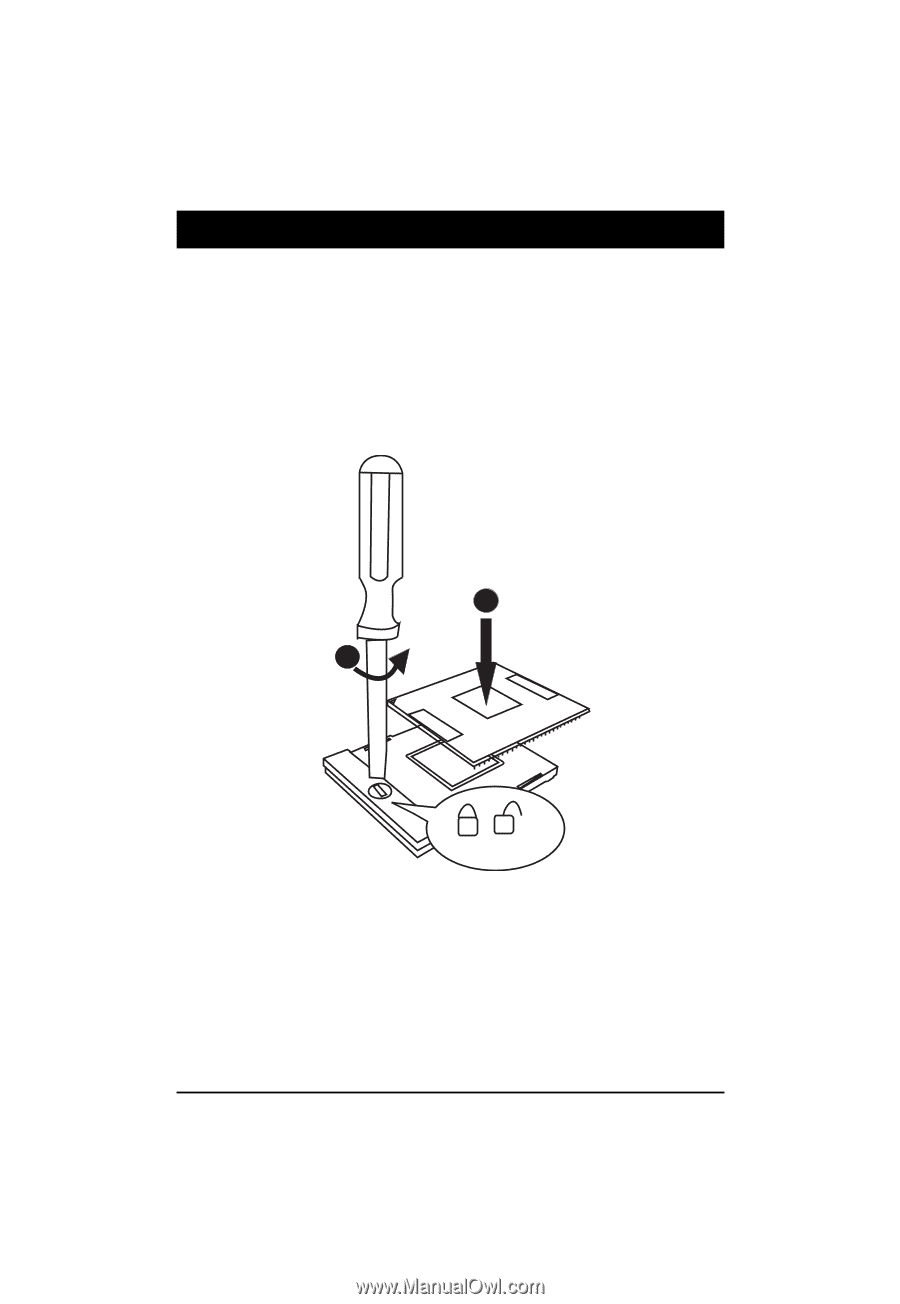
GA-6QPCV-RH Motherboard Chapter 2 Hardware Installation Process 2-1: Installing Processor Step 1 Step 2 The processor socket come with a screw to secure the processor. Insert the CPU into the socket by making sure the notch on the corner of the CPUcorresponds with the notch on the inside of the socket. Once the processor has slide into the socket, lock the screw. Refer to the figures below. 1 2 Lock Unlock 11
-
 1
1 -
2
-
3
-
4
-
5
-
 6
6 -
 7
7 -
 8
8 -
 9
9 -
 10
10 -
 11
11 -
 12
12 -
 13
13 -
 14
14 -
 15
15 -
 16
16 -
17
-
18
-
19
-
20
-
21
-
22
-
23
-
24
-
25
-
26
-
27
-
28
-
29
-
30
-
31
-
32
-
33
-
34
-
35
-
36
-
37
-
38
-
39
-
40
-
41
-
42
-
43
-
44
-
45
-
46
-
47
-
48
-
49
-
50
-
51
-
52
-
53
-
54
-
55
-
56
-
57
-
58
-
59
-
60
-
61
-
62
-
63
-
64
-
65
 |
 |
11
GA-6QPCV-RH
Motherboard
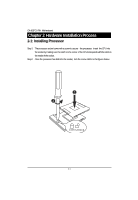
Chapter 2
Hardware Installation Process
2-1: Installing Processor
Step 1
The processor socket come with a screw to secure
the processor.
Insert
the CPU into
the socket by making sure the notch on the corner of the CPUcorresponds with the notch on
the inside of the socket.
Step 2
Once the processor has slide into the socket,
lock the screw. Refer to the figures below.
2
1
Lock Unlock