HTC Legend User Manual - Page 79
Synchronizing with a Microsoft Exchange ActiveSync account, Managing your accounts
 |
View all HTC Legend manuals
Add to My Manuals
Save this manual to your list of manuals |
Page 79 highlights
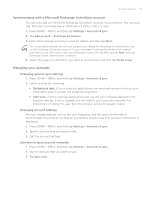
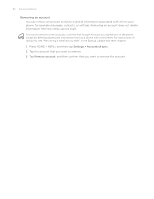
Accounts and sync 79 Synchronizing with a Microsoft Exchange ActiveSync account You can only add one Microsoft Exchange ActiveSync account on your phone. You can sync with Microsoft Exchange Server 2003 Service Pack 2 (SP2) or later. 1. Press HOME > MENU, and then tap Settings > Accounts & sync. 2. Tap Add account > Exchange ActiveSync. 3. Enter the Exchange ActiveSync account details, and then tap Next. Your corporate Exchange Server must support auto-detect for the phone to automatically set up the Exchange ActiveSync account. If your corporate Exchange Server does not support auto-detect, you will need to enter your Exchange Server settings after you tap Next. Ask your Exchange Server administrator for details. 4. Select the types of information you want to synchronize, and then tap Finish setup. Managing your accounts Changing general sync settings 1. Press HOME > MENU, and then tap Settings > Accounts & sync. 2. Select or clear the following: Background data. If this is selected, applications can send and receive online account information even if you are not currently using them. Auto-sync. If this is selected, applications can use the sync schedule defined in the account settings. If this is cleared, you will need to sync accounts manually. For instructions on doing this, see "Synchronizing an account manually" below. Changing account settings You can change settings such as the sync frequency and the types of information synchronized, the kinds of notification you receive, and the way that account information is displayed. 1. Press HOME > MENU, and then tap Settings > Accounts & sync. 2. Tap the account that you want to edit. 3. Edit the account settings. Synchronizing an account manually 1. Press HOME > MENU, and then tap Settings > Accounts & sync. 2. Tap the account that you want to sync. 3. Tap Sync now.
-
 1
1 -
2
-
3
-
4
-
5
-
6
-
7
-
8
-
9
-
10
-
11
-
12
-
13
-
14
-
15
-
16
-
17
-
18
-
19
-
20
-
21
-
22
-
23
-
24
-
25
-
26
-
27
-
28
-
29
-
30
-
31
-
32
-
33
-
34
-
35
-
36
-
37
-
38
-
39
-
40
-
41
-
42
-
43
-
44
-
45
-
46
-
47
-
48
-
49
-
50
-
51
-
52
-
53
-
54
-
55
-
56
-
57
-
58
-
59
-
60
-
61
-
62
-
63
-
64
-
65
-
66
-
67
-
68
-
69
-
70
-
71
-
72
-
73
-
 74
74 -
 75
75 -
 76
76 -
 77
77 -
 78
78 -
 79
79 -
 80
80 -
 81
81 -
 82
82 -
 83
83 -
 84
84 -
85
-
86
-
87
-
88
-
89
-
90
-
91
-
92
-
93
-
94
-
95
-
96
-
97
-
98
-
99
-
100
-
101
-
102
-
103
-
104
-
105
-
106
-
107
-
108
-
109
-
110
-
111
-
112
-
113
-
114
-
115
-
116
-
117
-
118
-
119
-
120
-
121
-
122
-
123
-
124
-
125
-
126
-
127
-
128
-
129
-
130
-
131
-
132
-
133
-
134
-
135
-
136
-
137
-
138
-
139
-
140
-
141
-
142
-
143
-
144
-
145
-
146
-
147
-
148
-
149
-
150
-
151
-
152
-
153
-
154
-
155
-
156
-
157
-
158
-
159
-
160
-
161
-
162
-
163
-
164
-
165
-
166
-
167
-
168
-
169
-
170
-
171
-
172
-
173
-
174
-
175
-
176
-
177
-
178
-
179
-
180
-
181
-
182
-
183
-
184
-
185
-
186
-
187
-
188
-
189
-
190
-
191
-
192
-
193
-
194
-
195
-
196
-
197
-
198
-
199
-
200
-
201
-
202
-
203
-
204
-
205
-
206
-
207
-
208
-
209
-
210
-
211
 |
 |