HP 17-bs000 Maintenance and Service Guide - Page 52
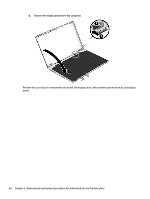
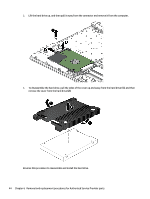
Reverse this procedure to reassemble and install the hard drive., remove the cover from the hard drive
 |
View all HP 17-bs000 manuals
Add to My Manuals
Save this manual to your list of manuals |
Page 52 highlights
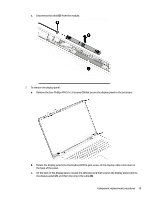
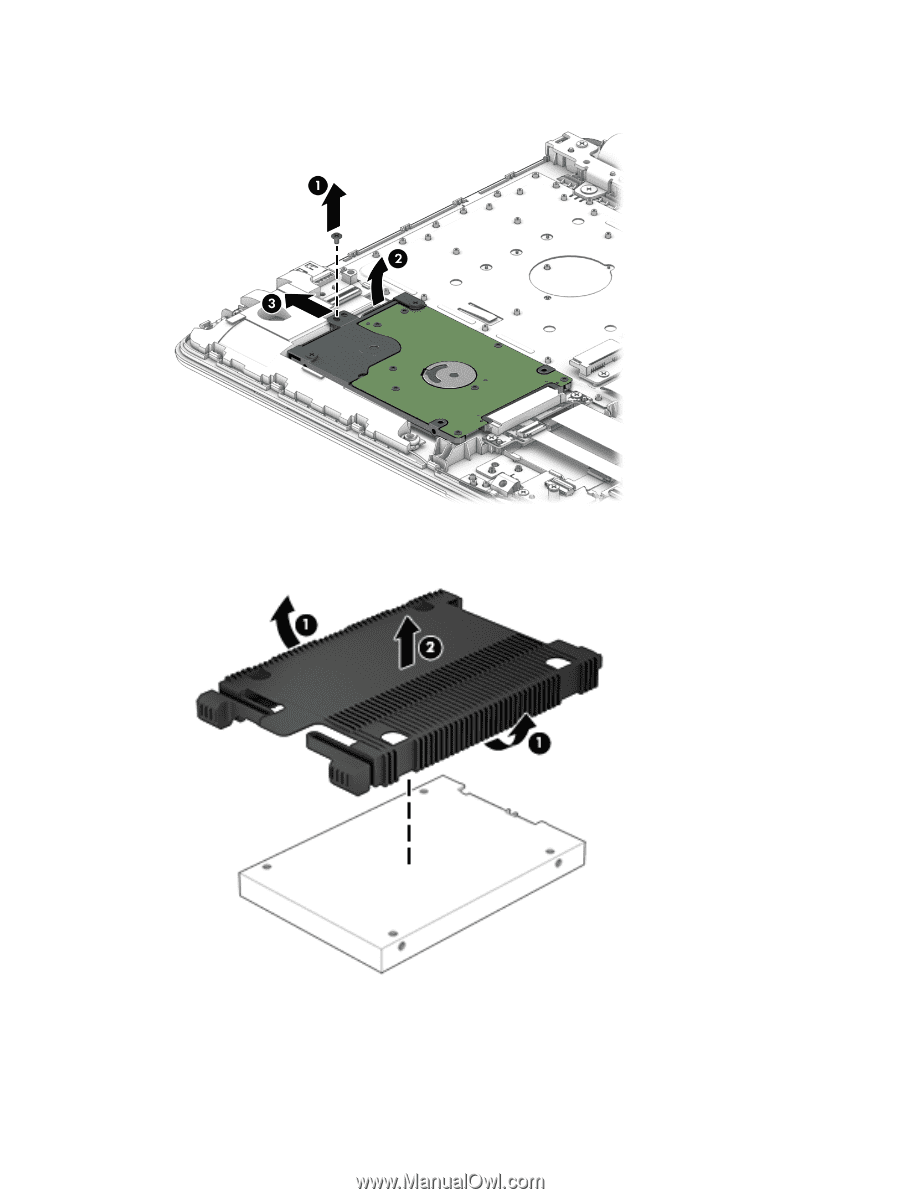
2. Lift the hard drive up, and then pull it away from the connector and remove it from the computer. 3. To disassemble the hard drive, pull the sides of the cover up and away from the hard drive (1), and then remove the cover from the hard drive (2). Reverse this procedure to reassemble and install the hard drive. 44 Chapter 6 Removal and replacement procedures for Authorized Service Provider parts
-
 1
1 -
2
-
3
-
4
-
5
-
6
-
7
-
8
-
9
-
10
-
11
-
12
-
13
-
14
-
15
-
16
-
17
-
18
-
19
-
20
-
21
-
22
-
23
-
24
-
25
-
26
-
27
-
28
-
29
-
30
-
31
-
32
-
33
-
34
-
35
-
36
-
37
-
38
-
39
-
40
-
41
-
42
-
43
-
44
-
45
-
46
-
 47
47 -
 48
48 -
 49
49 -
 50
50 -
 51
51 -
 52
52 -
 53
53 -
 54
54 -
 55
55 -
 56
56 -
 57
57 -
58
-
59
-
60
-
61
-
62
-
63
-
64
-
65
-
66
-
67
-
68
-
69
-
70
-
71
-
72
-
73
-
74
-
75
-
76
-
77
-
78
-
79
-
80
-
81
-
82
-
83
-
84
-
85
-
86
-
87
-
88
-
89
-
90
-
91
-
92
-
93
-
94
-
95
-
96
-
97
-
98
-
99
-
100
-
101
-
102
-
103
-
104
-
105
-
106
-
107
-
108
-
109
-
110
-
111
-
112
-
113
-
114
 |
 |
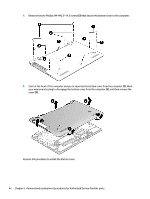
2.
Lift the hard drive up, and then pull it away from the connector and remove it from the computer.
3.
To disassemble the hard drive, pull the sides of the cover up and away from the hard drive
(1)
, and then
remove the cover from the hard drive
(2)
.
Reverse this procedure to reassemble and install the hard drive.
44
Chapter 6
Removal and replacement procedures for Authorized Service Provider parts