HP 2500c HP 2500C Professional Series Color Printer Network Guide - Page 16
Installing Printer Software in a Server Computer Running - postscript
 |
View all HP 2500c manuals
Add to My Manuals
Save this manual to your list of manuals |
Page 16 highlights
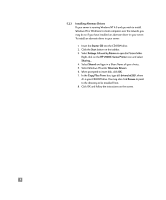
5. Select Share Printer As... from the Printer menu. If the Share As... option is disabled, you have not enabled printer sharing. To enable this, double-click the Windows Setup icon in the Main program group, choose Change Network Settings in the Options menu and enable printer sharing. Click OK and restart Windows. 6. Specify a shared name for this printer e.g., HP 2500C. 7. Check the Re-share At Startup option if you wish to share the printer permanently. 8. Click OK. 9. Proceed to install the printer software on the client computer. 5.1.2 Installing Printer Software in a Server Computer Running Windows 95, 98 or NT 4.0 There are 2 ways in which you may install and configure the printer onto the network. Option 1 Step 1 - Install HP 2500C Series Printer Software 1. Insert the Starter CD or PostScript CD into your CD-ROM drive. If the installation program does not run automatically, access File Manager or Explorer and run SETUP.EXE on the CD-ROM. 2. When prompted to select Local/Existing Printer or Network Printer, select Local/Existing Printer. Follow the instructions on screen to complete the installation. Step 2 - Share the Printer on the Network 1. To access the properties sheet of the printer, right-click on the printer icon in the Printer folder and select Properties. 2. Proceed to share the printer by selecting the Sharing tab in the Properties sheet of the printer. 3. If you do not see the Sharing tab, you have not enabled file and printer sharing. To enable this, double-click the Network icon in Control Panel. Click File and Printer Sharing and make sure both the check boxes are selected. Click OK and restart Windows. 4. In the Sharing tab, select Shared As and specify a shared name for this printer e.g., HP 2500C. 5. Click OK. 6. Proceed to install the printer software on the client computer. 13
-
 1
1 -
2
-
3
-
4
-
5
-
6
-
7
-
8
-
9
-
10
-
 11
11 -
 12
12 -
 13
13 -
 14
14 -
 15
15 -
 16
16 -
 17
17 -
 18
18 -
 19
19 -
 20
20
 |
 |
