HP 2500c HP 2500C Professional Series Color Printer Network Guide - Page 9
Sharing the Printer Through An HP JetDirect Print Server, Introduction, Server Configurations
 |
View all HP 2500c manuals
Add to My Manuals
Save this manual to your list of manuals |
Page 9 highlights
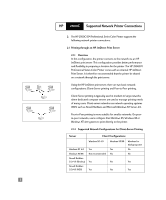
HP 2500C Sharing the Printer Through An HP JetDirect Print Server 4 4.1 Introduction This section describes how to setup network printing using the HP JetDirect print server and software. 4.2 Server Configurations 4.2.1 Windows 95, 98 or NT 4.0, (TCP/IP or IPX/SPX) Note: You may encounter problems printing with IPX/SPX in Windows NT 4.0. Larger print jobs may stop mid-page and continuously re-spool. We recommend that you use TCP/IP instead. There are 2 methods to configure the printer onto the network. Option 1 Step 1 - Install HP JetAdmin 1. Insert the HP JetDirect CD-ROM into your CD-ROM drive. If the installation program does not run automatically, access File Manager or Explorer and run SETUP.EXE on the CD-ROM. 2. Select the option to install JetAdmin and follow the instructions on the screen. Step 2 - Install HP 2500C/CM Printer Software 1. If you are running Windows NT 4.0, log onto the computer as system administrator. 2. Insert the Starter CD or PostScript CD into your CD-ROM drive. If the installation program does not run automatically, access File Manager or Explorer and run SETUP.EXE on the CD-ROM. 3. When prompted to select Local/Existing or Network in the Printer Ports group, select Local/Existing. Step 3 - Associate Printer Software with JetDirect Port 1. In the Printers Folder select HP 2500C/CM Printer, right click the mouse and select Properties. 2. Select Details tab, click Add Port, click Other. 3. Select a new port to print to your printer and click OK. 4. Be sure to set up this printer "shared". 6
-
 1
1 -
2
-
3
-
 4
4 -
 5
5 -
 6
6 -
 7
7 -
 8
8 -
 9
9 -
 10
10 -
 11
11 -
 12
12 -
 13
13 -
 14
14 -
15
-
16
-
17
-
18
-
19
-
20
 |
 |