HP 2500c HP 2500C Professional Series Color Printer Network Guide - Page 18
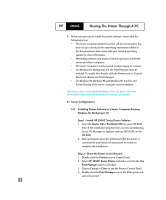
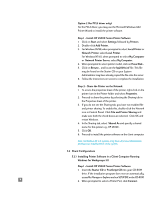
Installing Printer Software in a Client Computer Running, Local/Existing Printer - drivers
 |
View all HP 2500c manuals
Add to My Manuals
Save this manual to your list of manuals |
Page 18 highlights
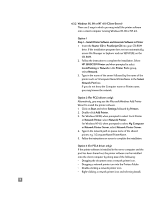
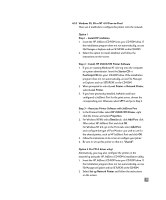
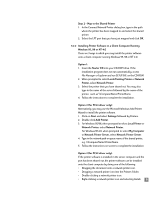
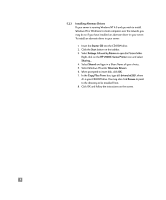
Step 2 - Map to the Shared Printer 1. In the Connect Network Printer dialog box, type in the path where the printer has been mapped to and select the shared printer. 2. Select the LPT port that you have just mapped and click OK. 5.2.2 Installing Printer Software in a Client Computer Running Windows 95, 98 or NT 4.0 There are 3 ways in which you may install the printer software onto a client computer running Windows 95, 98 or NT 4.0. Option 1: 1. Insert the Starter CD into your CD-ROM drive. If the installation program does not run automatically, access File Manager or Explorer and run SETUP.EXE on the CD-ROM. 2. When prompted to select Local/Existing Printer or Network Printer, select Network Printer. 3. Select the printer that you have shared out. You may also type in the name of the server followed by the name of the printer, such as \\ComputerName\PrinterName. 4. Follow the instructions to complete the installation. Option 2 (for PCL3 driver only): Alternatively, you may use the Microsoft Windows Add Printer Wizard to install the printer software. 1. Click on Start and select Settings followed by Printers. 2. Double-click Add Printer. 3. For Windows 95/98, when prompted to select Local Printer or Network Printer, select Network Printer. For Windows NT4.0, when prompted to select My Computer or Network Printer Server, select Network Printer Server. 4. Type in the network path or queue name of the shared printer, e.g. \\ComputerName\PrinterName. 5. Follow the instructions on screen to complete the installation. Option 3 (for PCL3 driver only): If the printer software is installed in the server computer and the port has been shared out, the printer software can be installed onto the client computer by doing one of the following: • Dragging the document onto a network printer icon. • Dragging a network printer icon into the Printers Folder. • Double-clicking a network printer icon. • Right-clicking a network printer icon and selecting Install. 15
-
 1
1 -
2
-
3
-
4
-
5
-
6
-
7
-
8
-
9
-
10
-
11
-
12
-
 13
13 -
 14
14 -
 15
15 -
 16
16 -
 17
17 -
 18
18 -
 19
19 -
 20
20
 |
 |