HP 7310 User Guide - Page 176
Software installation troubleshooting - carriage jam
 |
View all HP 7310 manuals
Add to My Manuals
Save this manual to your list of manuals |
Page 176 highlights
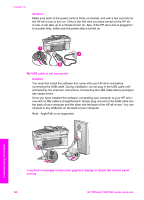
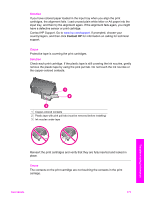
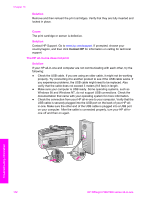
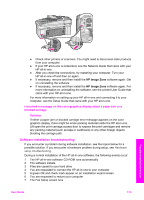
● Check other printers or scanners. You might need to disconnect older products from your computer. ● If your HP all-in-one is networked, see the Network Guide that came with your HP all-in-one. ● After you check the connections, try restarting your computer. Turn your HP all-in-one off and then on again. ● If necessary, remove and then install the HP Image Zone software again. Get on uninstalling the software. ● If necessary, remove and then install the HP Image Zone software again. For more information on uninstalling the software, see the printed User Guide that came with your HP all-in-one. For more information on setting up your HP all-in-one and connecting it to your computer, see the Setup Guide that came with your HP all-in-one. I received a message on the color graphics display about a paper jam or a blocked carriage Solution If either a paper jam or blocked carriage error message appears on the color graphics display, there might be some packing material inside the HP all-in-one. Lift open the print-carriage access door to expose the print cartridges and remove any packing material (such as tape or cardboard) or any other foreign objects blocking the carriage path. Software installation troubleshooting If you encounter a problem during software installation, see the topics below for a possible solution. If you encounter a hardware problem during setup, see Hardware setup troubleshooting. During a normal installation of the HP all-in-one software, the following events occur: 1 The HP all-in-one software CD-ROM runs automatically 2 The software installs 3 Files are copied to your hard drive 4 You are requested to connect the HP all-in-one to your computer 5 A green OK and check mark appear on an installation wizard screen 6 You are requested to restart your computer 7 The Fax Setup wizard runs Troubleshooting information User Guide 173
-
 1
1 -
2
-
3
-
4
-
5
-
6
-
7
-
8
-
9
-
10
-
11
-
12
-
13
-
14
-
15
-
16
-
17
-
18
-
19
-
20
-
21
-
22
-
23
-
24
-
25
-
26
-
27
-
28
-
29
-
30
-
31
-
32
-
33
-
34
-
35
-
36
-
37
-
38
-
39
-
40
-
41
-
42
-
43
-
44
-
45
-
46
-
47
-
48
-
49
-
50
-
51
-
52
-
53
-
54
-
55
-
56
-
57
-
58
-
59
-
60
-
61
-
62
-
63
-
64
-
65
-
66
-
67
-
68
-
69
-
70
-
71
-
72
-
73
-
74
-
75
-
76
-
77
-
78
-
79
-
80
-
81
-
82
-
83
-
84
-
85
-
86
-
87
-
88
-
89
-
90
-
91
-
92
-
93
-
94
-
95
-
96
-
97
-
98
-
99
-
100
-
101
-
102
-
103
-
104
-
105
-
106
-
107
-
108
-
109
-
110
-
111
-
112
-
113
-
114
-
115
-
116
-
117
-
118
-
119
-
120
-
121
-
122
-
123
-
124
-
125
-
126
-
127
-
128
-
129
-
130
-
131
-
132
-
133
-
134
-
135
-
136
-
137
-
138
-
139
-
140
-
141
-
142
-
143
-
144
-
145
-
146
-
147
-
148
-
149
-
150
-
151
-
152
-
153
-
154
-
155
-
156
-
157
-
158
-
159
-
160
-
161
-
162
-
163
-
164
-
165
-
166
-
167
-
168
-
169
-
170
-
 171
171 -
 172
172 -
 173
173 -
 174
174 -
 175
175 -
 176
176 -
 177
177 -
 178
178 -
 179
179 -
 180
180 -
 181
181 -
182
-
183
-
184
-
185
-
186
-
187
-
188
-
189
-
190
-
191
-
192
-
193
-
194
-
195
-
196
-
197
-
198
-
199
-
200
-
201
-
202
-
203
-
204
-
205
-
206
-
207
-
208
-
209
-
210
-
211
-
212
-
213
-
214
-
215
-
216
-
217
-
218
-
219
-
220
-
221
-
222
-
223
-
224
-
225
-
226
-
227
-
228
-
229
-
230
-
231
-
232
-
233
-
234
-
235
-
236
-
237
-
238
-
239
-
240
-
241
-
242
 |
 |
