HP 7310 User Guide - Page 218
Get HP support, Place the return shipping label on the outside of the box.
 |
View all HP 7310 manuals
Add to My Manuals
Save this manual to your list of manuals |
Page 218 highlights
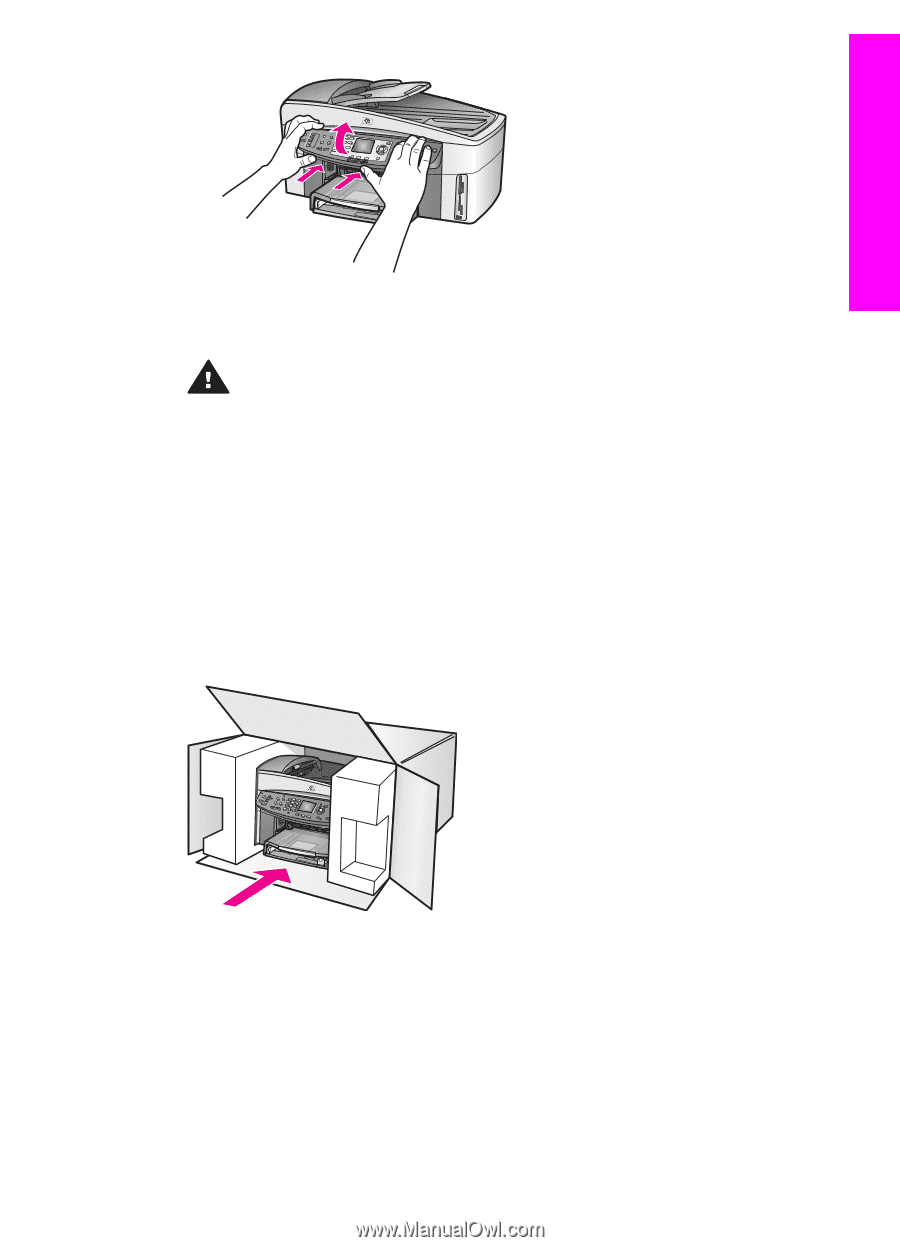
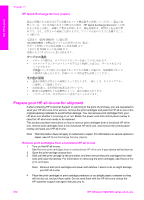
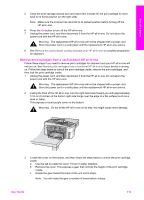
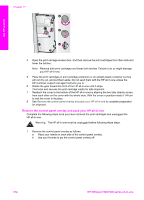
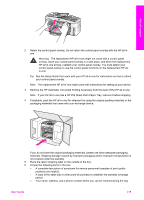
Get HP support 2 Retain the control panel overlay. Do not return the control panel overlay with the HP all-inone. Warning The replacement HP all-in-one might not come with a control panel overlay. Store your control panel overlay in a safe place, and when the replacement HP all-in-one arrives, reattach your control panel overlay. You must attach your control panel overlay to use the control panel functions on the replacement HP allin-one. Tip See the Setup Guide that came with your HP all-in-one for instructions on how to attach your control panel overlay. Note The replacement HP all-in-one might come with instructions for setting up your device. 3 Remove the HP Automatic Two-sided Printing Accessory from the back of the HP all-in-one. Note If your HP all-in-one has a HP 250 Sheet Plain Paper Tray, remove it before shipping. 4 If available, pack the HP all-in-one for shipment by using the original packing materials or the packaging materials that came with your exchange device. If you do not have the original packaging materials, please use other adequate packaging materials. Shipping damage caused by improper packaging and/or improper transportation is not covered under the warranty. 5 Place the return shipping label on the outside of the box. 6 Include the following items in the box: - A complete description of symptoms for service personnel (samples of print quality problems are helpful). - A copy of the sales slip or other proof of purchase to establish the warranty coverage period. - Your name, address, and a phone number where you can be reached during the day. User Guide 215
-
 1
1 -
2
-
3
-
4
-
5
-
6
-
7
-
8
-
9
-
10
-
11
-
12
-
13
-
14
-
15
-
16
-
17
-
18
-
19
-
20
-
21
-
22
-
23
-
24
-
25
-
26
-
27
-
28
-
29
-
30
-
31
-
32
-
33
-
34
-
35
-
36
-
37
-
38
-
39
-
40
-
41
-
42
-
43
-
44
-
45
-
46
-
47
-
48
-
49
-
50
-
51
-
52
-
53
-
54
-
55
-
56
-
57
-
58
-
59
-
60
-
61
-
62
-
63
-
64
-
65
-
66
-
67
-
68
-
69
-
70
-
71
-
72
-
73
-
74
-
75
-
76
-
77
-
78
-
79
-
80
-
81
-
82
-
83
-
84
-
85
-
86
-
87
-
88
-
89
-
90
-
91
-
92
-
93
-
94
-
95
-
96
-
97
-
98
-
99
-
100
-
101
-
102
-
103
-
104
-
105
-
106
-
107
-
108
-
109
-
110
-
111
-
112
-
113
-
114
-
115
-
116
-
117
-
118
-
119
-
120
-
121
-
122
-
123
-
124
-
125
-
126
-
127
-
128
-
129
-
130
-
131
-
132
-
133
-
134
-
135
-
136
-
137
-
138
-
139
-
140
-
141
-
142
-
143
-
144
-
145
-
146
-
147
-
148
-
149
-
150
-
151
-
152
-
153
-
154
-
155
-
156
-
157
-
158
-
159
-
160
-
161
-
162
-
163
-
164
-
165
-
166
-
167
-
168
-
169
-
170
-
171
-
172
-
173
-
174
-
175
-
176
-
177
-
178
-
179
-
180
-
181
-
182
-
183
-
184
-
185
-
186
-
187
-
188
-
189
-
190
-
191
-
192
-
193
-
194
-
195
-
196
-
197
-
198
-
199
-
200
-
201
-
202
-
203
-
204
-
205
-
206
-
207
-
208
-
209
-
210
-
211
-
212
-
 213
213 -
 214
214 -
 215
215 -
 216
216 -
 217
217 -
 218
218 -
 219
219 -
 220
220 -
 221
221 -
 222
222 -
 223
223 -
224
-
225
-
226
-
227
-
228
-
229
-
230
-
231
-
232
-
233
-
234
-
235
-
236
-
237
-
238
-
239
-
240
-
241
-
242
 |
 |