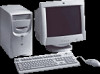
HP Brio ba300 hp brio ba300, upgrade guide - Page 12
Replacing the System Board
 |
View all HP Brio ba300 manuals
Add to My Manuals
Save this manual to your list of manuals |
Page 12 highlights
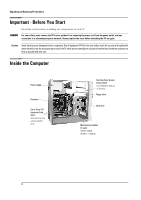
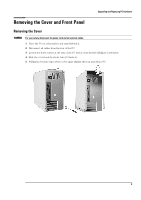
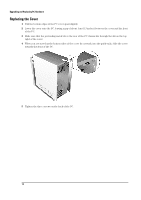
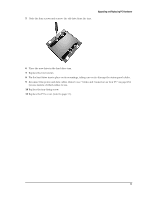
Upgrading and Replacing PC Hardware Replacing the System Board 1 Switch off the PC, disconnect the power cord and remove the PC's cover (refer to page 9). 2 Lay the PC on its side. 3 Remove all cables from the system board. 4 Remove any components you want to reuse such as the processor or memory modules. Refer to the appropriate section for instructions on removing the individual components. 5 Remove the six screws shown below. 6 Lift the system board clear of the PC's chassis. Be careful when pulling the rear connectors away from the PC's rear panel. 7 Install any components removed from the old system board in the new board. Refer to the appropriate section for instructions on installing the individual components. 8 Replace the system board in the PC, ensuring that it is properly in place and attach the six screws. 9 Reconnect the following connectors and cables: status panel connector, floppy drive cable, CD-ROM cable, hard drive cable, processor fan cable, power cable and CD audio cable, if you have a CD-ROM or DVD drive. If you can't remember how to reconnect them, refer to page 13. 10 Replace the PC's cover (refer to page 11) and reconnect the power cord. 12
-
 1
1 -
2
-
3
-
4
-
5
-
6
-
 7
7 -
 8
8 -
 9
9 -
 10
10 -
 11
11 -
 12
12 -
 13
13 -
 14
14 -
 15
15 -
 16
16 -
 17
17 -
18
-
19
-
20
-
21
-
22
-
23
-
24
 |
 |
