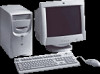
HP Brio ba300 hp brio ba300, upgrade guide - Page 15
Replacing the Floppy Drive
 |
View all HP Brio ba300 manuals
Add to My Manuals
Save this manual to your list of manuals |
Page 15 highlights
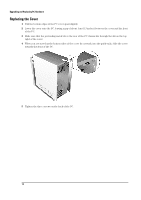
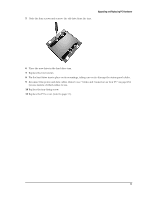
Upgrading and Replacing PC Hardware Replacing the Floppy Drive 1 Switch off the PC, disconnect the power cord and remove the PC's cover (refer to page 9). 2 Remove the floppy drive's two connectors. 3 Remove the PC's front panel (refer to page 11), taking care to disconnect the status panel cable. 4 Remove the two floppy drive fixing screws, noting carefully the position of these screws. 5 Slide the floppy drive tray out through the PC's front panel. 6 Slide the new drive into the floppy drive bay, making sure that the connectors on the rear of the drive are at the back of the bay. 7 Replace the two screws. 8 Replace the floppy drive connectors. 9 Replace the front panel (refer to page 11). 10 Replace the cover (refer to page 10) and reconnect the power cord. Note If the PC does not start properly, you may have reconnected the status panel connector wrongly. Remove the front panel and check the connection of the cable. 15
-
 1
1 -
2
-
3
-
4
-
5
-
6
-
7
-
8
-
9
-
 10
10 -
 11
11 -
 12
12 -
 13
13 -
 14
14 -
 15
15 -
 16
16 -
 17
17 -
 18
18 -
 19
19 -
 20
20 -
21
-
22
-
23
-
24
 |
 |
