HP Color LaserJet Enterprise M651 User Guide 1 - Page 104
Step three: Set the individual tray alignment, Calibrate the product to align the colors
 |
View all HP Color LaserJet Enterprise M651 manuals
Add to My Manuals
Save this manual to your list of manuals |
Page 104 highlights
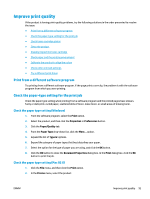
Step three: Set the individual tray alignment Follow these steps when text or images are not centered or aligned correctly on the printed page when printing from specific trays. 1. From the Home screen on the product control panel, scroll to and touch the Administration button. 2. Open the following menus: ● General Settings ● Print Quality ● Image Registration 3. Select the tray that you want to adjust. 4. Touch the Print Test Page button, and then follow the instructions on the printed pages. 5. Touch the Print Test Page button to verify the results, and then make further adjustments if necessary. 6. When you are satisfied with the results, touch the Save button to save the new settings. Calibrate the product to align the colors Calibration is a product function that optimizes print quality. Follow these steps to resolve print print-quality problems such as misaligned color, colored shadows, blurry graphics, or other print-quality issues. 1. From the Home screen on the product control panel, scroll to and touch the Device Maintenance button. 2. Open the following menus: ● Calibration/Cleaning ● Full Calibration 3. Touch the Start button to start the calibration process. A Calibrating message will display on the product control panel. The calibration process takes a few minutes to complete. Do not turn the product off until the calibration process has finished. 4. Wait while the product calibrates, and then try printing again. Check other print job settings When printing from a software program, follow these steps to try to resolve the issue by adjusting other print-driver settings. Adjust color settings (Windows) Follow these steps if colors on the printed page to not match colors on the computer screen, or if the colors on the printed page are not satisfactory. 96 Chapter 6 Solve general problems ENWW
-
 1
1 -
2
-
3
-
4
-
5
-
6
-
7
-
8
-
9
-
10
-
11
-
12
-
13
-
14
-
15
-
16
-
17
-
18
-
19
-
20
-
21
-
22
-
23
-
24
-
25
-
26
-
27
-
28
-
29
-
30
-
31
-
32
-
33
-
34
-
35
-
36
-
37
-
38
-
39
-
40
-
41
-
42
-
43
-
44
-
45
-
46
-
47
-
48
-
49
-
50
-
51
-
52
-
53
-
54
-
55
-
56
-
57
-
58
-
59
-
60
-
61
-
62
-
63
-
64
-
65
-
66
-
67
-
68
-
69
-
70
-
71
-
72
-
73
-
74
-
75
-
76
-
77
-
78
-
79
-
80
-
81
-
82
-
83
-
84
-
85
-
86
-
87
-
88
-
89
-
90
-
91
-
92
-
93
-
94
-
95
-
96
-
97
-
98
-
 99
99 -
 100
100 -
 101
101 -
 102
102 -
 103
103 -
 104
104 -
 105
105 -
 106
106 -
 107
107 -
 108
108 -
 109
109 -
110
-
111
-
112
 |
 |