HP Designjet 9000s Service Manual - Page 95
Door and remove ALL 3 Cleaning Liquid Cartridges.
 |
View all HP Designjet 9000s manuals
Add to My Manuals
Save this manual to your list of manuals |
Page 95 highlights
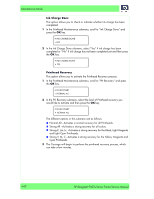
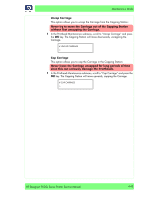
Maintenance Mode 37 Once the printheads and the Sub-Tank have been flushed, the following message will be displayed on the Front Panel. Open the Left Ink Cartridge Door and remove ALL 3 Cleaning Liquid Cartridges. OPEN L INKCOVER REMOVE CARTRIDGE 38 Once the Cleaning Liquid Cartridges have been removed, install a Purging Cartridge in to each slot and close the Left Ink Cartridge Door. LOAD PURGING CAR CLOSE L INKCOVER 39 If the Printer detects that a Purging Cartridge has been installed incorrectly or if an invalid Cartridge has been installed, one of the following messages will be displayed on the Front Panel. You will need to make sure that a valid Purging Cartridge has been installed correctly before you can continue. OPEN L INKCOVER LOAD XX SLOT LOAD PURGING CAR LOAD XX SLOT 40 When the following message is displayed on the Front Panel, open the Right Ink Cartridge Door and remove ALL 3 Cleaning Liquid Cartridges. OPEN R INKCOVER REMOVE CARTRIDGE 41 Once the Cleaning Liquid Cartridges have been removed, install a Purging Cartridge in to each slot and close the Right Ink Cartridge Door. LOAD PURGING CAR CLOSE R INKCOVER 42 If the Printer detects that a Purging Cartridge has been installed incorrectly or if an invalid Cartridge has been installed, one of the following messages will be displayed on the Front Panel. You will need to make sure that a valid Purging Cartridge has been installed correctly before you can continue. OPEN R INKCOVER LOAD XX SLOT LOAD PURGING CAR LOAD XX SLOT 43 The Cleaning Liquid purge process will start and you will need to recheck whether the Waste Ink Bottle is present and is NOT full. Press the OK key once the Waste Ink Bottle has been checked. START PURGING * BOTTLE OK? HP Designjet 9000s Series Printer Service Manual 4-39
-
 1
1 -
2
-
3
-
4
-
5
-
6
-
7
-
8
-
9
-
10
-
11
-
12
-
13
-
14
-
15
-
16
-
17
-
18
-
19
-
20
-
21
-
22
-
23
-
24
-
25
-
26
-
27
-
28
-
29
-
30
-
31
-
32
-
33
-
34
-
35
-
36
-
37
-
38
-
39
-
40
-
41
-
42
-
43
-
44
-
45
-
46
-
47
-
48
-
49
-
50
-
51
-
52
-
53
-
54
-
55
-
56
-
57
-
58
-
59
-
60
-
61
-
62
-
63
-
64
-
65
-
66
-
67
-
68
-
69
-
70
-
71
-
72
-
73
-
74
-
75
-
76
-
77
-
78
-
79
-
80
-
81
-
82
-
83
-
84
-
85
-
86
-
87
-
88
-
89
-
 90
90 -
 91
91 -
 92
92 -
 93
93 -
 94
94 -
 95
95 -
 96
96 -
 97
97 -
 98
98 -
 99
99 -
 100
100 -
101
-
102
-
103
-
104
-
105
-
106
-
107
-
108
-
109
-
110
-
111
-
112
-
113
-
114
-
115
-
116
-
117
-
118
-
119
-
120
-
121
-
122
-
123
-
124
-
125
-
126
-
127
-
128
-
129
-
130
-
131
-
132
-
133
-
134
-
135
-
136
-
137
-
138
-
139
-
140
-
141
-
142
-
143
-
144
-
145
-
146
-
147
-
148
-
149
-
150
-
151
-
152
-
153
-
154
-
155
-
156
-
157
-
158
-
159
-
160
-
161
-
162
-
163
-
164
-
165
-
166
-
167
-
168
-
169
-
170
-
171
-
172
-
173
-
174
-
175
-
176
-
177
-
178
-
179
-
180
-
181
-
182
-
183
-
184
-
185
-
186
-
187
-
188
-
189
-
190
-
191
-
192
-
193
-
194
-
195
-
196
-
197
-
198
-
199
-
200
-
201
-
202
-
203
-
204
-
205
-
206
-
207
-
208
-
209
-
210
-
211
-
212
-
213
-
214
-
215
-
216
-
217
-
218
-
219
-
220
-
221
-
222
-
223
-
224
-
225
-
226
-
227
-
228
-
229
-
230
-
231
-
232
-
233
-
234
-
235
-
236
-
237
-
238
-
239
-
240
-
241
-
242
-
243
-
244
-
245
-
246
-
247
-
248
-
249
-
250
-
251
-
252
-
253
-
254
-
255
-
256
-
257
-
258
-
259
-
260
-
261
-
262
-
263
-
264
-
265
-
266
-
267
-
268
-
269
-
270
-
271
-
272
-
273
-
274
-
275
-
276
-
277
-
278
-
279
-
280
-
281
-
282
-
283
-
284
-
285
-
286
-
287
-
288
-
289
-
290
-
291
-
292
-
293
-
294
-
295
-
296
-
297
-
298
-
299
-
300
-
301
-
302
-
303
-
304
-
305
-
306
-
307
-
308
-
309
-
310
-
311
-
312
-
313
-
314
-
315
-
316
-
317
-
318
-
319
-
320
-
321
-
322
-
323
-
324
-
325
-
326
-
327
-
328
-
329
-
330
-
331
-
332
-
333
-
334
-
335
-
336
-
337
-
338
-
339
-
340
-
341
-
342
-
343
-
344
-
345
-
346
-
347
-
348
-
349
-
350
-
351
-
352
-
353
-
354
-
355
-
356
-
357
-
358
-
359
-
360
-
361
-
362
-
363
-
364
-
365
-
366
-
367
-
368
-
369
-
370
-
371
-
372
 |
 |
