HP DeskJet 2600 User Guide - Page 77
Change from a USB connection to a wireless network
 |
View all HP DeskJet 2600 manuals
Add to My Manuals
Save this manual to your list of manuals |
Page 77 highlights
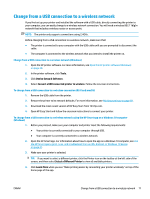
Change from a USB connection to a wireless network If you first set up your printer and installed the software with a USB cable, directly connecting the printer to your computer, you can easily change to a wireless network connection. You will need a wireless 802.11b/g/n network that includes a wireless router or access point. NOTE: The printer only supports connections using 2.4GHz. Before changing from a USB connection to a wireless network, make sure that: ● The printer is connected to your computer with the USB cable until you are prompted to disconnect the cable. ● The computer is connected to the wireless network that you intend to install the printer on. Change from a USB connection to a wireless network (Windows) 1. Open the HP printer software. For more information, see Open the HP printer software (Windows) on page 20. 2. In the printer software, click Tools. 3. Click Device Setup & Software. 4. Select Convert a USB connected printer to wireless. Follow the onscreen instructions. To change from a USB connection to a wireless connection (OS X and macOS) 1. Remove the USB cable from the printer. 2. Restore the printer to its network defaults. For more information, see Wireless settings on page 69. 3. Download the most recent version of HP Easy Start from 123.hp.com. 4. Open HP Easy Start and follow the onscreen instructions to connect your printer. To change from a USB connection to a wireless network using the HP Smart app on a Windows 10 computer (Windows) 1. Before you proceed, make sure your computer and printer meet the following requirements: ● Your printer is currently connected to your computer through USB. ● Your computer is currently connected to a wireless network. 2. Open the HP Smart app. For information about how to open the app on a Windows 10 computer, see Use the HP Smart app to print, scan, and troubleshoot from an iOS, Android, or Windows 10 device on page 21. 3. Make sure your printer is selected. TIP: If you want to select a different printer, click the Printer icon on the toolbar at the left side of the screen, and then select Select a Different Printer to view all available printers. 4. Click Learn More when you see "Make printing easier by connecting your printer wirelessly" on top of the home page of the app. ENWW Change from a USB connection to a wireless network 71
-
 1
1 -
2
-
3
-
4
-
5
-
6
-
7
-
8
-
9
-
10
-
11
-
12
-
13
-
14
-
15
-
16
-
17
-
18
-
19
-
20
-
21
-
22
-
23
-
24
-
25
-
26
-
27
-
28
-
29
-
30
-
31
-
32
-
33
-
34
-
35
-
36
-
37
-
38
-
39
-
40
-
41
-
42
-
43
-
44
-
45
-
46
-
47
-
48
-
49
-
50
-
51
-
52
-
53
-
54
-
55
-
56
-
57
-
58
-
59
-
60
-
61
-
62
-
63
-
64
-
65
-
66
-
67
-
68
-
69
-
70
-
71
-
 72
72 -
 73
73 -
 74
74 -
 75
75 -
 76
76 -
 77
77 -
 78
78 -
 79
79 -
 80
80 -
 81
81 -
 82
82 -
83
-
84
-
85
-
86
-
87
-
88
-
89
-
90
-
91
-
92
-
93
-
94
-
95
-
96
-
97
-
98
-
99
-
100
-
101
-
102
-
103
-
104
-
105
-
106
-
107
-
108
-
109
-
110
-
111
-
112
-
113
-
114
-
115
-
116
-
117
-
118
-
119
-
120
-
121
-
122
-
123
-
124
-
125
-
126
-
127
-
128
 |
 |
