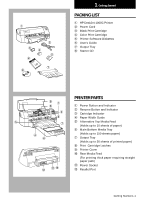
HP Deskjet 1000c HP DeskJet 1000C Professional Series Printer - (English) User - Page 10
From Floppy Disks in Windows 3.1, From Floppy Disks in Windows 95, STEP 7: Align Cartridges - toolbox
 |
View all HP Deskjet 1000c manuals
Add to My Manuals
Save this manual to your list of manuals |
Page 10 highlights
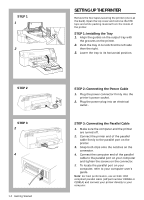
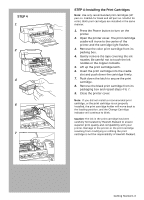
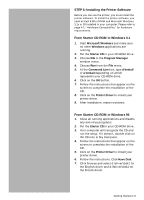
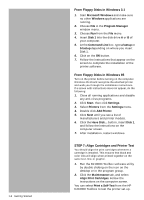
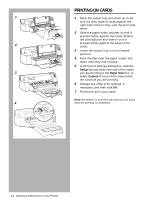
1-6 Getting Started From Floppy Disks in Windows 3.1 1. Start Microsoft Windows and make sure no other Windows applications are running. 2. Choose File in the Program Manager window menu. 3. Choose Run from the File menu. 4. Insert Disk 1 into the disk drive A or B of your computer. 5. At the Command Line box, type a:\setup or b:\setup depending on where you insert Disk 1. 6. Click on the OK button. 7. Follow the instructions that appear on the screen to complete the installation of the printer software. From Floppy Disks in Windows 95 Turn on the printer before turning on the computer. Windows 95 should recognize the attached printer and walk you through the installation instructions. If a screen with instructions does not appear, do the following: 1. Close all running applications and disable any anti-virus programs. 2. Click Start, then click Settings. 3. Select Printers from the Settings menu. 4. Double click Add Printer. 5. Click Next until you see a list of manufacturers and printer models. 6. Click the Have Disk... button, insert Disk 1, and follow the instructions on the computer screen. 7. After installation, restart windows. STEP 7: Align Cartridges and Printer Test You should align the print cartridges whenever a cartridge is installed. This ensures that black and color inks will align when printed together on the same text, line, or graphic. 1. Run the DJ1000C Toolbox software utility by double clicking on the icon on the desktop or in the program group. 2. Click the Maintenance tab, and select Align Print Cartridges. Follow the instructions on the computer screen. You can select Print a Self-Test from the HP DJ1000C Toolbox to test the printer set-up.
-
 1
1 -
2
-
3
-
4
-
 5
5 -
 6
6 -
 7
7 -
 8
8 -
 9
9 -
 10
10 -
 11
11 -
 12
12 -
 13
13 -
 14
14 -
 15
15 -
16
-
17
-
18
-
19
-
20
-
21
-
22
-
23
-
24
-
25
-
26
-
27
-
28
-
29
-
30
-
31
-
32
-
33
-
34
-
35
-
36
-
37
-
38
-
39
-
40
 |
 |