HP ENVY TouchSmart m6-k125dx HP ENVY m6 Sleekbook HP ENVY Touchsmart m6 SleekB - Page 39
Reverse this procedure to install the service cover.
 |
View all HP ENVY TouchSmart m6-k125dx manuals
Add to My Manuals
Save this manual to your list of manuals |
Page 39 highlights
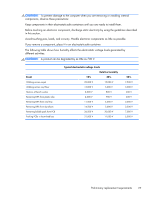
2. Remove the 8 remaining larger Phillips screws from the back and the middle of the service cover. 3. Lift up the cover (1) from the unit at the rear edge and remove the service cover (2). Reverse this procedure to install the service cover. Component replacement procedures 31
-
 1
1 -
2
-
3
-
4
-
5
-
6
-
7
-
8
-
9
-
10
-
11
-
12
-
13
-
14
-
15
-
16
-
17
-
18
-
19
-
20
-
21
-
22
-
23
-
24
-
25
-
26
-
27
-
28
-
29
-
30
-
31
-
32
-
33
-
 34
34 -
 35
35 -
 36
36 -
 37
37 -
 38
38 -
 39
39 -
 40
40 -
 41
41 -
 42
42 -
 43
43 -
 44
44 -
45
-
46
-
47
-
48
-
49
-
50
-
51
-
52
-
53
-
54
-
55
-
56
-
57
-
58
-
59
-
60
-
61
-
62
-
63
-
64
-
65
-
66
-
67
-
68
-
69
-
70
-
71
-
72
-
73
-
74
-
75
-
76
-
77
-
78
-
79
-
80
-
81
-
82
-
83
-
84
-
85
-
86
-
87
-
88
-
89
-
90
-
91
-
92
-
93
-
94
-
95
-
96
 |
 |
2.
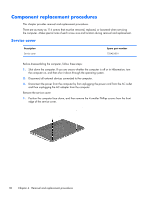
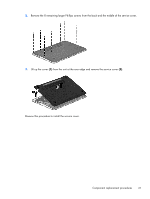
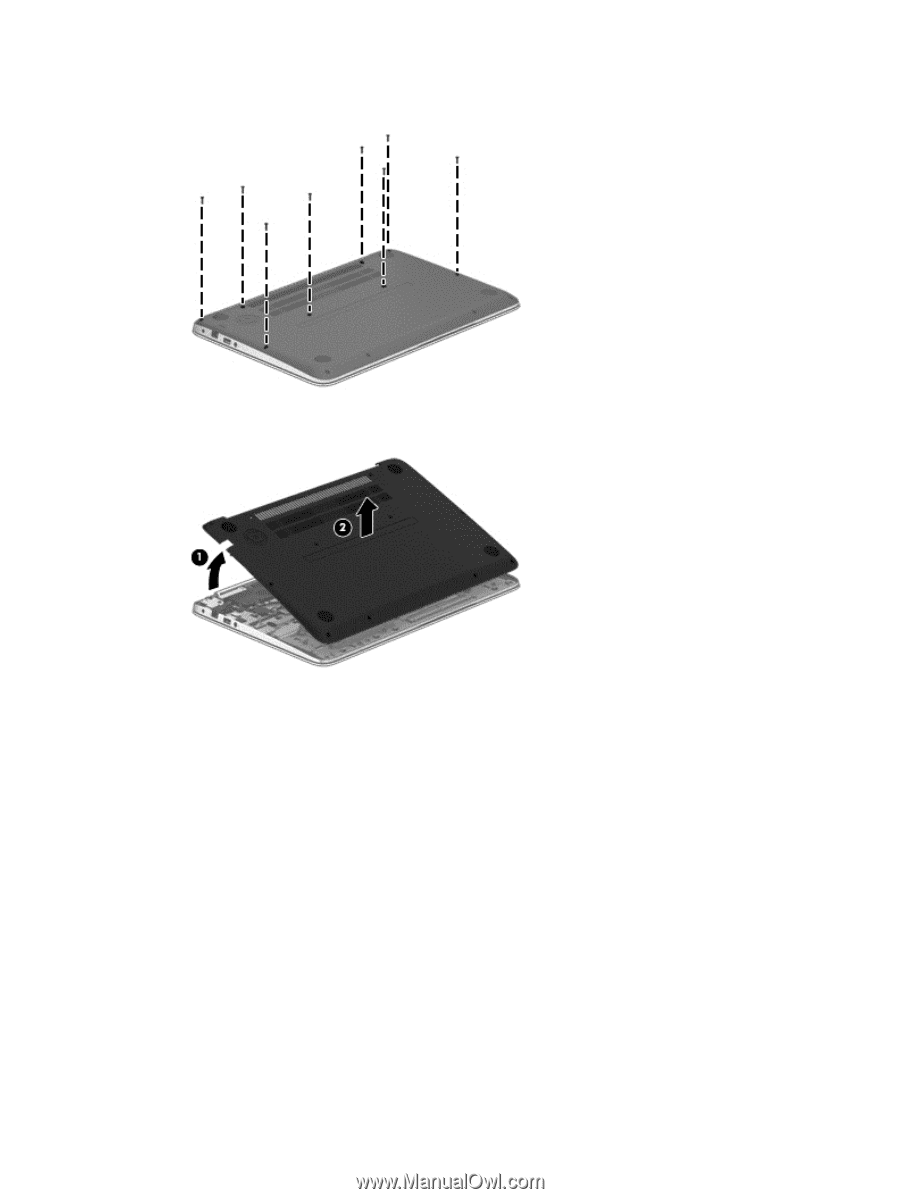
Remove the 8 remaining larger Phillips screws from the back and the middle of the service cover.
3.
Lift up the cover
(1)
from the unit at the rear edge and remove the service cover
(2)
.
Reverse this procedure to install the service cover.
Component replacement procedures
31