HP ENVY TouchSmart m6-k125dx HP ENVY m6 Sleekbook HP ENVY Touchsmart m6 SleekB - Page 76
Reverse these procedures to reassemble the touchscreen display panel., enclosure
 |
View all HP ENVY TouchSmart m6-k125dx manuals
Add to My Manuals
Save this manual to your list of manuals |
Page 76 highlights
13. If you need to remove the display cable, noting the routing clips on the sides of the display enclosure, lift the cable from the display enclosure. Reverse these procedures to reassemble the touchscreen display panel. 68 Chapter 4 Removal and replacement procedures
-
 1
1 -
2
-
3
-
4
-
5
-
6
-
7
-
8
-
9
-
10
-
11
-
12
-
13
-
14
-
15
-
16
-
17
-
18
-
19
-
20
-
21
-
22
-
23
-
24
-
25
-
26
-
27
-
28
-
29
-
30
-
31
-
32
-
33
-
34
-
35
-
36
-
37
-
38
-
39
-
40
-
41
-
42
-
43
-
44
-
45
-
46
-
47
-
48
-
49
-
50
-
51
-
52
-
53
-
54
-
55
-
56
-
57
-
58
-
59
-
60
-
61
-
62
-
63
-
64
-
65
-
66
-
67
-
68
-
69
-
70
-
 71
71 -
 72
72 -
 73
73 -
 74
74 -
 75
75 -
 76
76 -
 77
77 -
 78
78 -
 79
79 -
 80
80 -
 81
81 -
82
-
83
-
84
-
85
-
86
-
87
-
88
-
89
-
90
-
91
-
92
-
93
-
94
-
95
-
96
 |
 |
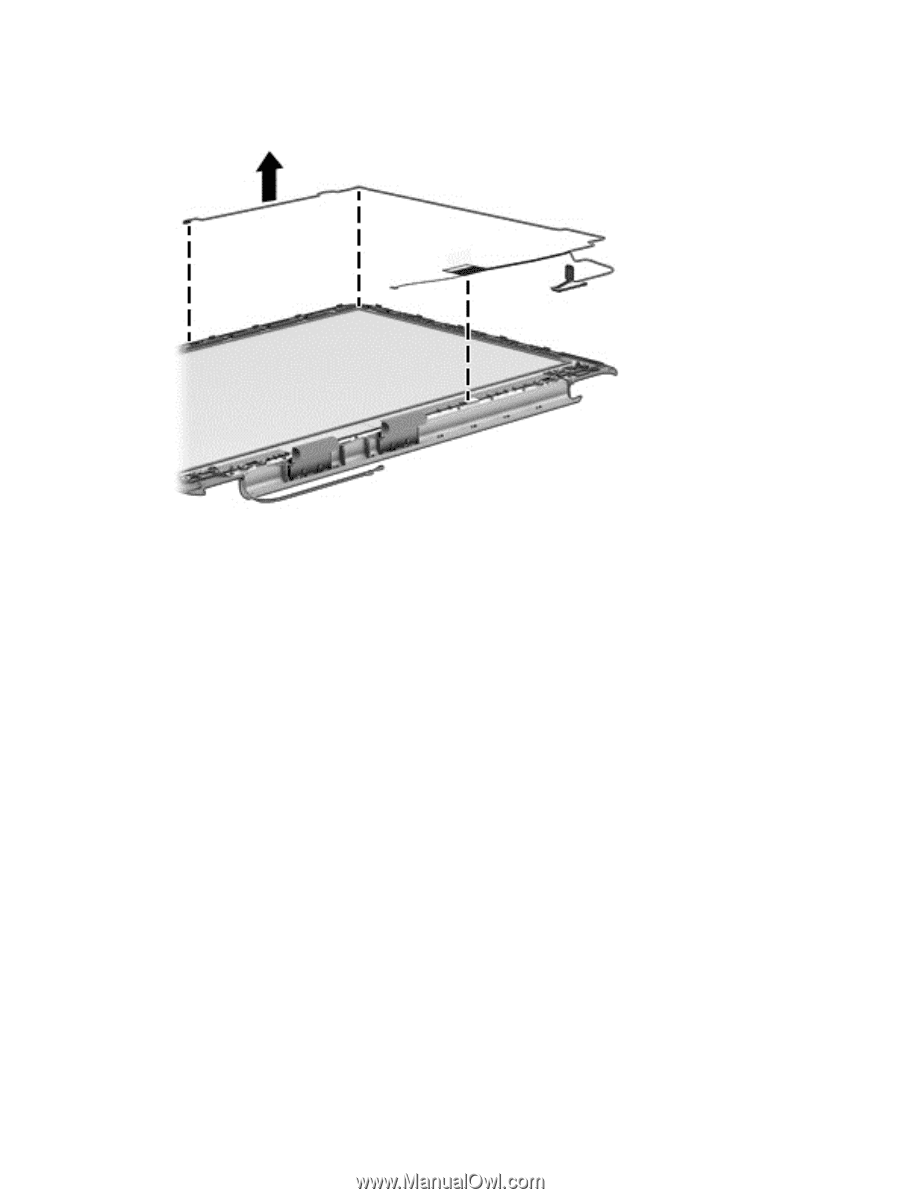
13.
If you need to remove the display cable, noting the routing clips on the sides of the display
enclosure, lift the cable from the display enclosure.
Reverse these procedures to reassemble the touchscreen display panel.
68
Chapter 4
Removal and replacement procedures