HP Envy 15-1000se HP Envy 15 User Guide - Windows 7 - Page 107
Disabling RAID 0, The Reset RAID Data window displays.
 |
View all HP Envy 15-1000se manuals
Add to My Manuals
Save this manual to your list of manuals |
Page 107 highlights
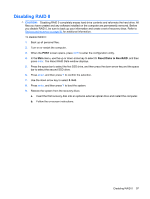
Disabling RAID 0 CAUTION: Disabling RAID 0 completely erases hard drive contents and reformats the hard drive. All files you have created and any software installed on the computer are permanently removed. Before you disable RAID 0, be sure to back up your information and create a set of recovery discs. Refer to Backup and recovery on page 91 for additional information. To disable RAID 0: 1. Back up all personal files. 2. Turn on or restart the computer. 3. When the POST screen opens, press ctrl+I to enter the configuration utility. 4. In the Main menu, use the up or down arrow key to select 3. Reset Disks to Non-RAID, and then press enter. The Reset RAID Data window displays. 5. Press the space bar to select the first SSD drive, and then press the down arrow key and the space bar to select the second SSD drive. 6. Press enter, and then press Y to confirm the selection. 7. Use the down arrow key to select 5. Exit. 8. Press enter, and then press Y to boot the system. 9. Restore the system from the recovery discs: a. Insert the first recovery disc into an optional external optical drive and restart the computer. b. Follow the on-screen instructions. Disabling RAID 0 97
-
 1
1 -
2
-
3
-
4
-
5
-
6
-
7
-
8
-
9
-
10
-
11
-
12
-
13
-
14
-
15
-
16
-
17
-
18
-
19
-
20
-
21
-
22
-
23
-
24
-
25
-
26
-
27
-
28
-
29
-
30
-
31
-
32
-
33
-
34
-
35
-
36
-
37
-
38
-
39
-
40
-
41
-
42
-
43
-
44
-
45
-
46
-
47
-
48
-
49
-
50
-
51
-
52
-
53
-
54
-
55
-
56
-
57
-
58
-
59
-
60
-
61
-
62
-
63
-
64
-
65
-
66
-
67
-
68
-
69
-
70
-
71
-
72
-
73
-
74
-
75
-
76
-
77
-
78
-
79
-
80
-
81
-
82
-
83
-
84
-
85
-
86
-
87
-
88
-
89
-
90
-
91
-
92
-
93
-
94
-
95
-
96
-
97
-
98
-
99
-
100
-
101
-
 102
102 -
 103
103 -
 104
104 -
 105
105 -
 106
106 -
 107
107 -
 108
108 -
 109
109 -
 110
110 -
 111
111 -
 112
112
 |
 |
