HP Evo D500 Hardware Reference Guide Compaq Evo Desktop Family Convertible Min - Page 32
Installing Additional Drives, Installing a CD-ROM, DVD-ROM, or other Removable Storage Device
 |
View all HP Evo D500 manuals
Add to My Manuals
Save this manual to your list of manuals |
Page 32 highlights
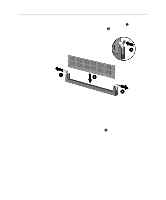
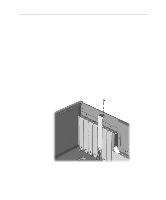
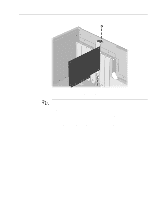
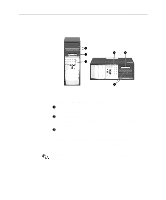
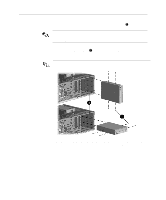
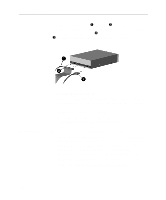
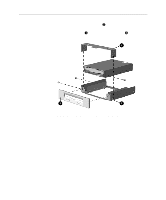
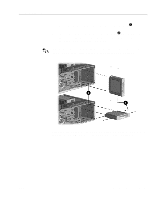
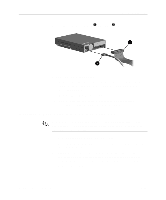
Hardware Upgrades Installing Additional Drives The computer supports up to five drives which may be installed in various configurations. When installing additional drives, follow these guidelines: ■ For optimal performance, connect hard drives to the primary controller. Connect expansion devices, such as CD-ROM, IDE tape, and diskette drives, to the secondary controller using an 80-conductor IDE cable. ■ You may install either a third-height or a half-height drive into a half-height bay. ■ You must install guide screws to ensure the drive will line up correctly in the drive cage. Compaq has provided extra guide screws, installed in the front of the computer chassis, behind the front bezel. Some options use metric hardware. The Compaq supplied metric screws are black. CAUTION: To prevent loss of work and damage to the computer or drive: ■ If you are inserting or removing a hard drive, shut down the operating system properly, then turn off the computer. Do not remove a hard drive while the computer is on or in standby mode. ■ Before handling a drive, ensure that you are discharged of static electricity. While handling a drive, avoid touching the connector. For more information about preventing electrostatic damage, refer to Appendix E, "Electrostatic Discharge." ■ Handle a drive carefully; do not drop it. ■ Do not use excessive force when inserting a drive. ■ Avoid exposing a hard drive to liquids, temperature extremes, or products that have magnetic fields such as monitors or speakers. Installing a CD-ROM, DVD-ROM, or other Removable Storage Device 1. If you have locked the Smart Cover Lock, use Computer Setup to unlock the lock. 2. Shut down the operating system properly, then turn off the computer and any external devices, disconnect the power cord from the power outlet, and remove the computer access panel. 2-14 Hardware Reference Guide
-
 1
1 -
2
-
3
-
4
-
5
-
6
-
7
-
8
-
9
-
10
-
11
-
12
-
13
-
14
-
15
-
16
-
17
-
18
-
19
-
20
-
21
-
22
-
23
-
24
-
25
-
26
-
 27
27 -
 28
28 -
 29
29 -
 30
30 -
 31
31 -
 32
32 -
 33
33 -
 34
34 -
 35
35 -
 36
36 -
 37
37 -
38
-
39
-
40
-
41
-
42
-
43
-
44
-
45
-
46
-
47
-
48
-
49
-
50
-
51
-
52
-
53
-
54
-
55
-
56
-
57
-
58
-
59
-
60
-
61
-
62
-
63
-
64
-
65
-
66
-
67
-
68
 |
 |