HP Evo D500 Hardware Reference Guide Compaq Evo Desktop Family Convertible Min - Page 36
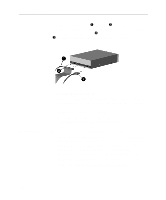
the adapter when it snaps into place.
 |
View all HP Evo D500 manuals
Add to My Manuals
Save this manual to your list of manuals |
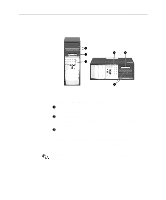
Page 36 highlights
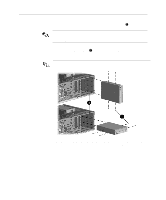
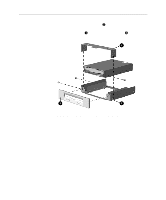
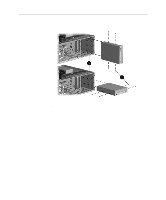
Hardware Upgrades 7. Install two guide screws on each side of the adapter 1. 8. Install the adapter in the desired drive bay 2 by sliding it into the front of the drive cage; the drivelock automatically secures the adapter when it snaps into place. The primary 3.5-inch diskette drive should only be installed into bay 3. Bay 3 is the topmost bay in the desktop configuration. Aligning the Guide Screws and Installing an Adapter with a 3.5Inch Drive on a Minitower (top) and a Desktop (bottom) 2-18 Hardware Reference Guide
-
 1
1 -
2
-
3
-
4
-
5
-
6
-
7
-
8
-
9
-
10
-
11
-
12
-
13
-
14
-
15
-
16
-
17
-
18
-
19
-
20
-
21
-
22
-
23
-
24
-
25
-
26
-
27
-
28
-
29
-
30
-
 31
31 -
 32
32 -
 33
33 -
 34
34 -
 35
35 -
 36
36 -
 37
37 -
 38
38 -
 39
39 -
 40
40 -
 41
41 -
42
-
43
-
44
-
45
-
46
-
47
-
48
-
49
-
50
-
51
-
52
-
53
-
54
-
55
-
56
-
57
-
58
-
59
-
60
-
61
-
62
-
63
-
64
-
65
-
66
-
67
-
68
 |
 |
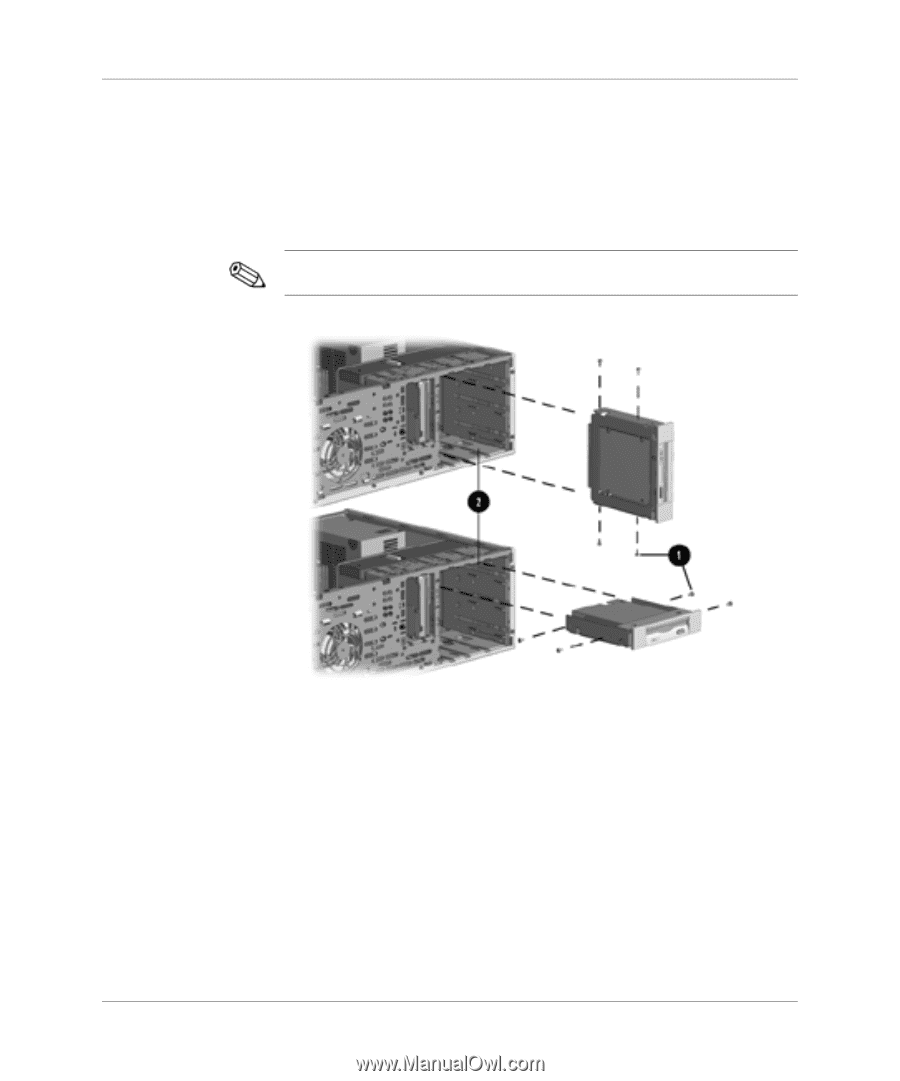
Hardware Upgrades
7.
Install two guide screws on each side of the adapter
1
.
8.
Install the adapter in the desired drive bay
2
by sliding it into
the front of the drive cage; the drivelock automatically secures
the adapter when it snaps into place.
The primary 3.5-inch diskette drive should only be installed into
bay 3. Bay 3 is the topmost bay in the desktop configuration.
Aligning the Guide Screws and Installing an Adapter with a 3.5-
Inch Drive on a Minitower (top) and a Desktop (bottom)
2-18
Hardware Reference Guide