HP Evo D500 Hardware Reference Guide Compaq Evo Desktop Family Convertible Min - Page 33
front of the drive cage, the drivelock automatically secures
 |
View all HP Evo D500 manuals
Add to My Manuals
Save this manual to your list of manuals |
Page 33 highlights
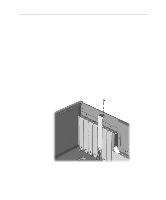
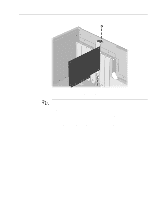
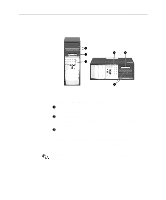
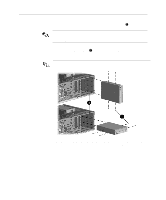
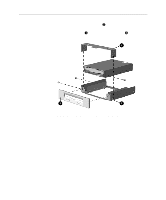
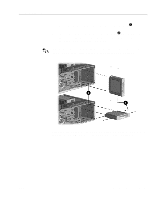
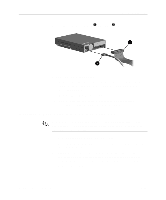
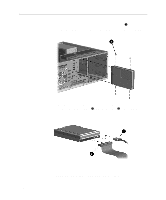
Hardware Upgrades 3. Install two guide screws on each side of the drive 1. Some options use metric hardware. Extra guide screws are provided on the front of the chassis, under the front bezel. The Compaq supplied metric screws are black. 4. Install the drive in the desired drive bay by sliding it into the front of the drive cage 2; the drivelock automatically secures the drive in the bay. Be sure the guide screws line up with the guide slots in the drive cage. Aligning the Guide Screws and Installing an Optional 5.25-Inch Drive on a Minitower (top) and a Desktop (bottom) Hardware Reference Guide 2-15
-
 1
1 -
2
-
3
-
4
-
5
-
6
-
7
-
8
-
9
-
10
-
11
-
12
-
13
-
14
-
15
-
16
-
17
-
18
-
19
-
20
-
21
-
22
-
23
-
24
-
25
-
26
-
27
-
 28
28 -
 29
29 -
 30
30 -
 31
31 -
 32
32 -
 33
33 -
 34
34 -
 35
35 -
 36
36 -
 37
37 -
 38
38 -
39
-
40
-
41
-
42
-
43
-
44
-
45
-
46
-
47
-
48
-
49
-
50
-
51
-
52
-
53
-
54
-
55
-
56
-
57
-
58
-
59
-
60
-
61
-
62
-
63
-
64
-
65
-
66
-
67
-
68
 |
 |

Hardware Upgrades
3. Install two guide screws on each side of the drive
1
.
Some options use metric hardware. Extra guide screws are provided
on the front of the chassis, under the front bezel. The Compaq
supplied metric screws are black.
4.
Install the drive in the desired drive bay by sliding it into the
front of the drive cage
2
; the drivelock automatically secures the
drive in the bay.
Be sure the guide screws line up with the guide slots in the drive cage.
Aligning the Guide Screws and Installing an Optional 5.25-Inch
Drive on a Minitower (top) and a Desktop (bottom)
Hardware Reference Guide
2-15