HP GbE2c HP GbE2c Layer 2/3 Ethernet Blade Switch for c-Class BladeSystem User - Page 17
Switch security - set switch name
 |
UPC - 808736802215
View all HP GbE2c manuals
Add to My Manuals
Save this manual to your list of manuals |
Page 17 highlights
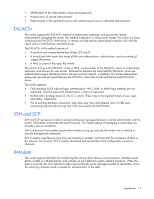
The Onboard Administrator module controls all port enabling. Enabling is based on matching ports between the server and the interconnect bay. Before power up, the Onboard Administrator module verifies that the server NIC option matches the switch bay that is selected and enables all ports for the NICs installed. NOTE: Port 19 is reserved for connection to the Onboard Administrator module for switch management. This allows a user to enable the functionality of future firmware upgrade releases. For detailed port mapping information, see the HP BladeSystem enclosure installation poster or the HP BladeSystem enclosure setup and installation guide on the HP website (http://www.hp.com/go/bladesystem/documentation). When planning the configuration, consider the default settings for these parameters: • Switch IP settings • VLAN settings • STP settings • Port names and types • Port trunking settings • Interswitch X-Connect port settings • SNMP settings • User name and password settings • Default access to various management interfaces • NTP settings IMPORTANT: See "Runtime switching software default settings (on page 29)" for a complete list of default configuration settings. Switch security When planning the switch configuration, secure access to the management interface by: • Creating users with various access levels • Enabling or disabling access to various management interfaces to fit the security policy • Changing default SNMP community strings for read-only and read-write access User, operator, and administrator access rights To enable better switch management and user accountability, three levels or classes of user access have been implemented on the switch. Levels of access to CLI, Web management functions, and screens increase as needed to perform various switch management tasks. Conceptually, access classes are defined as: • User interaction with the switch is completely passive. Nothing can be changed on the switch. Users can display information that has no security or privacy implications, such as switch statistics and current operational state information. • Operators can only effect temporary changes on the switch. These changes will be lost when the switch is rebooted/reset. Operators have access to the switch management features used for daily switch operations. Because any changes an operator makes are undone by a reset of the switch, operators cannot severely impact switch operation. Installing the switch 17
-
 1
1 -
2
-
3
-
4
-
5
-
6
-
7
-
8
-
9
-
10
-
11
-
 12
12 -
 13
13 -
 14
14 -
 15
15 -
 16
16 -
 17
17 -
 18
18 -
 19
19 -
 20
20 -
 21
21 -
 22
22 -
23
-
24
-
25
-
26
-
27
-
28
-
29
-
30
-
31
-
32
-
33
-
34
-
35
-
36
-
37
-
38
-
39
-
40
-
41
-
42
-
43
-
44
-
45
-
46
-
47
-
48
-
49
-
50
-
51
-
52
-
53
-
54
-
55
-
56
-
57
-
58
-
59
-
60
 |
 |
