HP GbE2c HP GbE2c Layer 2/3 Ethernet Blade Switch for c-Class BladeSystem User - Page 22
Supporting software and special considerations - firmware upgrade utility
 |
UPC - 808736802215
View all HP GbE2c manuals
Add to My Manuals
Save this manual to your list of manuals |
Page 22 highlights
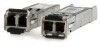
CAUTION: Do not install or remove fiber-optic SFP transceivers with cables attached because of the potential damage to the cables, the cable connector, or the optical interfaces in the SFP transceiver. Disconnect all cables before removing or installing an SFP transceiver. Removing and installing an SFP transceiver can shorten the useful life. Do not remove and insert SFP transceivers more often than is necessary. 1. Attach an ESD-preventative wrist strap to your wrist and to a bare metal surface on the chassis. CAUTION: Do not remove the dust plugs from the fiber-optic SFP transceiver or the rubber plugs from the fiber-optic cable until you are ready to connect the cable. The plugs and caps protect the SFP transceiver ports and cables from contamination and ambient light. 2. Remove the dust cap and save for future use. IMPORTANT: Use only SFP transceivers purchased from HP. 3. Insert the SFP transceiver. Supporting software and special considerations Supporting software is available to assist in configuring and managing the switch. • Server Blade and Power Management Module Firmware-Provides firmware and installation instructions required for proper rack location operation. • Utilities package and documentation-Provides utilities and documentation for switch management. • Firmware Upgrade Smart Component (for Microsoft Windows only)-Provides quick and easy installation of the switch firmware, firmware upgrade tool, and readme file. A SoftPaq is available for use with Linux operating systems. The utilities package and documentation, and the SoftPaq listed above, are available on the HP website (http://www.hp.com/go/bladesystem/documentation). Installing the switch 22
-
 1
1 -
2
-
3
-
4
-
5
-
6
-
7
-
8
-
9
-
10
-
11
-
12
-
13
-
14
-
15
-
16
-
 17
17 -
 18
18 -
 19
19 -
 20
20 -
 21
21 -
 22
22 -
 23
23 -
 24
24 -
 25
25 -
 26
26 -
 27
27 -
28
-
29
-
30
-
31
-
32
-
33
-
34
-
35
-
36
-
37
-
38
-
39
-
40
-
41
-
42
-
43
-
44
-
45
-
46
-
47
-
48
-
49
-
50
-
51
-
52
-
53
-
54
-
55
-
56
-
57
-
58
-
59
-
60
 |
 |
