HP Integrity rx2800 Boot from SAN Guide - Page 24
Step 4c – Create a LUN, Creating a LUN on Enterprise Virtual Arrays
 |
View all HP Integrity rx2800 manuals
Add to My Manuals
Save this manual to your list of manuals |
Page 24 highlights
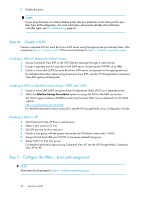
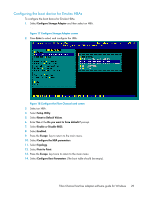
2. Enable the zone. NOTE: If your array firmware is in Active/Passive mode, then you must zone in the active port for your Boot From SAN configuration. For more information about active-standby (Active/Passive) controller types, see 3 Troubleshooting, page 41. Step 4c - Create a LUN Create a separate LUN for each Boot from SAN server using the appropriate procedure(s) here. After completing Step 4c - Create a LUN, VCM users should skip to Step 6 - Install the operating system . Creating a LUN on Enterprise Virtual Arrays 1. Access Command View EVA or the HSV Element Manager through a web browser. 2. Create a separate host for each Boot from SAN server containing the WWPN of its HBA. 3. Create a virtual disk (LUN) for each Boot from SAN server and present to the appropriate host. For detailed information about using Command View EVA, see the HP StorageWorks Command View EVA getting started guide. Creating a LUN on Modular Smart Arrays 1000 and 1500 1. Create a virtual disk (LUN) using the Array Configuration Utility (ACU) on a separate server. 2. Select the Selective Storage Presentation option to assign the LUN to the HBA connection. The MSA Support Software CD-ROM containing the latest ACU can be obtained from the MSA website http://www.hp.com/go/msa1000 For detailed information about using ACU, see the HP StorageWorks Array Configuration Guide. Creating a LUN on XP 1. Start Command View XP from a web browser. 2. Select a port (such as CL1-A). 3. Set LUN security for the array port. 4. Create a host group with the proper host mode (for Windows, host mode = 0x00). 5. Assign the first boot HBA port WWN to the newly created host group. 6. Assign LUN 0 to that host group. For detailed information about using Command View XP, see the HP StorageWorks Command View XP for XP. Step 5 - Configure the HBAs - boot path assignment NOTE: VCM users should proceed to Step 6 - Install the operating system. 24 Boot from SAN
-
 1
1 -
2
-
3
-
4
-
5
-
6
-
7
-
8
-
9
-
10
-
11
-
12
-
13
-
14
-
15
-
16
-
17
-
18
-
 19
19 -
 20
20 -
 21
21 -
 22
22 -
 23
23 -
 24
24 -
 25
25 -
 26
26 -
 27
27 -
 28
28 -
 29
29 -
30
-
31
-
32
-
33
-
34
-
35
-
36
-
37
-
38
-
39
-
40
-
41
-
42
-
43
-
44
 |
 |