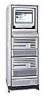
HP LC2000r HP Netserver LC 2000 Installation Guide - Page 45
SCSI Device Installation Order
 |
View all HP LC2000r manuals
Add to My Manuals
Save this manual to your list of manuals |
Page 45 highlights
Chapter 4 Installing Mass Storage Devices • SCSI Drive Addressing ◊ The drives in the Hot Swap Cage are automatically assigned SCSI addresses by the HP NetServer. The Hot Swap drive's address is dependent on its position within the drive cage and the combination of half-height and low-profile SCSI drives installed. Refer to Figures 4-2 through 4-5 for the automatic SCSI ID assignments. The Hot Swap Cage also supports the installation of a Duplex board, which divides the cage in two equal halves. The only drive addresses available in this case are 0 through 2. Refer to Figures 4-4 and 4-5 for duplexed cage drive examples. ◊ The non-hot swap SCSI devices use SCSI IDs from 0 through 15, with the following restrictions: a. Narrow SCSI devices must be addressed 0 through 6. b. Wide SCSI devices may be addressed 0 through 15, except for ID 7, which is held by the SCSI controller. The non-hot swap SCSI devices are all connected to the same cable, which is terminated and connected to one SCSI controller. Each SCSI device connected to the non-hot swap device connector must have a unique address. • SCSI Device Installation Order The Hot Swap Cage's supported hard drive configurations for both HP NetServer models are shown in Figures 4-2 through 4-5. The arrows indicate the order of hard drive installation. ◊ Start from the bottom of the Hot Swap drive cage when adding hard drives in the HP NetServer LC 2000. If you are using one or more filler panels, insert them at the top of the cage. These configurations may use filler panels and drive spacers to close up the front of the Hot Swap mass storage cage. If there are gaps in the cage, the drives may not receive the proper ventilation and could suffer thermal damage. ◊ Start from the left of the Hot Swap drive cage when adding hard drives in the HP NetServer LC 2000r. If you are using one or more filler panels, insert the panels on the right side of the drive cage. These configurations may use filler panels and drive spacers to close up the front of the Hot Swap mass storage cage. 37
-
 1
1 -
2
-
3
-
4
-
5
-
6
-
7
-
8
-
9
-
10
-
11
-
12
-
13
-
14
-
15
-
16
-
17
-
18
-
19
-
20
-
21
-
22
-
23
-
24
-
25
-
26
-
27
-
28
-
29
-
30
-
31
-
32
-
33
-
34
-
35
-
36
-
37
-
38
-
39
-
 40
40 -
 41
41 -
 42
42 -
 43
43 -
 44
44 -
 45
45 -
 46
46 -
 47
47 -
 48
48 -
 49
49 -
 50
50 -
51
-
52
-
53
-
54
-
55
-
56
-
57
-
58
-
59
-
60
-
61
-
62
-
63
-
64
-
65
-
66
-
67
-
68
-
69
-
70
-
71
-
72
-
73
-
74
-
75
-
76
-
77
-
78
-
79
-
80
-
81
-
82
-
83
-
84
-
85
-
86
-
87
-
88
-
89
-
90
-
91
-
92
-
93
-
94
-
95
-
96
-
97
-
98
-
99
-
100
-
101
-
102
-
103
-
104
-
105
-
106
-
107
-
108
-
109
-
110
-
111
-
112
-
113
-
114
-
115
-
116
-
117
-
118
-
119
-
120
-
121
-
122
-
123
-
124
-
125
-
126
-
127
-
128
-
129
-
130
-
131
-
132
-
133
-
134
-
135
-
136
-
137
-
138
-
139
-
140
-
141
-
142
-
143
-
144
-
145
-
146
-
147
-
148
-
149
-
150
-
151
-
152
-
153
-
154
-
155
-
156
-
157
-
158
-
159
-
160
-
161
-
162
-
163
-
164
-
165
-
166
-
167
-
168
-
169
-
170
-
171
-
172
-
173
-
174
-
175
-
176
-
177
-
178
-
179
-
180
-
181
-
182
-
183
-
184
-
185
-
186
-
187
-
188
-
189
-
190
-
191
-
192
-
193
-
194
 |
 |
