HP LH4r HP Netserver LH 3/LH 3r to LH 4/LH 4r - Page 23
Installing Memory
 |
View all HP LH4r manuals
Add to My Manuals
Save this manual to your list of manuals |
Page 23 highlights
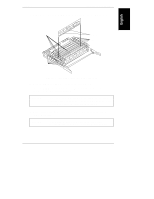
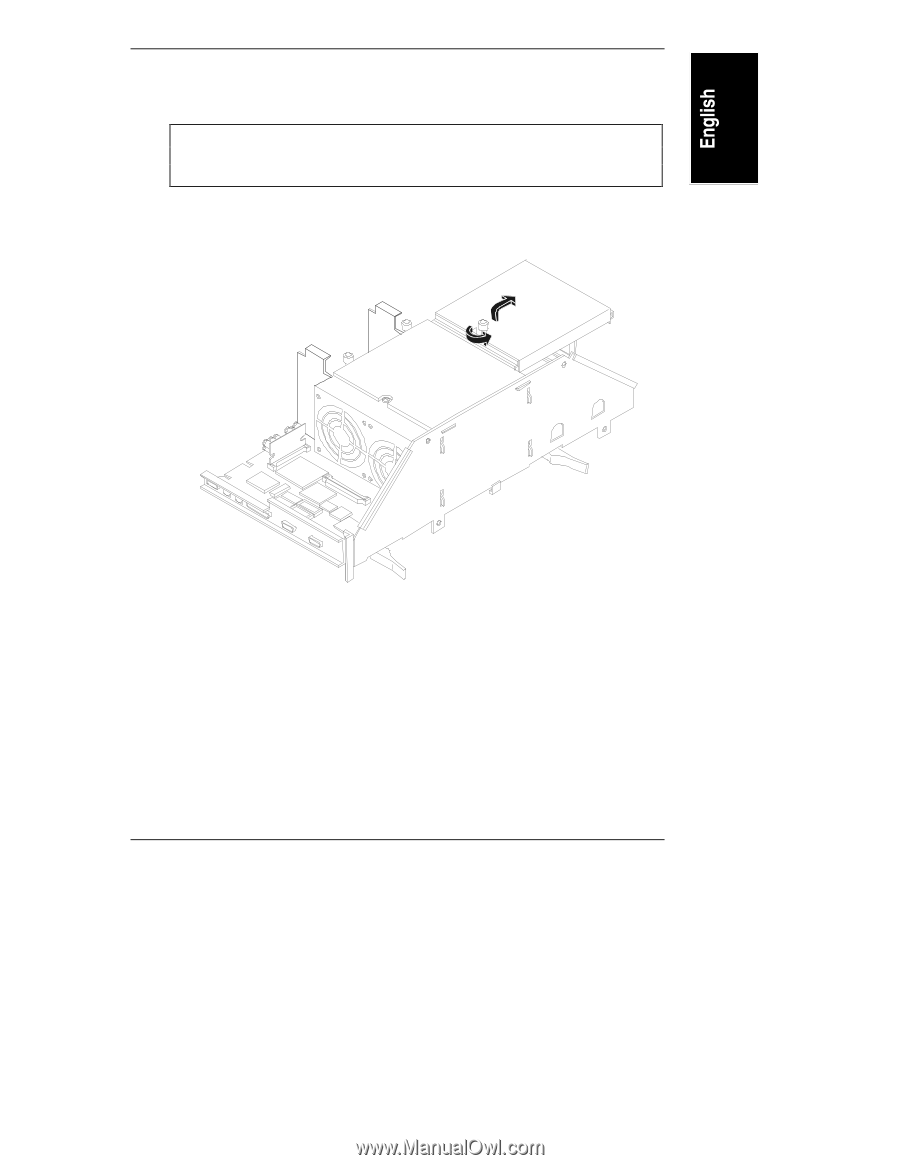
Chapter 3 Installing LH 4 Components Installing Memory CAUTION Memory comes in packages of four DIMMs. Do not install all four DIMMs into one board. Proper interleaving requires memory in each board, bank by bank, in pairs. 1. Unfasten the captive screw on the right side of the memory cage cover, as shown in Figure 3-4, and lift it upward and away from the memory cage. Figure 3-4. Opening the Memory Card Cage 2. Remove the two memory boards from the slots in the memory cage. Lift the ejection levers away from the board to back the board out of its slot, then lift the board free from the cage, as shown in Figure 3-5. 19
-
 1
1 -
2
-
3
-
4
-
5
-
6
-
7
-
8
-
9
-
10
-
11
-
12
-
13
-
14
-
15
-
16
-
17
-
 18
18 -
 19
19 -
 20
20 -
 21
21 -
 22
22 -
 23
23 -
 24
24 -
 25
25 -
 26
26 -
 27
27 -
 28
28 -
29
-
30
-
31
-
32
-
33
-
34
-
35
-
36
-
37
-
38
-
39
-
40
-
41
-
42
 |
 |
Chapter 3
Installing LH 4 Components
19
Installing Memory
CAUTION
Memory comes in packages of four DIMMs. Do not install all
four DIMMs into one board. Proper interleaving requires
memory in each board, bank by bank, in pairs.
1.
Unfasten the captive screw on the right side of the memory cage cover, as
shown in Figure 3-4, and lift it upward and away from the memory cage.
Figure 3-4. Opening the Memory Card Cage
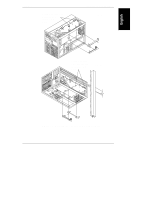
2.
Remove the two memory boards from the slots in the memory cage. Lift the
ejection levers away from the board to back the board out of its slot, then
lift the board free from the cage, as shown in Figure 3-5.