HP LaserJet M5000 LaserJet Analog Fax Accessory 500 - Send Fax Driver Guide - Page 53
Edit names in the phone book, Edit Phone Book, Delete, CONFIRM, Fax Job, Setup, HP MFP Send Fax
 |
View all HP LaserJet M5000 manuals
Add to My Manuals
Save this manual to your list of manuals |
Page 53 highlights
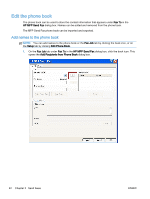
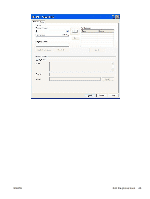
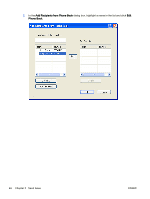
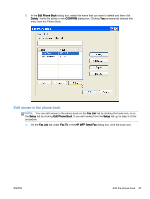
3. In the Edit Phone Book dialog box, select the name that you want to delete and then click Delete. Verify the delete in the CONFIRM dialog box. Clicking Yes permanently deletes this entry from the Phone Book. Edit names in the phone book NOTE: You can edit names in the phone book on the Fax Job tab by clicking the book icon, or on the Setup tab by clicking Edit Phone Book. If you edit names from the Setup tab, go to step 3 of this procedure. 1. On the Fax Job tab under Fax To in the HP MFP Send Fax dialog box, click the book icon. ENWW Edit the phone book 47
-
 1
1 -
2
-
3
-
4
-
5
-
6
-
7
-
8
-
9
-
10
-
11
-
12
-
13
-
14
-
15
-
16
-
17
-
18
-
19
-
20
-
21
-
22
-
23
-
24
-
25
-
26
-
27
-
28
-
29
-
30
-
31
-
32
-
33
-
34
-
35
-
36
-
37
-
38
-
39
-
40
-
41
-
42
-
43
-
44
-
45
-
46
-
47
-
 48
48 -
 49
49 -
 50
50 -
 51
51 -
 52
52 -
 53
53 -
 54
54 -
 55
55 -
 56
56 -
 57
57 -
 58
58 -
59
-
60
-
61
-
62
-
63
-
64
-
65
-
66
-
67
-
68
-
69
-
70
-
71
-
72
-
73
-
74
-
75
-
76
-
77
-
78
-
79
-
80
-
81
-
82
-
83
-
84
-
85
-
86
 |
 |
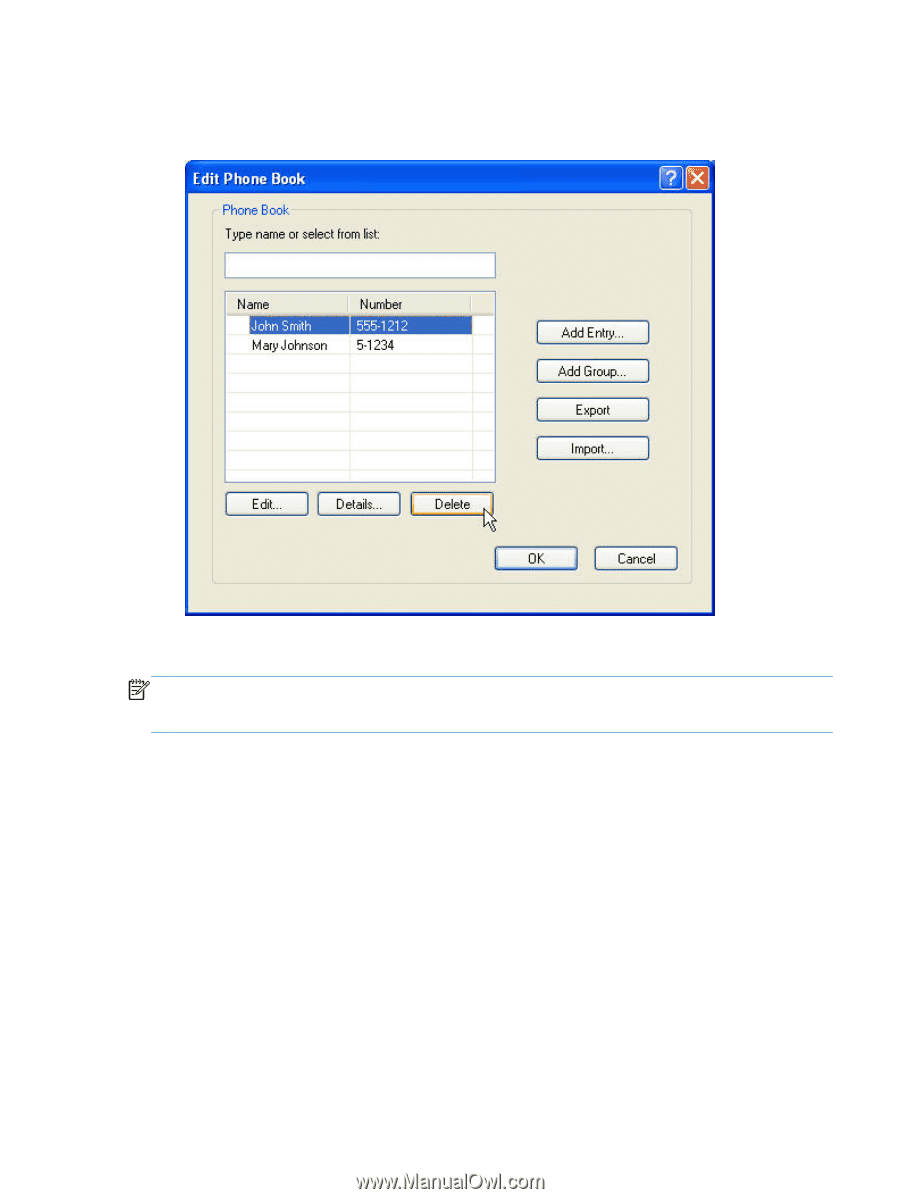
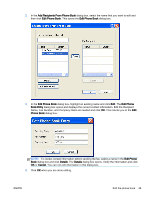
3.
In the
Edit Phone Book
dialog box, select the name that you want to delete and then click
Delete
. Verify the delete in the
CONFIRM
dialog box. Clicking
Yes
permanently deletes this
entry from the Phone Book.
Edit names in the phone book
NOTE:
You can edit names in the phone book on the
Fax Job
tab by clicking the book icon, or on
the
Setup
tab by clicking
Edit Phone Book
. If you edit names from the
Setup
tab, go to step 3 of this
procedure.
1.
On the
Fax Job
tab under
Fax To
in the
HP MFP Send Fax
dialog box, click the book icon.
ENWW
Edit the phone book
47