HP LaserJet M9040/M9050 HP LaserJet M9040/M9050 MFP - User Guide - Page 126
CAUTION, Print on envelopes from a program
 |
View all HP LaserJet M9040/M9050 manuals
Add to My Manuals
Save this manual to your list of manuals |
Page 126 highlights
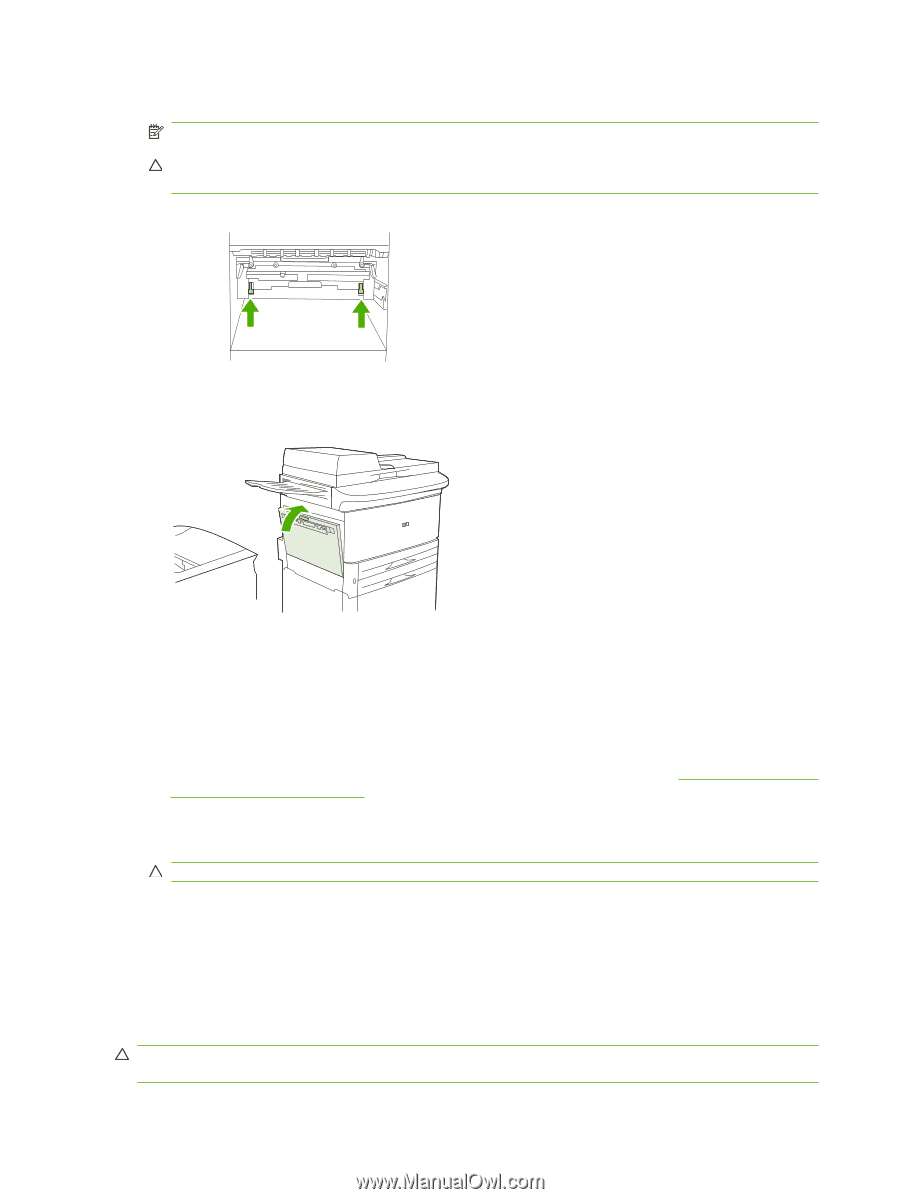
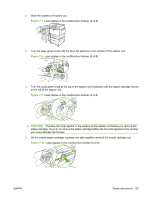
3. Locate and lift up the two blue levers. NOTE: Return the fuser levers to the down position after printing on envelopes. CAUTION: Failure to return levers to the down position for standard paper types can result in poor print quality. Figure 7-19 Change the fuser levers (3 of 4) 4. Close the left door. Figure 7-20 Change the fuser levers (4 of 4) 5. Push the output device back into place. Print on envelopes from a program 1. Load envelopes into tray 1. 2. In your program or in the printer driver, select tray 1 as the source. 3. Set the appropriate envelope size and type. For envelope specifications, see Supported paper and print media sizes on page 81. 4. If your program does not automatically format for an envelope, specify "Portrait" for page orientation. CAUTION: To avoid a jam, do not remove or insert an envelope after you begin printing. 5. Set margins to within 15 mm (0.6 inch) from the edge of the envelope. For best print quality, set margins for a return and mailing address (typical address margins for a Commercial #10 or DL envelope are offered). Avoid printing over the area where the three back flaps meet on the back of an envelope. 6. Select the left bin as the output location. 7. When finished printing on envelopes, return the fuser levers to the down position. CAUTION: Failure to return levers to the down position for standard paper types can result in poor print quality. 112 Chapter 7 Print tasks ENWW
-
 1
1 -
2
-
3
-
4
-
5
-
6
-
7
-
8
-
9
-
10
-
11
-
12
-
13
-
14
-
15
-
16
-
17
-
18
-
19
-
20
-
21
-
22
-
23
-
24
-
25
-
26
-
27
-
28
-
29
-
30
-
31
-
32
-
33
-
34
-
35
-
36
-
37
-
38
-
39
-
40
-
41
-
42
-
43
-
44
-
45
-
46
-
47
-
48
-
49
-
50
-
51
-
52
-
53
-
54
-
55
-
56
-
57
-
58
-
59
-
60
-
61
-
62
-
63
-
64
-
65
-
66
-
67
-
68
-
69
-
70
-
71
-
72
-
73
-
74
-
75
-
76
-
77
-
78
-
79
-
80
-
81
-
82
-
83
-
84
-
85
-
86
-
87
-
88
-
89
-
90
-
91
-
92
-
93
-
94
-
95
-
96
-
97
-
98
-
99
-
100
-
101
-
102
-
103
-
104
-
105
-
106
-
107
-
108
-
109
-
110
-
111
-
112
-
113
-
114
-
115
-
116
-
117
-
118
-
119
-
120
-
 121
121 -
 122
122 -
 123
123 -
 124
124 -
 125
125 -
 126
126 -
 127
127 -
 128
128 -
 129
129 -
 130
130 -
 131
131 -
132
-
133
-
134
-
135
-
136
-
137
-
138
-
139
-
140
-
141
-
142
-
143
-
144
-
145
-
146
-
147
-
148
-
149
-
150
-
151
-
152
-
153
-
154
-
155
-
156
-
157
-
158
-
159
-
160
-
161
-
162
-
163
-
164
-
165
-
166
-
167
-
168
-
169
-
170
-
171
-
172
-
173
-
174
-
175
-
176
-
177
-
178
-
179
-
180
-
181
-
182
-
183
-
184
-
185
-
186
-
187
-
188
-
189
-
190
-
191
-
192
-
193
-
194
-
195
-
196
-
197
-
198
-
199
-
200
-
201
-
202
-
203
-
204
-
205
-
206
-
207
-
208
-
209
-
210
-
211
-
212
-
213
-
214
-
215
-
216
-
217
-
218
-
219
-
220
-
221
-
222
-
223
-
224
-
225
-
226
-
227
-
228
-
229
-
230
-
231
-
232
-
233
-
234
-
235
-
236
-
237
-
238
-
239
-
240
-
241
-
242
-
243
-
244
-
245
-
246
-
247
-
248
-
249
-
250
-
251
-
252
-
253
-
254
-
255
-
256
-
257
-
258
-
259
-
260
-
261
-
262
-
263
-
264
-
265
-
266
-
267
-
268
-
269
-
270
-
271
-
272
-
273
-
274
-
275
-
276
-
277
-
278
-
279
-
280
-
281
-
282
-
283
-
284
-
285
-
286
-
287
-
288
 |
 |