HP LaserJet P1500 Service Manual - Page 62
ECU, Remove ECU 1 of 5
 |
View all HP LaserJet P1500 manuals
Add to My Manuals
Save this manual to your list of manuals |
Page 62 highlights
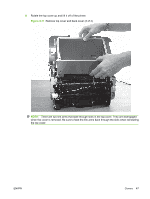
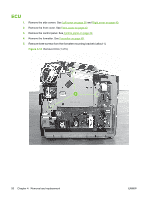
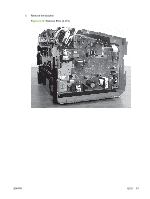
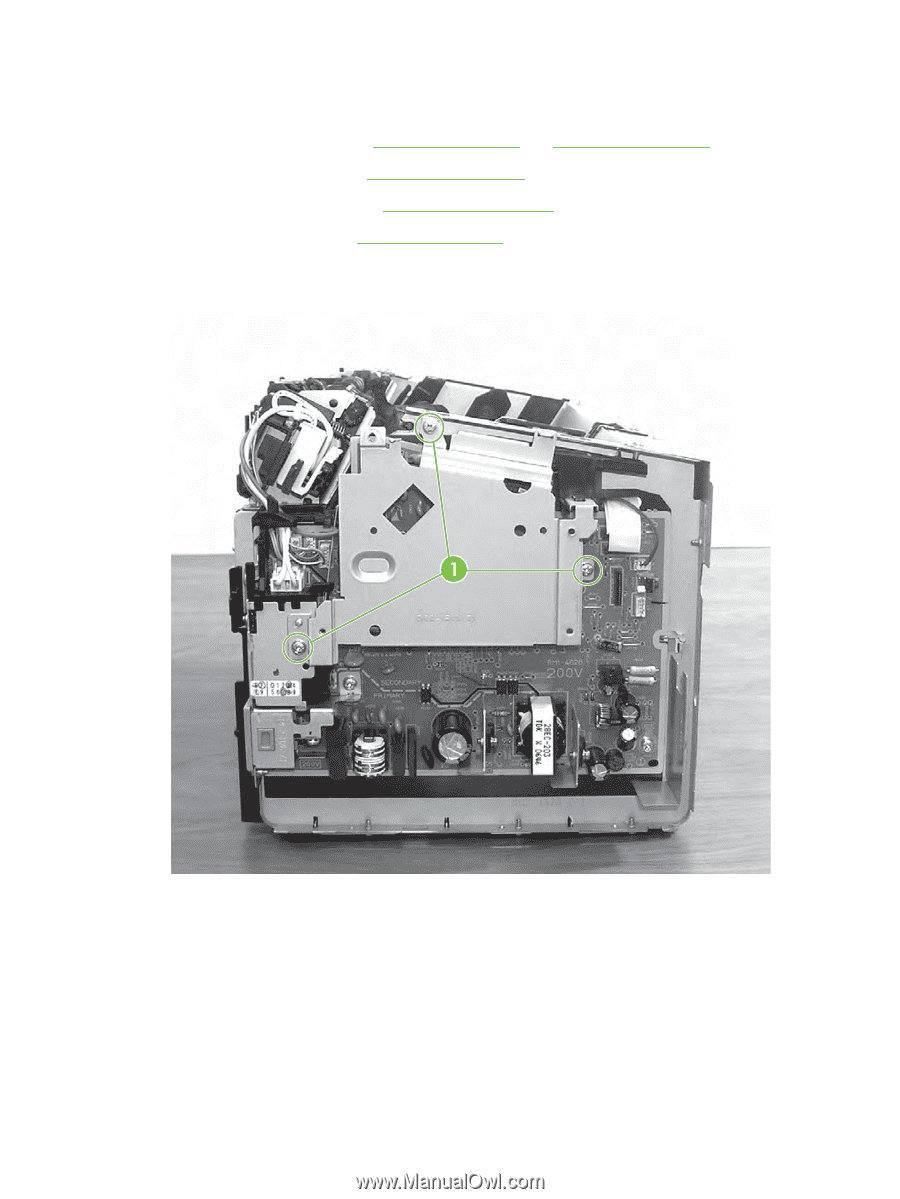
ECU 1. Remove the side covers. See Left cover on page 38 and Right cover on page 40. 2. Remove the front cover. See Front cover on page 42. 3. Remove the control panel. See Control panel on page 42. 4. Remove the formatter. See Formatter on page 48. 5. Remove three screws from the formatter mounting bracket (callout 1). Figure 4-14 Remove ECU (1 of 5) 50 Chapter 4 Removal and replacement ENWW
-
 1
1 -
2
-
3
-
4
-
5
-
6
-
7
-
8
-
9
-
10
-
11
-
12
-
13
-
14
-
15
-
16
-
17
-
18
-
19
-
20
-
21
-
22
-
23
-
24
-
25
-
26
-
27
-
28
-
29
-
30
-
31
-
32
-
33
-
34
-
35
-
36
-
37
-
38
-
39
-
40
-
41
-
42
-
43
-
44
-
45
-
46
-
47
-
48
-
49
-
50
-
51
-
52
-
53
-
54
-
55
-
56
-
 57
57 -
 58
58 -
 59
59 -
 60
60 -
 61
61 -
 62
62 -
 63
63 -
 64
64 -
 65
65 -
 66
66 -
 67
67 -
68
-
69
-
70
-
71
-
72
-
73
-
74
-
75
-
76
-
77
-
78
-
79
-
80
-
81
-
82
-
83
-
84
-
85
-
86
-
87
-
88
-
89
-
90
-
91
-
92
-
93
-
94
-
95
-
96
-
97
-
98
-
99
-
100
-
101
-
102
-
103
-
104
-
105
-
106
-
107
-
108
-
109
-
110
-
111
-
112
-
113
-
114
-
115
-
116
-
117
-
118
-
119
-
120
-
121
-
122
-
123
-
124
-
125
-
126
-
127
-
128
-
129
-
130
-
131
-
132
-
133
-
134
-
135
-
136
-
137
-
138
-
139
-
140
-
141
-
142
-
143
-
144
-
145
-
146
-
147
-
148
-
149
-
150
 |
 |
ECU
1.
Remove the side covers. See
Left cover
on page
38
and
Right cover
on page
40
.
2.
Remove the front cover. See
Front cover
on page
42
.
3.
Remove the control panel. See
Control panel
on page
42
.
4.
Remove the formatter. See
Formatter
on page
48
.
5.
Remove three screws from the formatter mounting bracket (callout 1).
Figure 4-14
Remove ECU (1 of 5)
50
Chapter 4
Removal and replacement
ENWW