HP LaserJet Pro M1536 HP LaserJet Pro M1530 - User Guide - Page 21
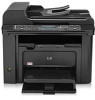
Control panel layout, Reduce/Enlarge button. - toner for
 |
View all HP LaserJet Pro M1536 manuals
Add to My Manuals
Save this manual to your list of manuals |
Page 21 highlights
Control panel layout 1 23 4 5 6 7 8 9 10 11 20 19 18 17 16 15 14 13 12 1 Speed dial buttons. Use the speed dial buttons to quickly fax documents to commonly used destinations. 2 Phone Book button. Use the Phone Book button to access the phone book entries that have been set up for the product. 3 Fax Menu button. Use the Fax Menu button to open a fax settings menu. 4 Alphanumeric keypad. Use the alphanumeric buttons to type data into the product control-panel display and dial telephone numbers for faxing. 5 LCD display. Use the LCD display to navigate the menu structure and monitor product status. 6 Back button. Use the Back button to return to a previous menu, or to exit the menus and return to the Ready state. 7 Arrow buttons. Use the arrow buttons to navigate the menus and adjust certain settings. 8 OK button. Use the OK button to acknowledge a setting or to confirm an action to proceed. 9 Lighter/Darker button. Use the Lighter/Darker button to control the brightness or darkness of a copy. 10 Reduce/Enlarge button. Use the Reduce/Enlarge button to reduce or enlarge the size of a copy. 11 Copy Menu button. Use the Copy Menu button to open a copy settings menu. To use the ID copy feature, press the button until the ID Copy item displays. 12 Start Copy button. Use the Start Copy button to start a copy job. 13 # Copies button. Use the # Copies button to set the number of copies that you want for the current copy job. 14 Cancel button. Use the Cancel button to cancel the current job. 15 Setup button. Use the Setup button to open the main menu options. 16 Toner light . This light indicates that the print cartridge toner level is low. 17 Attention light . This light indicates a problem with the product. View the LCD display for a message. 18 Ready light . This light indicates that the product is ready or is processing a job. 19 Start Fax button. Use the Start Fax button to start a fax job. 20 Redial button. Use the Redial button to recall the last digits used for the previous fax job. ENWW Product views 7
-
 1
1 -
2
-
3
-
4
-
5
-
6
-
7
-
8
-
9
-
10
-
11
-
12
-
13
-
14
-
15
-
 16
16 -
 17
17 -
 18
18 -
 19
19 -
 20
20 -
 21
21 -
 22
22 -
 23
23 -
 24
24 -
 25
25 -
 26
26 -
27
-
28
-
29
-
30
-
31
-
32
-
33
-
34
-
35
-
36
-
37
-
38
-
39
-
40
-
41
-
42
-
43
-
44
-
45
-
46
-
47
-
48
-
49
-
50
-
51
-
52
-
53
-
54
-
55
-
56
-
57
-
58
-
59
-
60
-
61
-
62
-
63
-
64
-
65
-
66
-
67
-
68
-
69
-
70
-
71
-
72
-
73
-
74
-
75
-
76
-
77
-
78
-
79
-
80
-
81
-
82
-
83
-
84
-
85
-
86
-
87
-
88
-
89
-
90
-
91
-
92
-
93
-
94
-
95
-
96
-
97
-
98
-
99
-
100
-
101
-
102
-
103
-
104
-
105
-
106
-
107
-
108
-
109
-
110
-
111
-
112
-
113
-
114
-
115
-
116
-
117
-
118
-
119
-
120
-
121
-
122
-
123
-
124
-
125
-
126
-
127
-
128
-
129
-
130
-
131
-
132
-
133
-
134
-
135
-
136
-
137
-
138
-
139
-
140
-
141
-
142
-
143
-
144
-
145
-
146
-
147
-
148
-
149
-
150
-
151
-
152
-
153
-
154
-
155
-
156
-
157
-
158
-
159
-
160
-
161
-
162
-
163
-
164
-
165
-
166
-
167
-
168
-
169
-
170
-
171
-
172
-
173
-
174
-
175
-
176
-
177
-
178
-
179
-
180
-
181
-
182
-
183
-
184
-
185
-
186
-
187
-
188
-
189
-
190
-
191
-
192
-
193
-
194
-
195
-
196
-
197
-
198
-
199
-
200
-
201
-
202
-
203
-
204
-
205
-
206
-
207
-
208
-
209
-
210
-
211
-
212
-
213
-
214
-
215
-
216
-
217
-
218
-
219
-
220
-
221
-
222
-
223
-
224
-
225
-
226
-
227
-
228
-
229
-
230
-
231
-
232
-
233
-
234
-
235
-
236
-
237
-
238
-
239
-
240
-
241
-
242
-
243
-
244
-
245
-
246
-
247
-
248
-
249
-
250
-
251
-
252
-
253
-
254
-
255
-
256
-
257
-
258
-
259
-
260
-
261
-
262
-
263
-
264
-
265
-
266
-
267
-
268
-
269
-
270
-
271
-
272
-
273
-
274
-
275
-
276
-
277
-
278
-
279
-
280
-
281
-
282
-
283
-
284
-
285
-
286
 |
 |
