HP Media Center m477.uk HP Media Center PC - User's Guide 5990-6456 - Page 151
Copying Pictures to CDs
 |
View all HP Media Center m477.uk manuals
Add to My Manuals
Save this manual to your list of manuals |
Page 151 highlights
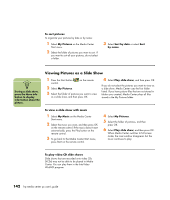
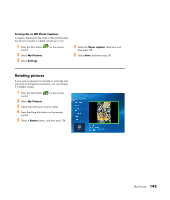
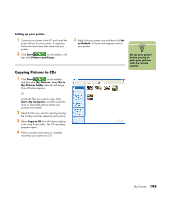
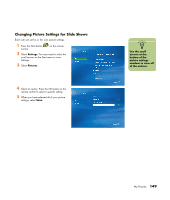
Setting up your printer 1 Connect your printer to the PC and install the printer drivers for your printer, if necessary. Follow the instructions that came with your printer. 2 Click Start on the taskbar, and then click Printers and Faxes. Copying Pictures to CDs 1 Click Start on the taskbar, and then click My Pictures. Select Go to My Pictures folder when the HP Image Zone Window appears. Or Locate the files you want to copy. Click Start, My Computer, and then select the drive or removable device where your pictures are located. 2 Select the files you want to copy by pressing the Ctrl key and then selecting each picture. 3 Select Copy to CD from Windows Explorer in the area Picture tasks. The CD recording program opens. 4 Follow onscreen instructions to complete recording your pictures to CD. 3 Right-click your printer icon and then click Set as Default. A check mark appears next to your printer. n Set up your printer before you try to print your pictures with the remote control. My Pictures 145
-
 1
1 -
2
-
3
-
4
-
5
-
6
-
7
-
8
-
9
-
10
-
11
-
12
-
13
-
14
-
15
-
16
-
17
-
18
-
19
-
20
-
21
-
22
-
23
-
24
-
25
-
26
-
27
-
28
-
29
-
30
-
31
-
32
-
33
-
34
-
35
-
36
-
37
-
38
-
39
-
40
-
41
-
42
-
43
-
44
-
45
-
46
-
47
-
48
-
49
-
50
-
51
-
52
-
53
-
54
-
55
-
56
-
57
-
58
-
59
-
60
-
61
-
62
-
63
-
64
-
65
-
66
-
67
-
68
-
69
-
70
-
71
-
72
-
73
-
74
-
75
-
76
-
77
-
78
-
79
-
80
-
81
-
82
-
83
-
84
-
85
-
86
-
87
-
88
-
89
-
90
-
91
-
92
-
93
-
94
-
95
-
96
-
97
-
98
-
99
-
100
-
101
-
102
-
103
-
104
-
105
-
106
-
107
-
108
-
109
-
110
-
111
-
112
-
113
-
114
-
115
-
116
-
117
-
118
-
119
-
120
-
121
-
122
-
123
-
124
-
125
-
126
-
127
-
128
-
129
-
130
-
131
-
132
-
133
-
134
-
135
-
136
-
137
-
138
-
139
-
140
-
141
-
142
-
143
-
144
-
145
-
 146
146 -
 147
147 -
 148
148 -
 149
149 -
 150
150 -
 151
151 -
 152
152 -
 153
153 -
 154
154 -
 155
155 -
 156
156 -
157
-
158
-
159
-
160
-
161
-
162
-
163
-
164
-
165
-
166
-
167
-
168
-
169
-
170
-
171
-
172
-
173
-
174
-
175
-
176
-
177
-
178
-
179
-
180
-
181
-
182
-
183
-
184
-
185
-
186
-
187
-
188
-
189
-
190
-
191
-
192
-
193
-
194
-
195
-
196
-
197
-
198
-
199
-
200
-
201
-
202
-
203
-
204
-
205
-
206
-
207
-
208
-
209
-
210
-
211
-
212
-
213
-
214
-
215
-
216
-
217
-
218
-
219
-
220
-
221
-
222
-
223
-
224
-
225
-
226
-
227
-
228
-
229
-
230
-
231
-
232
 |
 |