HP Microportable Projector MP2810 Compaq MP2800 Microportable Projector - Page 20
Using the Compaq Presentation Utility, systems: Microsoft Windows 95, Windows 98, Windows NT 4.0
 |
View all HP Microportable Projector MP2810 manuals
Add to My Manuals
Save this manual to your list of manuals |
Page 20 highlights
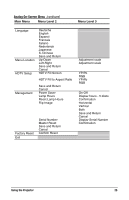
Using the Compaq Presentation Utility The Compaq Presentation utility included on the CD-ROM is for use with portable computers. The purpose of the Presentation utility is to disable power management features of the portable computer while the Compaq Microportable Projector is connected to it. The utility also disables the computer's screen savers and auto-suspend feature while the utility is running. A graphical user interface (GUI) is required to control the projector's resolution settings and the enabled/disabled status. The Compaq Presentation utility supports the following GUI operating systems: Microsoft Windows 95, Windows 98, Windows NT 4.0, and Windows 2000. To install the Presentation utility onto a portable computer: 1. Insert the CD-ROM into the computer's CD-ROM drive. The CD-ROM menu will automatically launch on the screen. 2. From the launch menu, click "Install Software Install Presentation Utility" and follow the on-screen instructions. 3. Select Next in the dialog box to install the program. The Presentation utility installs on the hard drive and you are prompted to restart the computer. Upon restart, a program icon (yellow beam of light containing a Q) is placed in the Windows system tray. 4. Double-click the program icon to launch the Presentation Properties dialog box. 5. Set the Presentation Mode Duration time in the dialog box. The dialog box has default settings enabled to turn off the computer's power management features and screen saver features. 6. Select OK from the dialog box to execute the settings. The software dialog box closes and the computer is ready to continue with the presentation. When the installation is complete, the appropriate language is installed on the computer based on the computer's operating system language. If the computer's operating system language is not included as one of the installation languages, then, by default, the English version will install on the computer. Getting Started 20
-
 1
1 -
2
-
3
-
4
-
5
-
6
-
7
-
8
-
9
-
10
-
11
-
12
-
13
-
14
-
 15
15 -
 16
16 -
 17
17 -
 18
18 -
 19
19 -
 20
20 -
 21
21 -
 22
22 -
 23
23 -
 24
24 -
 25
25 -
26
-
27
-
28
-
29
-
30
-
31
-
32
-
33
-
34
-
35
-
36
-
37
-
38
-
39
-
40
-
41
-
42
-
43
-
44
-
45
-
46
-
47
-
48
-
49
-
50
-
51
-
52
-
53
-
54
-
55
-
56
-
57
-
58
-
59
-
60
-
61
 |
 |
