HP Mini 110-4100ca HP Mini 200 - Maintenance and Service Guide - Page 80
Using System Diagnostics, Windows 7, Start > Computer, My Computer
 |
View all HP Mini 110-4100ca manuals
Add to My Manuals
Save this manual to your list of manuals |
Page 80 highlights
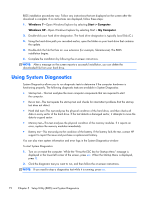
BIOS installation procedures vary. Follow any instructions that are displayed on the screen after the download is complete. If no instructions are displayed, follow these steps: 1. Windows 7-Open Windows Explorer by selecting Start > Computer. Windows XP-Open Windows Explorer by selecting Start > My Computer. 2. Double-click your hard drive designation. The hard drive designation is typically Local Disk (C:). 3. Using the hard drive path you recorded earlier, open the folder on your hard drive that contains the update. 4. Double-click the file that has an .exe extension (for example, filename.exe). The BIOS installation begins. 5. Complete the installation by following the on-screen instructions. NOTE: After a message on the screen reports a successful installation, you can delete the downloaded file from your hard drive. Using System Diagnostics System Diagnostics allows you to run diagnostic tests to determine if the computer hardware is functioning properly. The following diagnostic tests are available in System Diagnostics: ● Start-up test-This test analyzes the main computer components that are required to start the computer. ● Run-in test-This test repeats the start-up test and checks for intermittent problems that the start-up test does not detect. ● Hard disk test-This test analyzes the physical condition of the hard drive, and then checks all data in every sector of the hard drive. If the test detects a damaged sector, it attempts to move the data to a good sector. ● Memory test-This test analyzes the physical condition of the memory modules. If it reports an error, replace the memory modules immediately. ● Battery test-This test analyzes the condition of the battery. If the battery fails the test, contact HP support to report the issue and purchase a replacement battery. You can also view system information and error logs in the System Diagnostics window. To start System Diagnostics: 1. Turn on or restart the computer. While the "Press the ESC key for Startup Menu" message is displayed in the lower-left corner of the screen, press esc. When the Startup Menu is displayed, press f2. 2. Click the diagnostic test you want to run, and then follow the on-screen instructions. NOTE: If you need to stop a diagnostics test while it is running, press esc. 72 Chapter 5 Setup Utility (BIOS) and System Diagnostics
-
 1
1 -
2
-
3
-
4
-
5
-
6
-
7
-
8
-
9
-
10
-
11
-
12
-
13
-
14
-
15
-
16
-
17
-
18
-
19
-
20
-
21
-
22
-
23
-
24
-
25
-
26
-
27
-
28
-
29
-
30
-
31
-
32
-
33
-
34
-
35
-
36
-
37
-
38
-
39
-
40
-
41
-
42
-
43
-
44
-
45
-
46
-
47
-
48
-
49
-
50
-
51
-
52
-
53
-
54
-
55
-
56
-
57
-
58
-
59
-
60
-
61
-
62
-
63
-
64
-
65
-
66
-
67
-
68
-
69
-
70
-
71
-
72
-
73
-
74
-
 75
75 -
 76
76 -
 77
77 -
 78
78 -
 79
79 -
 80
80 -
 81
81 -
 82
82 -
 83
83 -
 84
84 -
 85
85 -
86
-
87
-
88
-
89
-
90
-
91
-
92
-
93
-
94
-
95
 |
 |