HP Pavilion 14-e000 HP Pavillion 14 Notebook PC Maintenance and Service Guide - Page 48
Optical drive, Remove the Phillips PM2.5×7.0 screw
 |
View all HP Pavilion 14-e000 manuals
Add to My Manuals
Save this manual to your list of manuals |
Page 48 highlights
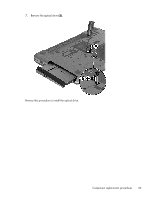
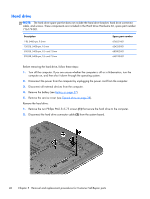
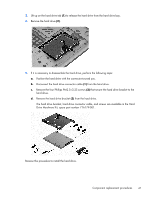
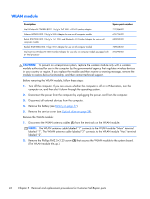
Optical drive NOTE: This section applies only to computer models equipped with an Intel processor. Description DVD±RW Double Layer SuperMulti Drive Spare part number 720671-001 Before removing the optical drive, follow these steps: 1. Turn off the computer. If you are unsure whether the computer is off or in Hibernation, turn the computer on, and then shut it down through the operating system. 2. Disconnect the power from the computer by unplugging the power cord from the computer. 3. Disconnect all external devices from the computer. 4. Remove the battery (see Battery on page 37). Remove the optical drive: 1. Loosen the Phillips PM3.0×10.5 captive screw (1) that secures the service cover to the computer. 2. Slide the service cover (2) forward until it disengages from the computer. 3. Remove the service cover (3). The service cover is available using spare part number 720675-001. 4. Position the computer with the left side toward you. 5. Remove the Phillips PM2.5×7.0 screw (1) that secures the optical drive to the computer. 6. Insert a flat-bladed screwdriver or similar tool into the optical drive tab access (2) and press the tab to the left to release the optical drive from the computer. 38 Chapter 5 Removal and replacement procedures for Customer Self-Repair parts
-
 1
1 -
2
-
3
-
4
-
5
-
6
-
7
-
8
-
9
-
10
-
11
-
12
-
13
-
14
-
15
-
16
-
17
-
18
-
19
-
20
-
21
-
22
-
23
-
24
-
25
-
26
-
27
-
28
-
29
-
30
-
31
-
32
-
33
-
34
-
35
-
36
-
37
-
38
-
39
-
40
-
41
-
42
-
 43
43 -
 44
44 -
 45
45 -
 46
46 -
 47
47 -
 48
48 -
 49
49 -
 50
50 -
 51
51 -
 52
52 -
 53
53 -
54
-
55
-
56
-
57
-
58
-
59
-
60
-
61
-
62
-
63
-
64
-
65
-
66
-
67
-
68
-
69
-
70
-
71
-
72
-
73
-
74
-
75
-
76
-
77
-
78
-
79
-
80
-
81
-
82
-
83
-
84
-
85
-
86
-
87
-
88
-
89
-
90
-
91
-
92
-
93
-
94
-
95
-
96
-
97
-
98
-
99
-
100
-
101
-
102
-
103
-
104
-
105
-
106
-
107
-
108
-
109
-
110
-
111
-
112
-
113
-
114
 |
 |
