HP Pavilion a100 HP Pavilion Desktop PCs - (English) Quick Start Guide UK SPR - Page 57
To connect your multi-channel, speaker system to the PC, To con multi-channel audio, output
 |
View all HP Pavilion a100 manuals
Add to My Manuals
Save this manual to your list of manuals |
Page 57 highlights
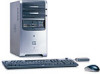
Basics To connect your multi-channel speaker system to the PC 1 Turn off the PC. 2 Connect the three audio cable plugs from the speaker system to the connectors on the back of the PC (see following table). Connect speaker channels (plugs) Front speakers Rear speakers Centre/subwoofer speakers To PC back connector Audio (Line) Out (lime-green) Audio (Line) In (blue) Mic-1 (pink) 3 Turn on the PC. 4 Turn on your speaker system. 5 Configure the multi-channel audio output; refer to the next procedure. To configure multi-channel audio output for speakers configuration 1 Click Start on the taskbar. 2 Choose All Programs. 3 Click Multi-channel Sound Manager and then click Multi-channel Sound Manager again. The Multi-channel Audio Configuration window opens. Note: If you do not see the Speaker Configuration tab, your PC does not have the multi-channel capability. 4 Click the Speaker Configuration tab. (Your speakers must be connected to see this tab.) 5 Select the option describing the number of speakers in your system, for example, 6 speaker mode (for 5.1 channels). You can click the Speaker Test tab and then click a speaker icon to test it. 6 Click OK. Quick Start Guide 29
-
 1
1 -
2
-
3
-
4
-
5
-
6
-
7
-
8
-
9
-
10
-
11
-
12
-
13
-
14
-
15
-
16
-
17
-
18
-
19
-
20
-
21
-
22
-
23
-
24
-
25
-
26
-
27
-
28
-
29
-
30
-
31
-
32
-
33
-
34
-
35
-
36
-
37
-
38
-
39
-
40
-
41
-
42
-
43
-
44
-
45
-
46
-
47
-
48
-
49
-
50
-
51
-
 52
52 -
 53
53 -
 54
54 -
 55
55 -
 56
56 -
 57
57 -
 58
58 -
 59
59 -
 60
60 -
 61
61 -
 62
62 -
63
-
64
-
65
-
66
-
67
-
68
-
69
-
70
-
71
-
72
-
73
-
74
-
75
-
76
-
77
-
78
-
79
-
80
-
81
-
82
-
83
-
84
-
85
-
86
-
87
-
88
-
89
-
90
-
91
-
92
-
93
-
94
-
95
-
96
-
97
-
98
-
99
-
100
-
101
-
102
-
103
-
104
-
105
-
106
-
107
-
108
-
109
-
110
-
111
-
112
-
113
-
114
-
115
-
116
-
117
-
118
-
119
-
120
-
121
-
122
-
123
-
124
-
125
-
126
-
127
-
128
-
129
-
130
-
131
-
132
-
133
-
134
-
135
-
136
-
137
-
138
 |
 |
