HP Pavilion dv5-2100 HP Pavilion dv5 Entertainment PC - Maintenance and Servic - Page 75
or other similar thin tool into the screw hole, Insert a thin, flat-tip screwdriver
 |
View all HP Pavilion dv5-2100 manuals
Add to My Manuals
Save this manual to your list of manuals |
Page 75 highlights
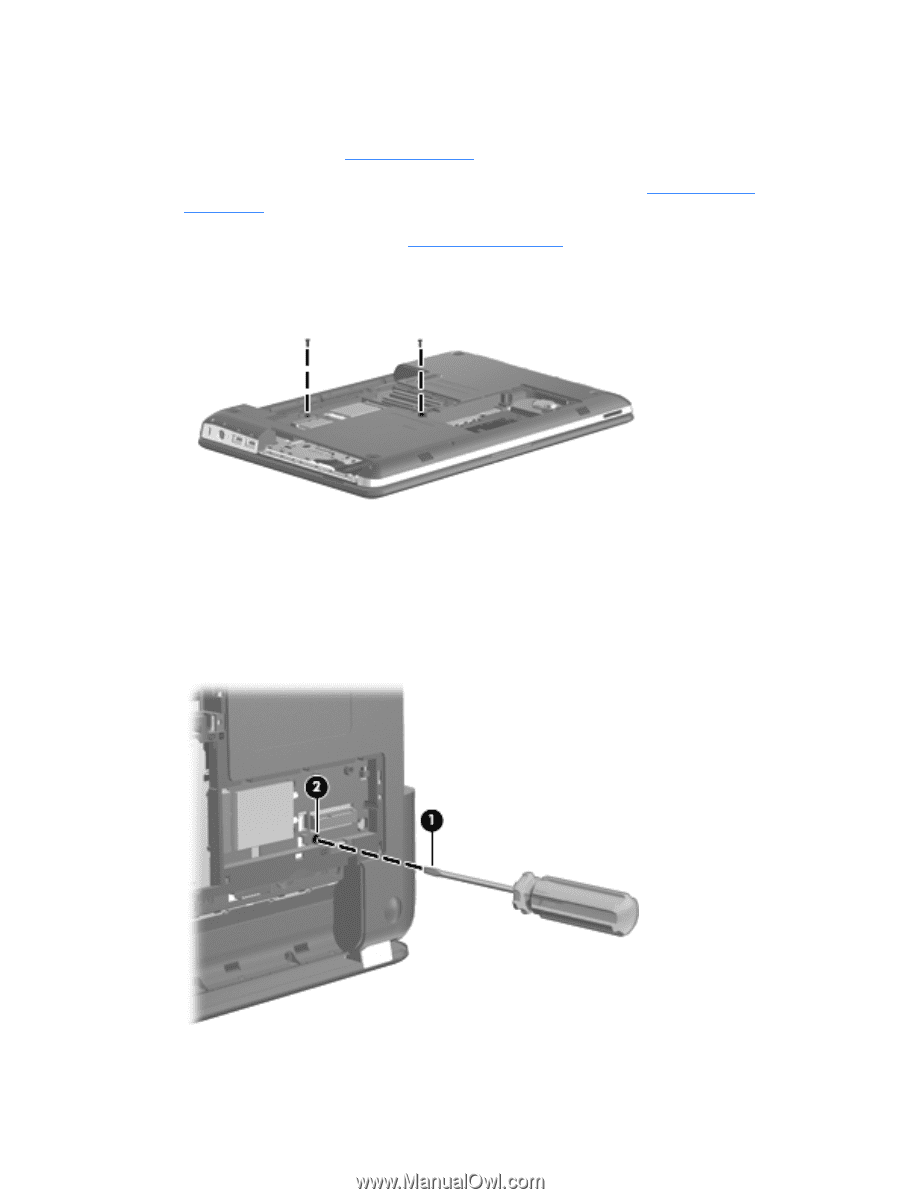
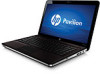
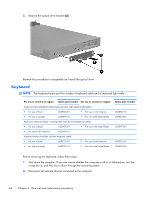
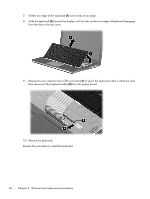
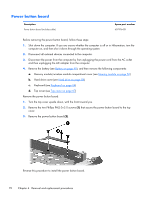
3. Disconnect the power from the computer by first unplugging the power cord from the AC outlet and then unplugging the AC adapter from the computer. 4. Remove the battery (see Battery on page 49). 5. Remove the memory module/wireless module compartment cover (see Memory module on page 50). 6. Remove the hard drive cover (see Hard drive on page 58). Remove the keyboard: 1. Remove the two Phillips PM 2.5×7.0 screws that secure the keyboard to the computer. 2. Turn the computer display-side up, with the front toward you. 3. Open the computer to a 90-degree position. 4. Tip the computer back and rest it on the display enclosure. 5. Insert a thin, flat-tip screwdriver (1) or other similar thin tool into the screw hole (2) in the wireless module compartment and gently push on the back of the keyboard. 6. Position the computer so that it rests on the base enclosure. Component replacement procedures 65
-
 1
1 -
2
-
3
-
4
-
5
-
6
-
7
-
8
-
9
-
10
-
11
-
12
-
13
-
14
-
15
-
16
-
17
-
18
-
19
-
20
-
21
-
22
-
23
-
24
-
25
-
26
-
27
-
28
-
29
-
30
-
31
-
32
-
33
-
34
-
35
-
36
-
37
-
38
-
39
-
40
-
41
-
42
-
43
-
44
-
45
-
46
-
47
-
48
-
49
-
50
-
51
-
52
-
53
-
54
-
55
-
56
-
57
-
58
-
59
-
60
-
61
-
62
-
63
-
64
-
65
-
66
-
67
-
68
-
69
-
 70
70 -
 71
71 -
 72
72 -
 73
73 -
 74
74 -
 75
75 -
 76
76 -
 77
77 -
 78
78 -
 79
79 -
 80
80 -
81
-
82
-
83
-
84
-
85
-
86
-
87
-
88
-
89
-
90
-
91
-
92
-
93
-
94
-
95
-
96
-
97
-
98
-
99
-
100
-
101
-
102
-
103
-
104
-
105
-
106
-
107
-
108
-
109
-
110
-
111
-
112
-
113
-
114
-
115
-
116
-
117
-
118
-
119
-
120
-
121
-
122
-
123
-
124
-
125
-
126
-
127
-
128
-
129
-
130
-
131
-
132
-
133
-
134
-
135
 |
 |