HP Photosmart A620 Basics Guide - Page 6
Control panel buttons and indicator lights, Use the touch screen, The quick touch frame
 |
View all HP Photosmart A620 manuals
Add to My Manuals
Save this manual to your list of manuals |
Page 6 highlights
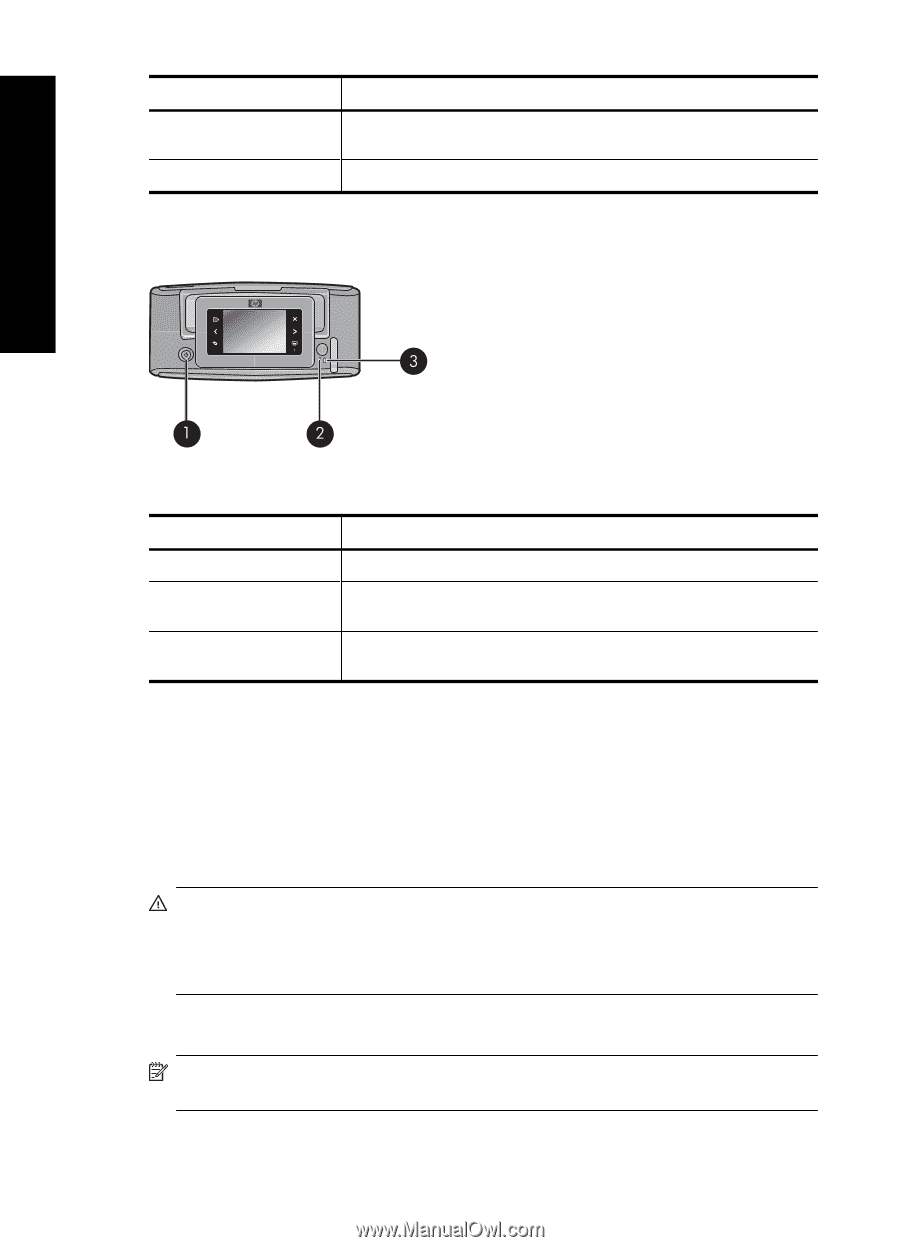
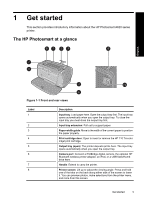
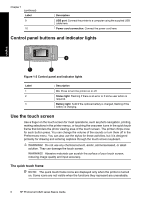
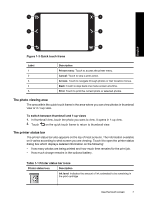
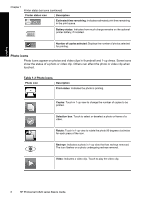
Chapter 1 (continued) Label 9 10 Description USB port: Connect the printer to a computer using the supplied USB cable here. Power cord connection: Connect the power cord here. Control panel buttons and indicator lights English Figure 1-2 Control panel and indicator lights Label 1 2 3 Description On: Press to turn the printer on or off. Status light: Flashing if there is an error or if some user action is required. Battery light: Solid if the optional battery is charged, flashing if the battery is charging. Use the touch screen Use a finger on the touch screen for most operations, such as photo navigation, printing, making selections in the printer menus, or touching the onscreen icons in the quick touch frame that borders the photo viewing area of the touch screen. The printer chirps once for each button press. You can change the volume of the sounds or turn them off in the Preferences menu. You can also use the stylus for these activities, but it is designed primarily for drawing and entering captions through the touch screen keyboard. WARNING! Do not use any chemical solvent, acidic, ammonia-based, or alkali solution. They can damage the touch screen. WARNING! Abrasive materials can scratch the surface of your touch screen, reducing image quality and input accuracy. The quick touch frame NOTE: The quick touch frame icons are displayed only when the printer is turned on. Some icons are not visible when the functions they represent are unavailable. 6 HP Photosmart A620 series Basics Guide
-
 1
1 -
 2
2 -
 3
3 -
 4
4 -
 5
5 -
 6
6 -
 7
7 -
 8
8 -
 9
9 -
 10
10 -
 11
11 -
 12
12 -
13
-
14
-
15
-
16
-
17
-
18
-
19
-
20
-
21
-
22
-
23
-
24
-
25
-
26
-
27
-
28
-
29
-
30
-
31
-
32
-
33
-
34
-
35
-
36
-
37
-
38
-
39
-
40
-
41
-
42
-
43
-
44
-
45
-
46
-
47
-
48
-
49
 |
 |