HP ProBook 4535s HP Notebook User Guide - Linux - Page 71
on each side of the memory module., The memory module tilts up.
 |
View all HP ProBook 4535s manuals
Add to My Manuals
Save this manual to your list of manuals |
Page 71 highlights
6. Slide the access cover in the direction shown on the image below (3), and then lift it away from the computer (4). 7. If you are replacing a memory module, remove the existing memory module: a. Pull away the retention clips (1) on each side of the memory module. The memory module tilts up. 61
-
 1
1 -
2
-
3
-
4
-
5
-
6
-
7
-
8
-
9
-
10
-
11
-
12
-
13
-
14
-
15
-
16
-
17
-
18
-
19
-
20
-
21
-
22
-
23
-
24
-
25
-
26
-
27
-
28
-
29
-
30
-
31
-
32
-
33
-
34
-
35
-
36
-
37
-
38
-
39
-
40
-
41
-
42
-
43
-
44
-
45
-
46
-
47
-
48
-
49
-
50
-
51
-
52
-
53
-
54
-
55
-
56
-
57
-
58
-
59
-
60
-
61
-
62
-
63
-
64
-
65
-
 66
66 -
 67
67 -
 68
68 -
 69
69 -
 70
70 -
 71
71 -
 72
72 -
 73
73 -
 74
74 -
 75
75 -
 76
76 -
77
-
78
-
79
-
80
-
81
-
82
-
83
-
84
-
85
-
86
-
87
-
88
-
89
-
90
-
91
-
92
-
93
-
94
-
95
-
96
-
97
-
98
-
99
-
100
-
101
-
102
-
103
-
104
-
105
-
106
-
107
-
108
 |
 |
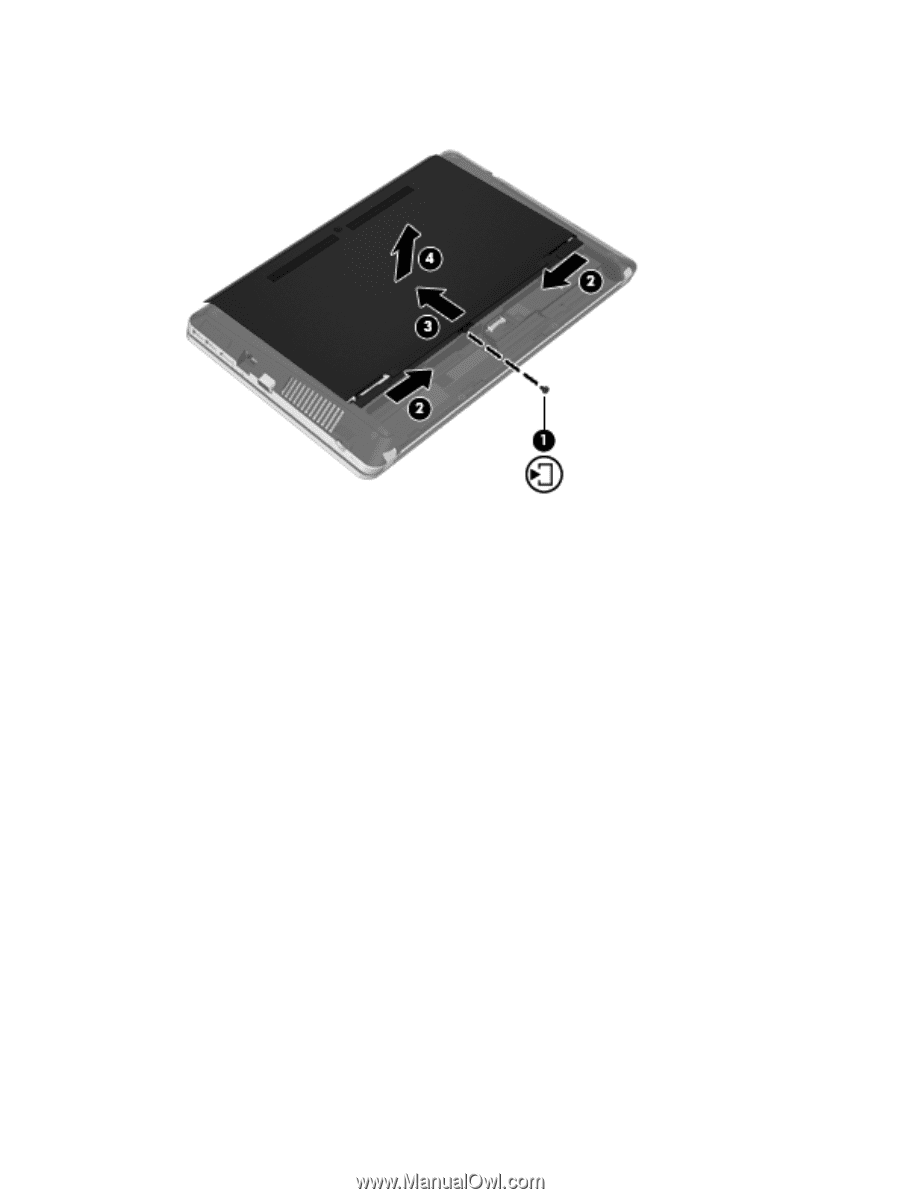
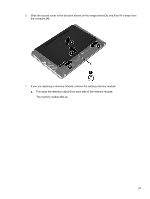
6.
Slide the access cover in the direction shown on the image below
(3)
, and then lift it away from
the computer
(4)
.
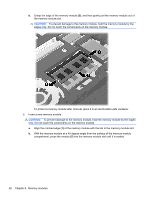
7.
If you are replacing a memory module, remove the existing memory module:
a.
Pull away the retention clips
(1)
on each side of the memory module.
The memory module tilts up.
61