HP Q5736A User Guide - Page 38
To replace the ink cartridges, and then insert each cartridge into its color-coded stall
 |
View all HP Q5736A manuals
Add to My Manuals
Save this manual to your list of manuals |
Page 38 highlights
If you are replacing ink cartridges, check that you are using the correct cartridges. To replace the ink cartridges 1. Open the ink cartridge door by pressing the raised bumps at the top of the door until the door clicks open. 2. Remove the ink cartridges that need to be replaced. Grasp a cartridge and pull it out of the stall. 3. Shake the new ink cartridges vigorously, at least six times, before opening their packages. 4. Unwrap the ink cartridges, and then insert each cartridge into its color-coded stall in the orientation shown. Press firmly on the cartridges to ensure proper contact. 5. Close the ink cartridge door. HP Photosmart Pro B9100 series User Guide 35
-
 1
1 -
2
-
3
-
4
-
5
-
6
-
7
-
8
-
9
-
10
-
11
-
12
-
13
-
14
-
15
-
16
-
17
-
18
-
19
-
20
-
21
-
22
-
23
-
24
-
25
-
26
-
27
-
28
-
29
-
30
-
31
-
32
-
 33
33 -
 34
34 -
 35
35 -
 36
36 -
 37
37 -
 38
38 -
 39
39 -
 40
40 -
 41
41 -
 42
42 -
 43
43 -
44
-
45
-
46
-
47
-
48
-
49
-
50
-
51
-
52
-
53
-
54
-
55
-
56
-
57
-
58
-
59
-
60
-
61
-
62
-
63
-
64
-
65
-
66
-
67
-
68
-
69
-
70
-
71
-
72
-
73
-
74
-
75
 |
 |

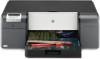
If you are replacing ink cartridges, check that you are using the correct cartridges.
To replace the ink cartridges
1.
Open the ink cartridge door by pressing the raised bumps at the top of the door until
the door clicks open.
2.
Remove the ink cartridges that need to be replaced. Grasp a cartridge and pull it out
of the stall.
3.
Shake the new ink cartridges vigorously, at least six times, before opening their
packages.
4.
Unwrap the ink cartridges, and then insert each cartridge into its color-coded stall in
the orientation shown. Press firmly on the cartridges to ensure proper contact.
5.
Close the ink cartridge door.
HP Photosmart Pro B9100 series User Guide
35